Revised 1-13-2022
Cured fish has been prepared for centuries as a means of food preservation. Because of refrigeration and our knowledge of food safety temps, fish is much safer to eat now than it was a couple of hundred years ago. Fish, and especially fish from the salmon family is a very healthy choice. More on nutrition can be found at the end of this article. In a nutshell.... salt draws moisture out of the fish—including out of any microbial cells. As the unwanted bacteria die, the good bacteria (lactobacillus bacteria) begins to feed off the sugar in the cure. As the good bacteria grows it creates a more acidic environment which is unwelcoming to the bad bacteria.
There are two basic ways to cure fish for smoking. One method is using a liquid brine cure. The second is a dry cure. I favor the dry cure for several reasons. First is ease of use, if you have a batch of cure in the freezer it takes only minutes to get a fillet prepped, wrapped and curing in the fridge. Dry cured fillets take up less room in the fridge. The texture and color of dry cured fish is more to my liking. And lastly, you can add seasonings to the base cure to give each fillet a different flavor profile.
This is the recipe for the dry cure I use. This makes enough cure for about 10 pounds of fish:
1 cup Morton Kosher salt (if you use Diamond Crystal, you will have to use more as it has larger grains)
2 cloves of garlic, finely chopped
2 cups firmly packed brown sugar
2 teaspoon ground ginger (I prefer to grind this myself in my mortar and pestle from cracked ginger)
1-2 teaspoons ground white pepper
1/2 teaspoon pulverized bay leaf
On a cutting board, sprinkle a little of the salt onto the chopped garlic, and mash to a paste with the point of a knife. In a small bowl, combine the garlic mixture with the remaining salt, the sugar, ginger, pepper and bay leaf. Mix this very well. Extra can be stored in the freezer.
-----------------------------------------
90% of the fillets I smoke have the skin on. The instructions are written with this in mind. There are some specific notes for using skinless fillets.
You must use an adequate amount of cure for the job. An average side of salmon or steelhead is 10 to 14 inches long, but the thickness and width will vary. Oftentimes I will cut the tail section off and smoke it separately. I also cut off the belly strip. When I mention a cure depth of 1/8" to 1/4" in the glass dish or the plastic wrap, this usually requires about 2/3 to 3/4 of a cup for a side of salmon. If you trim the fillet down it will take less. Naturally if you are doing a 6" or 8" center cut from a fillet, you will use way less than 2/3 of a cup of cure.
The cure time is based on the thickness of the fillet, not the weight. You notice I list a range of time, this is to accommodate different thickness as well as personal preference for flavor. Some folks like a stronger and slightly saltier flavor. Time in the cure for salmon is 8 to 12 hours for an average salmon fillet, and some readers have reported they prefer16 hours for a thick salmon fillet. A steelhead fillet will be thinner, so 6 to 8 hours works fine. Trout vary in size so the range of time is from 3 to 6 hours. With respect to cure time, disregard the length of the fillet, base it on thickness. Keep a log of your cure times and thickness so you can repeat a procedure you like. NOTE: For skinless fillets, sprinkle a layer of the dry cure on the top side as well. Skinless fillets will cure in about half the time because the cure is working from both sides. My personal cure times are usually around 3.5 hours for trout, 6 or 7 hours for steelhead, and around 8 hours for salmon.
Method 1 - Sprinkle a layer of cure about 1/8” to 1/4" deep into the bottom of a glass baking dish (don’t use metal) make sure it is a little wider and longer than the fillet. Place the fillet, skin side up, on top of the dry cure. Cover the dish with plastic wrap. Place in the refrigerator to cure.
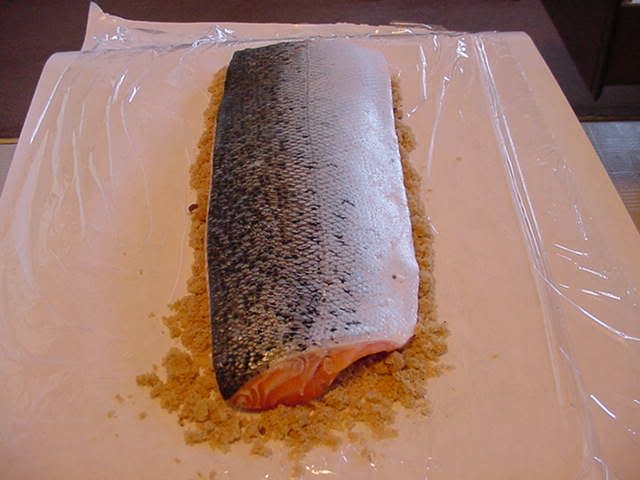
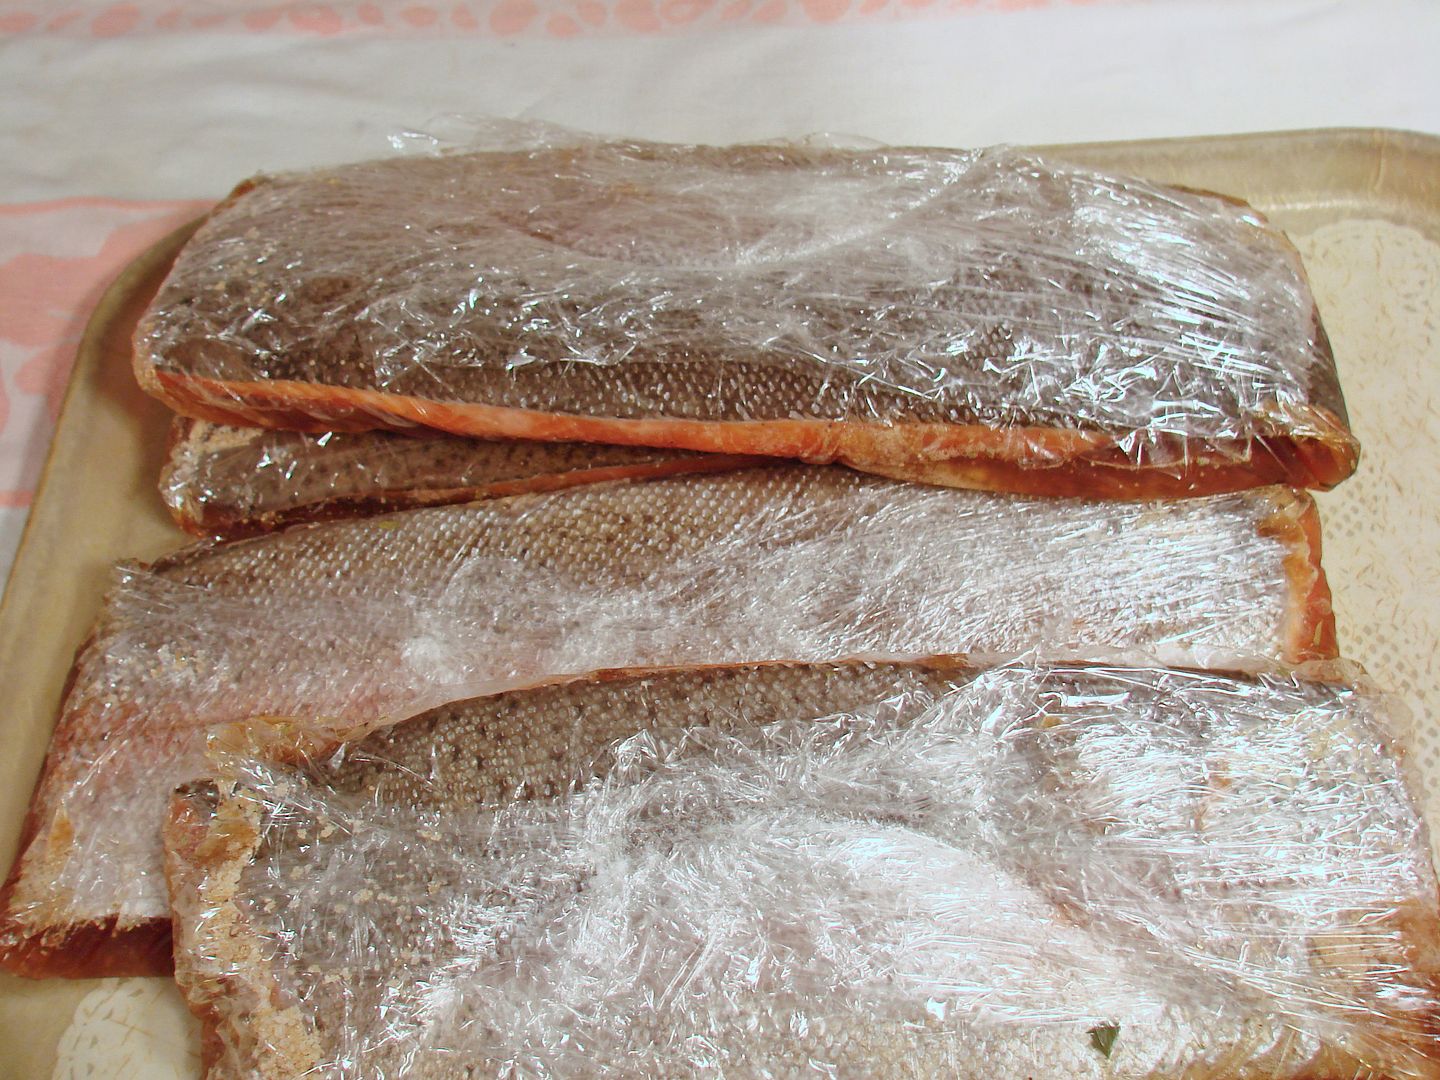
Method 2 (preferred) - Take a piece of plastic wrap at least 6 or 7 inches longer than your fillet and lay it out on your counter. In the center of the plastic, sprinkle a layer of cure about 1/8" to 1/4" deep onto the plastic wrap, making sure the layer of cure is a little longer and wider than your fillet. (You will be using the extra plastic on the ends when wrapping the fillet). Place one fillet on top of the cure (skin side up), then fold the sides up and then the ends, leaving the seam on top. The wrapped fillets can be stacked. (I put them on a shallow tray just in case one leaks). Put the fillets into the fridge to cure.
This first picture shows the fillet on a layer of cure ready to be wrapped up.
Here are several wrapped fillets.
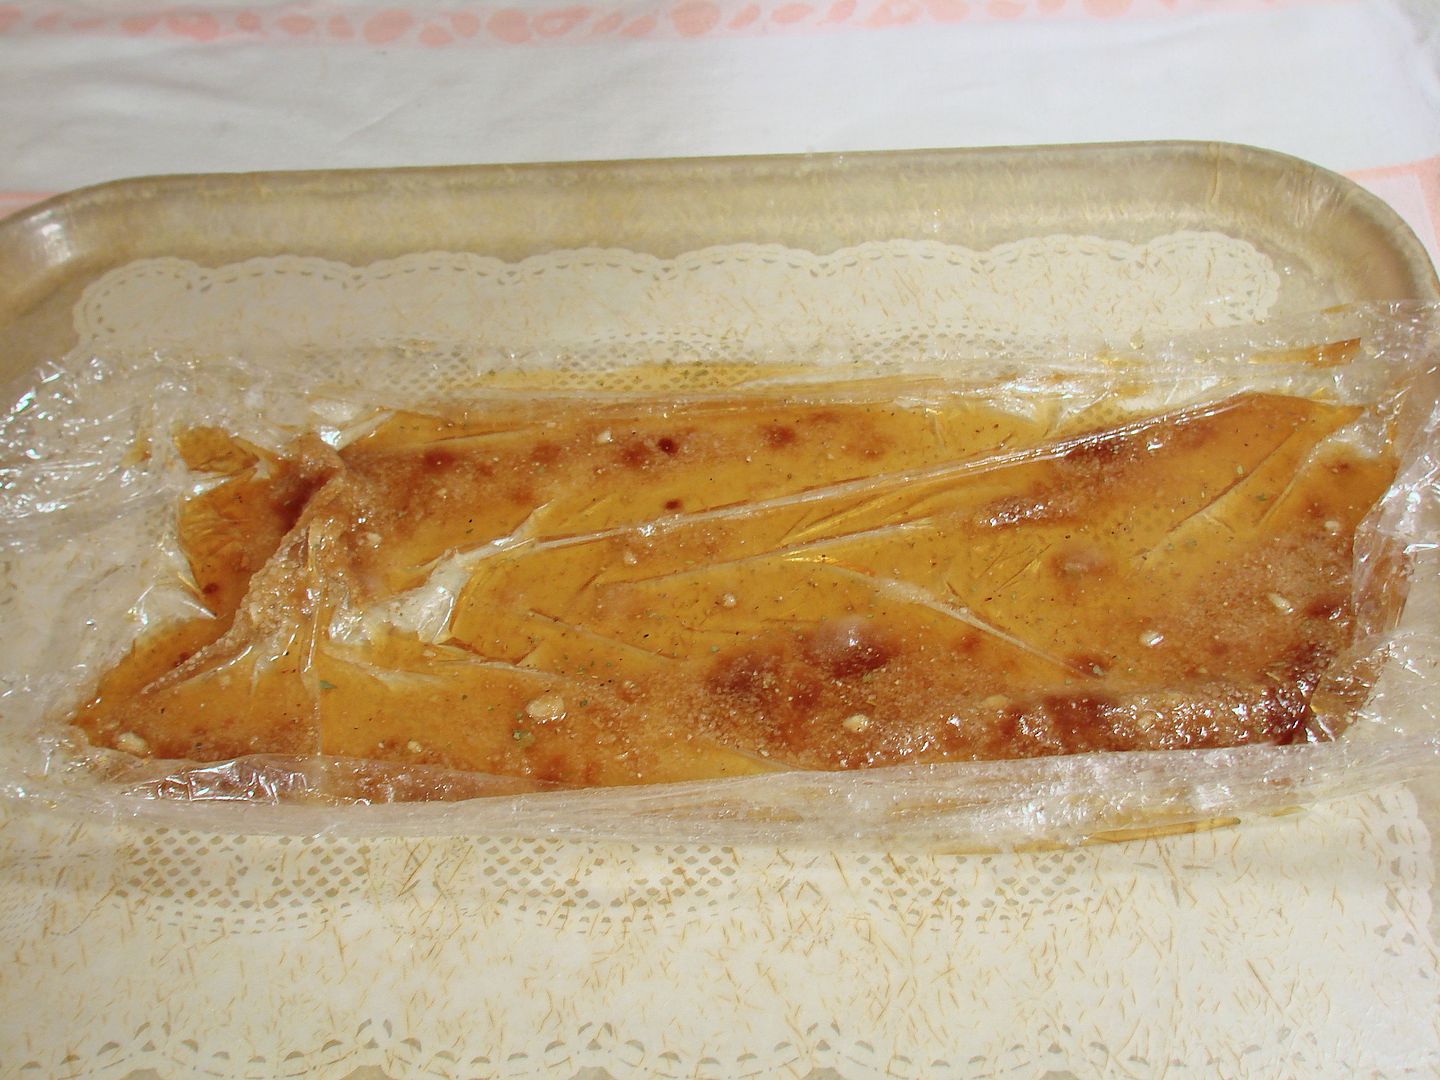
How The Cure Works - The moisture and oils in the fish will liquefy the dry cure and make a syrup which will cure the fish. After curing, rinse the fish very well under cold running water, rubbing gently to remove the syrup. I spend about 1 minute on each fillet rinsing and lightly scrubbing with my fingers. Blot dry with paper towels and put on a racks, then season with black pepper, garlic pepper, garlic powder, Montreal Steak seasoning, or whatever you like. Stay away from a rub with a lot of salt in it. Then air dry until tacky, at least 1 to 2 hours OR put back into the refrigerator for 4 to 6 hours. Resting overnight is my preferred method. Following the resting time, you can give the fillets a "shine coat" of oil by lightly brushing or spraying olive oil on them. A light coat is all that is needed, and the shine is especially nice on thinner trout fillets that may not have the higher oil content that salmon does.
Here is a fillet after curing - Note the syrup in the wrap
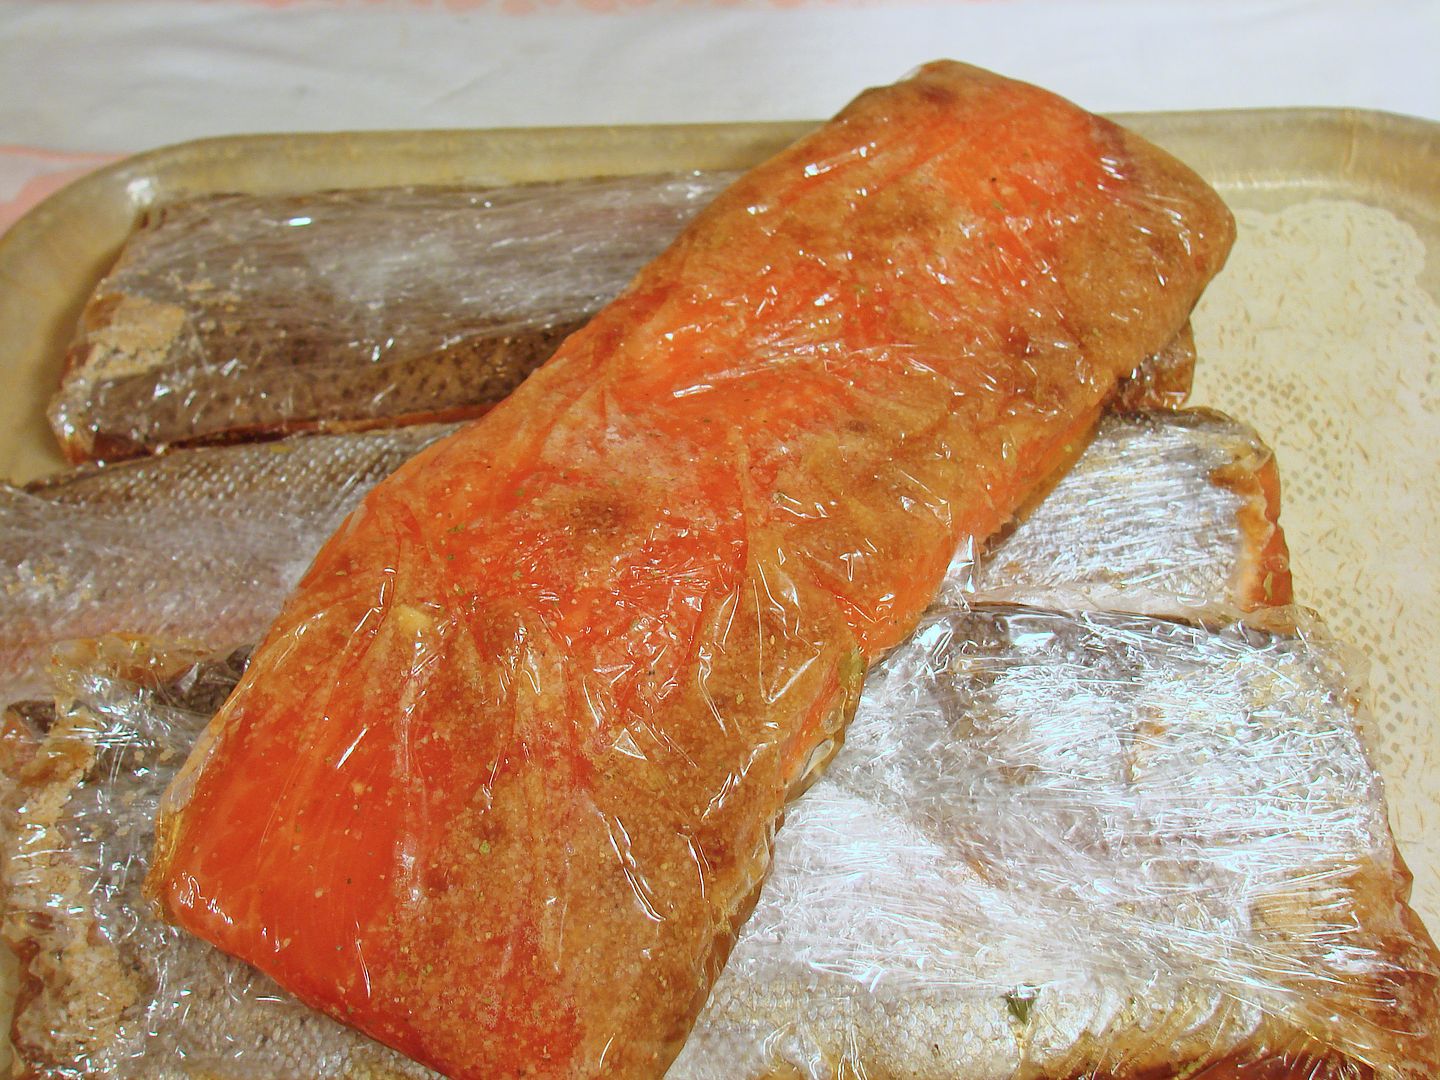
A photo of the syrup remaining in the plastic wrap
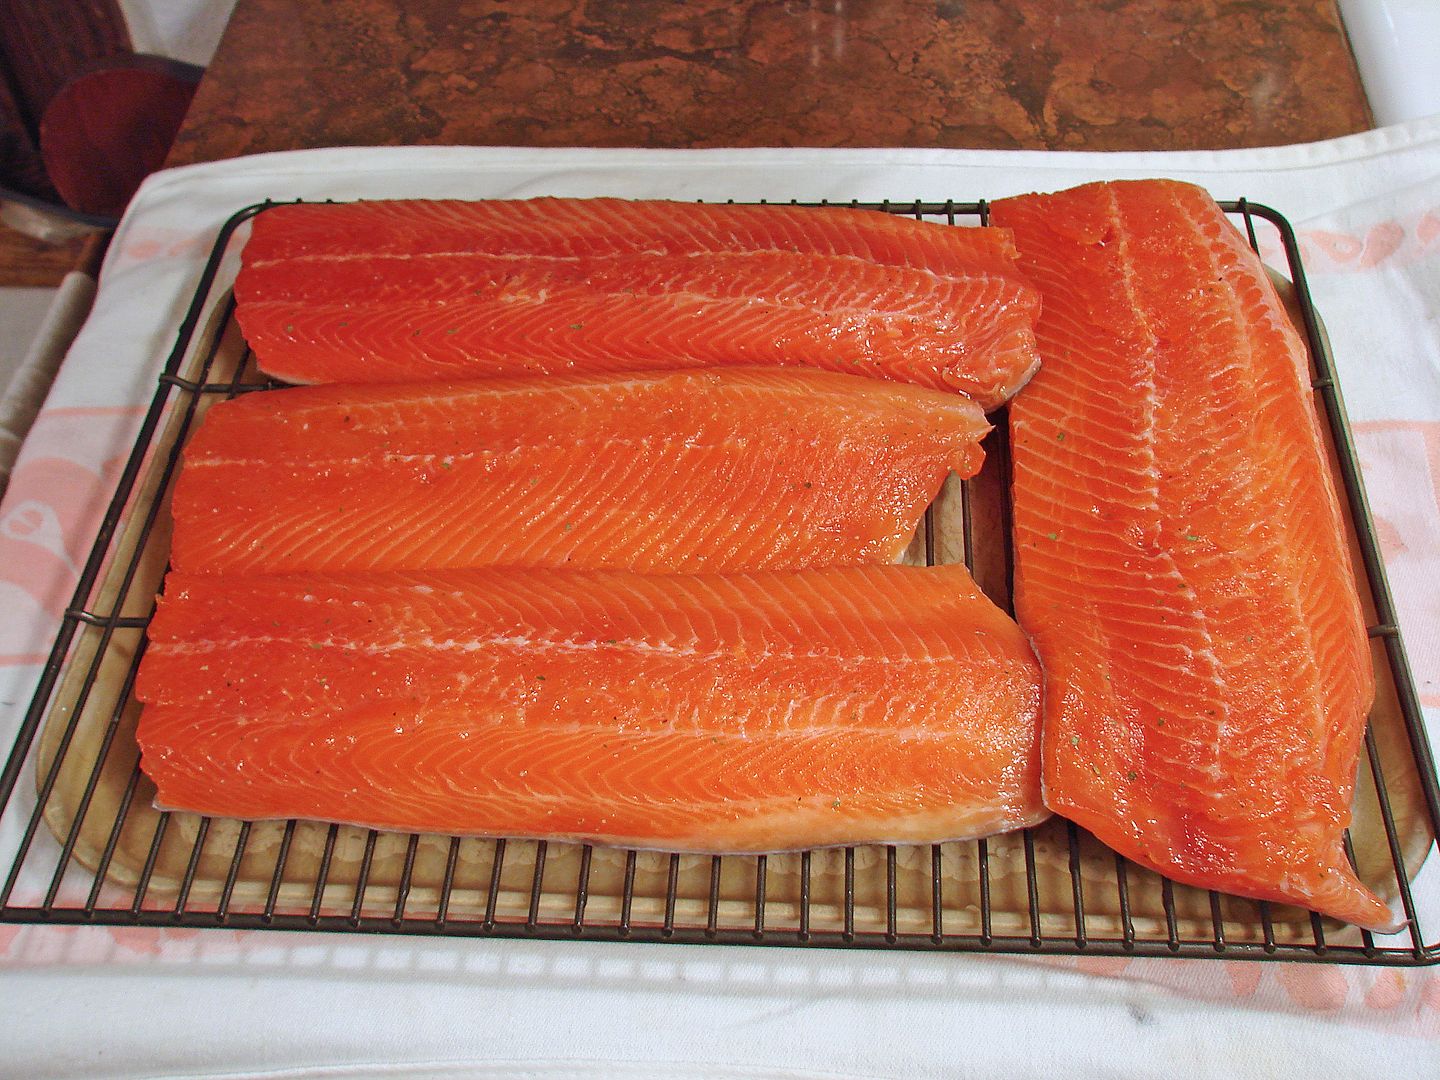
Here are some fillets following rinsing. These should be seasoned and returned to the fridge for resting. I prefer an overnight rest.
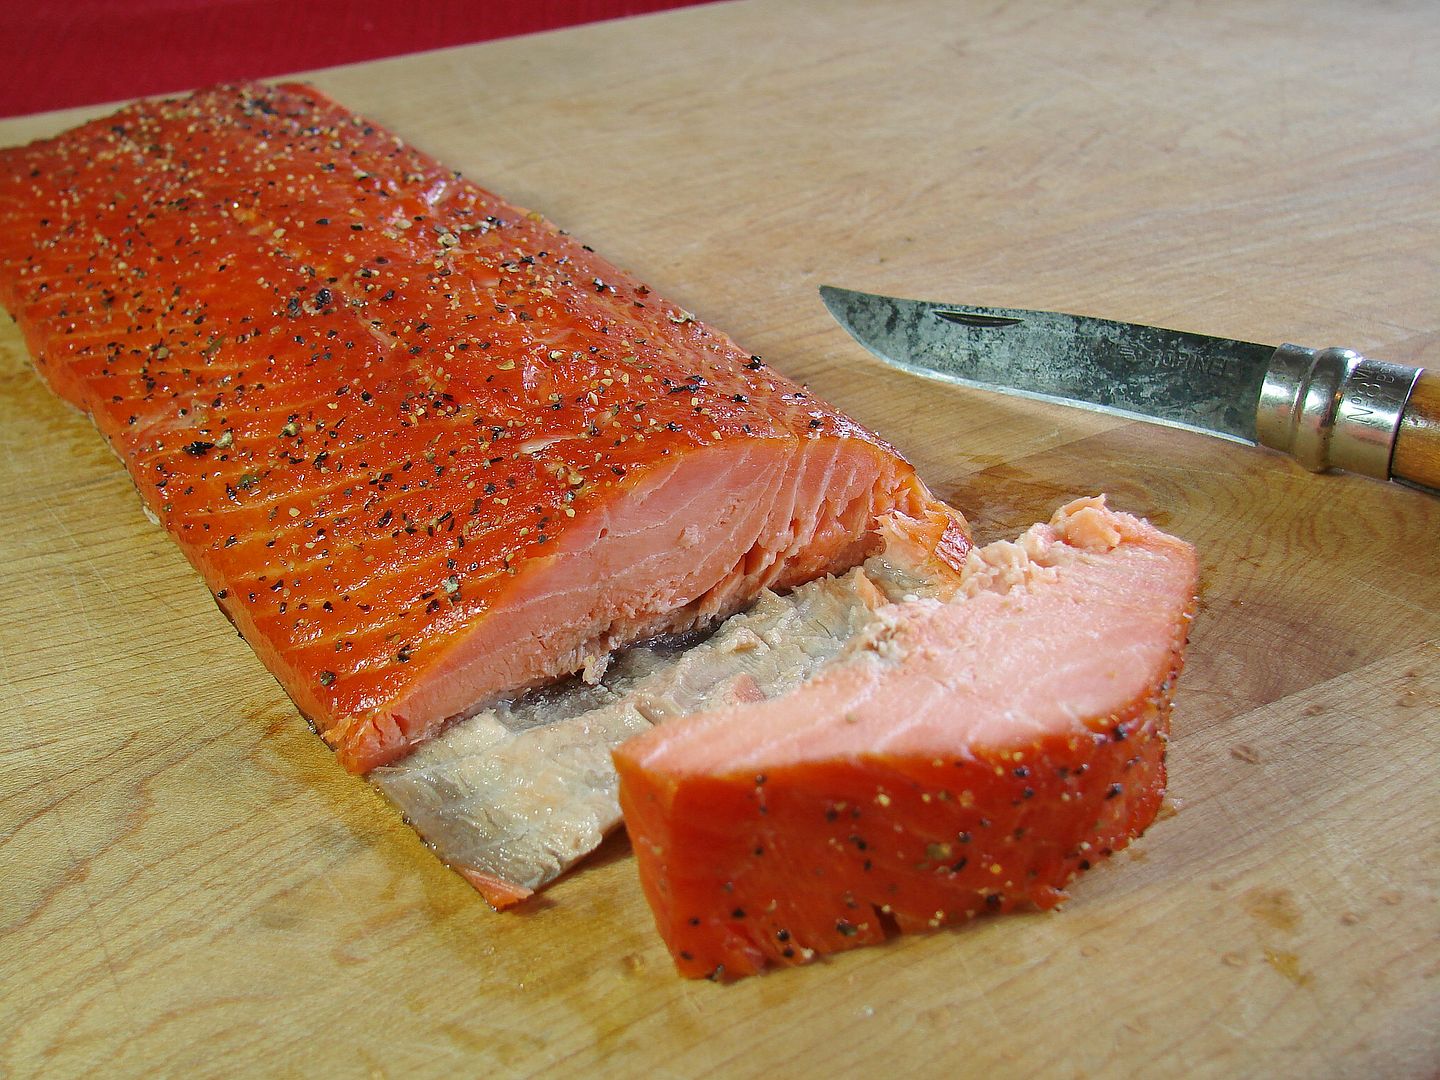
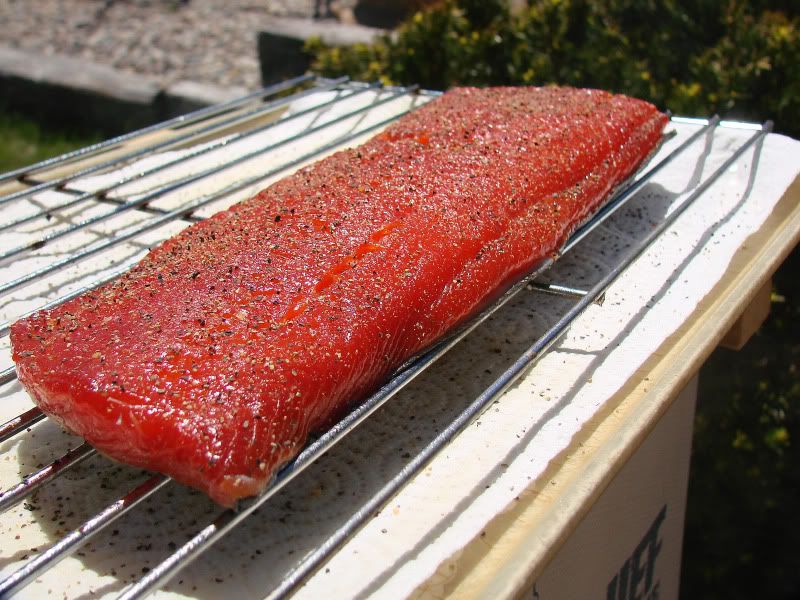
This fillet is ready for the smoker. Even raw it is darker than normal as this is wild caught Alaskan salmon. The amount of seasoning is typical, this one has garlic pepper and cracked black pepper.
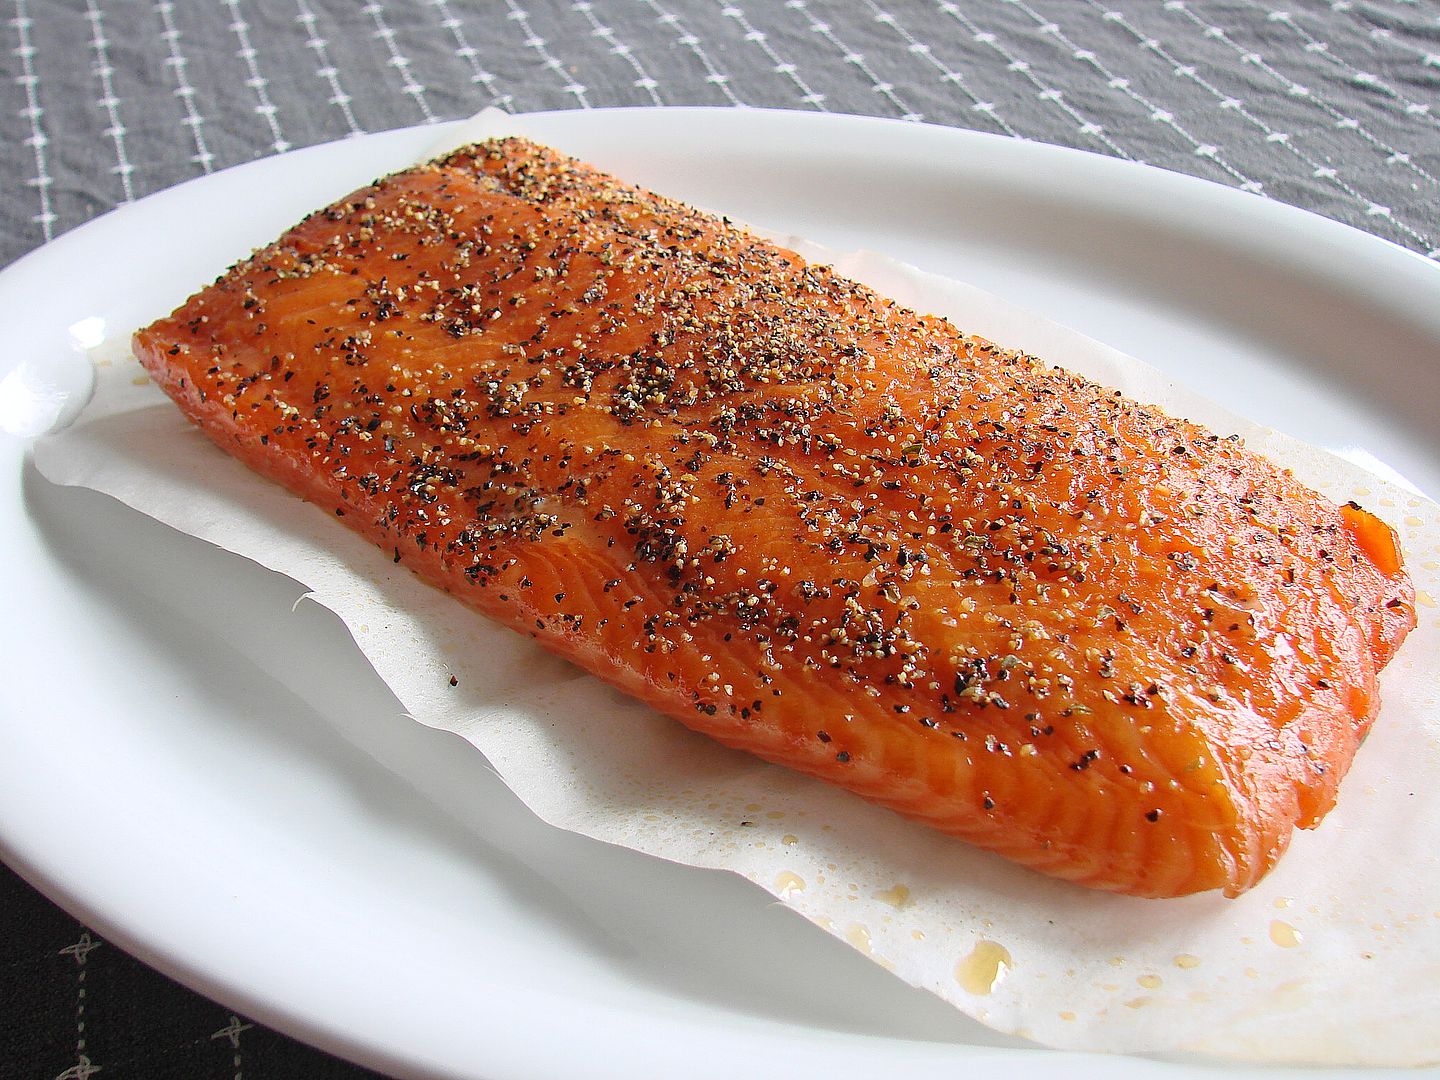
This photo below (taken after smoking) shows a fillet with a heavier dose of cracked pepper. The "shine coat" of oil I mention below allows the pepper to soften slightly during smoking, and the amount is quite good especially if smaller portions are served.
Smoking Process - Smoking fish or other meats is a tried-and-true way to preserve food and in addition it adds a layer of flavor that is pleasing to our palates. Wood smoke contains chemicals that slow the growth of microbes, and these antimicrobial compounds act as a disinfectant of sorts to help prevent spoilage and slow the development of rancid smells or flavors. Smoking is NOT a replacement for refrigeration. Cold smoking (at temps < 80°) require that the fish stay in the 40° to 140° danger zone for longer than 4 hours and even though we have the antimicrobial properties of dry-curing and smoking on our side, I prefer to hot smoke salmon, steelhead and trout.
This is the recipe for the dry cure I use. This makes enough cure for about 10 pounds of fish:
1 cup Morton Kosher salt (if you use Diamond Crystal, you will have to use more as it has larger grains)
2 cloves of garlic, finely chopped
2 cups firmly packed brown sugar
2 teaspoon ground ginger (I prefer to grind this myself in my mortar and pestle from cracked ginger)
1-2 teaspoons ground white pepper
1/2 teaspoon pulverized bay leaf
On a cutting board, sprinkle a little of the salt onto the chopped garlic, and mash to a paste with the point of a knife. In a small bowl, combine the garlic mixture with the remaining salt, the sugar, ginger, pepper and bay leaf. Mix this very well. Extra can be stored in the freezer.
-----------------------------------------
90% of the fillets I smoke have the skin on. The instructions are written with this in mind. There are some specific notes for using skinless fillets.
You must use an adequate amount of cure for the job. An average side of salmon or steelhead is 10 to 14 inches long, but the thickness and width will vary. Oftentimes I will cut the tail section off and smoke it separately. I also cut off the belly strip. When I mention a cure depth of 1/8" to 1/4" in the glass dish or the plastic wrap, this usually requires about 2/3 to 3/4 of a cup for a side of salmon. If you trim the fillet down it will take less. Naturally if you are doing a 6" or 8" center cut from a fillet, you will use way less than 2/3 of a cup of cure.
The cure time is based on the thickness of the fillet, not the weight. You notice I list a range of time, this is to accommodate different thickness as well as personal preference for flavor. Some folks like a stronger and slightly saltier flavor. Time in the cure for salmon is 8 to 12 hours for an average salmon fillet, and some readers have reported they prefer16 hours for a thick salmon fillet. A steelhead fillet will be thinner, so 6 to 8 hours works fine. Trout vary in size so the range of time is from 3 to 6 hours. With respect to cure time, disregard the length of the fillet, base it on thickness. Keep a log of your cure times and thickness so you can repeat a procedure you like. NOTE: For skinless fillets, sprinkle a layer of the dry cure on the top side as well. Skinless fillets will cure in about half the time because the cure is working from both sides. My personal cure times are usually around 3.5 hours for trout, 6 or 7 hours for steelhead, and around 8 hours for salmon.
Method 1 - Sprinkle a layer of cure about 1/8” to 1/4" deep into the bottom of a glass baking dish (don’t use metal) make sure it is a little wider and longer than the fillet. Place the fillet, skin side up, on top of the dry cure. Cover the dish with plastic wrap. Place in the refrigerator to cure.
Method 2 (preferred) - Take a piece of plastic wrap at least 6 or 7 inches longer than your fillet and lay it out on your counter. In the center of the plastic, sprinkle a layer of cure about 1/8" to 1/4" deep onto the plastic wrap, making sure the layer of cure is a little longer and wider than your fillet. (You will be using the extra plastic on the ends when wrapping the fillet). Place one fillet on top of the cure (skin side up), then fold the sides up and then the ends, leaving the seam on top. The wrapped fillets can be stacked. (I put them on a shallow tray just in case one leaks). Put the fillets into the fridge to cure.
This first picture shows the fillet on a layer of cure ready to be wrapped up.

Here are several wrapped fillets.

How The Cure Works - The moisture and oils in the fish will liquefy the dry cure and make a syrup which will cure the fish. After curing, rinse the fish very well under cold running water, rubbing gently to remove the syrup. I spend about 1 minute on each fillet rinsing and lightly scrubbing with my fingers. Blot dry with paper towels and put on a racks, then season with black pepper, garlic pepper, garlic powder, Montreal Steak seasoning, or whatever you like. Stay away from a rub with a lot of salt in it. Then air dry until tacky, at least 1 to 2 hours OR put back into the refrigerator for 4 to 6 hours. Resting overnight is my preferred method. Following the resting time, you can give the fillets a "shine coat" of oil by lightly brushing or spraying olive oil on them. A light coat is all that is needed, and the shine is especially nice on thinner trout fillets that may not have the higher oil content that salmon does.
Here is a fillet after curing - Note the syrup in the wrap

A photo of the syrup remaining in the plastic wrap

Here are some fillets following rinsing. These should be seasoned and returned to the fridge for resting. I prefer an overnight rest.

This fillet is ready for the smoker. Even raw it is darker than normal as this is wild caught Alaskan salmon. The amount of seasoning is typical, this one has garlic pepper and cracked black pepper.

This photo below (taken after smoking) shows a fillet with a heavier dose of cracked pepper. The "shine coat" of oil I mention below allows the pepper to soften slightly during smoking, and the amount is quite good especially if smaller portions are served.

Smoking Process - Smoking fish or other meats is a tried-and-true way to preserve food and in addition it adds a layer of flavor that is pleasing to our palates. Wood smoke contains chemicals that slow the growth of microbes, and these antimicrobial compounds act as a disinfectant of sorts to help prevent spoilage and slow the development of rancid smells or flavors. Smoking is NOT a replacement for refrigeration. Cold smoking (at temps < 80°) require that the fish stay in the 40° to 140° danger zone for longer than 4 hours and even though we have the antimicrobial properties of dry-curing and smoking on our side, I prefer to hot smoke salmon, steelhead and trout.
Hot Smoking Instructions - Prior to smoking, brush or spray a light coat of oil or Pam on the skin side of the fish and on your smoker rack. Place fish in the smoker with the skin side on the rack and hot smoke at 150° – 190° (grate temp).
Option 2 - Smoking With Hickory: Hickory is one of the stronger woods and is not typically used for something delicate like fish. However, if you use caution and small amounts of chips or pellets hickory will produce a wonderful flavored fish. One of the few commercially smoked salmon that I really like is from The Honey Smoked Fish Company in Colorado, and part of their secret process is using hickory for smoke.
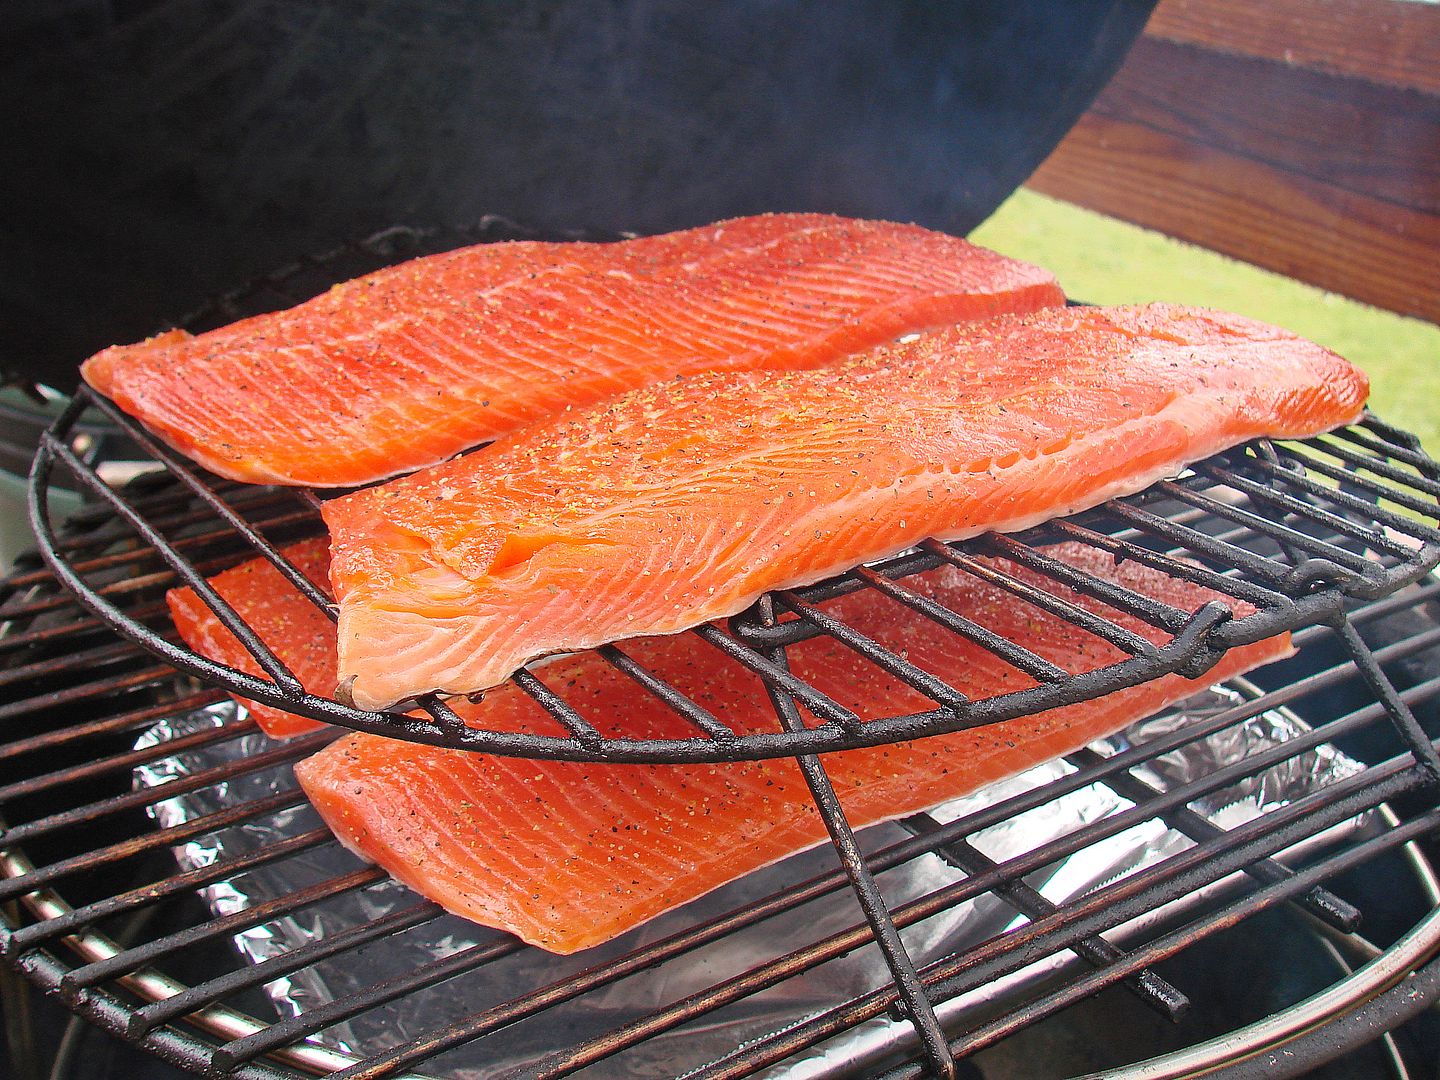
Here are a few different set-ups for smoking fish. This is a over-under set up in my large Big Green Egg
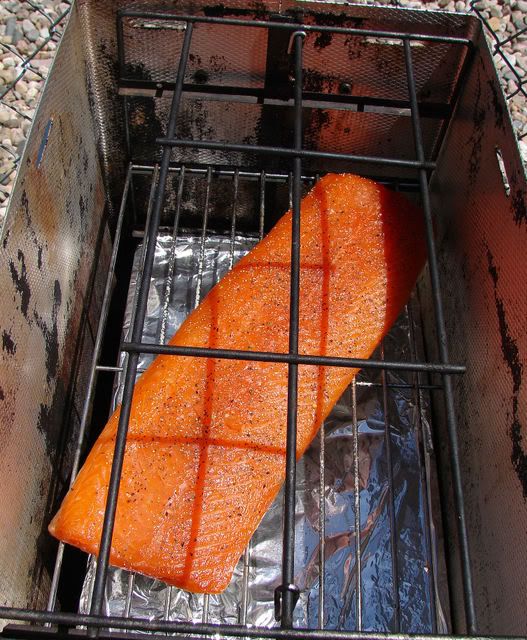
Here is a fillet in my Big Chief box smoker
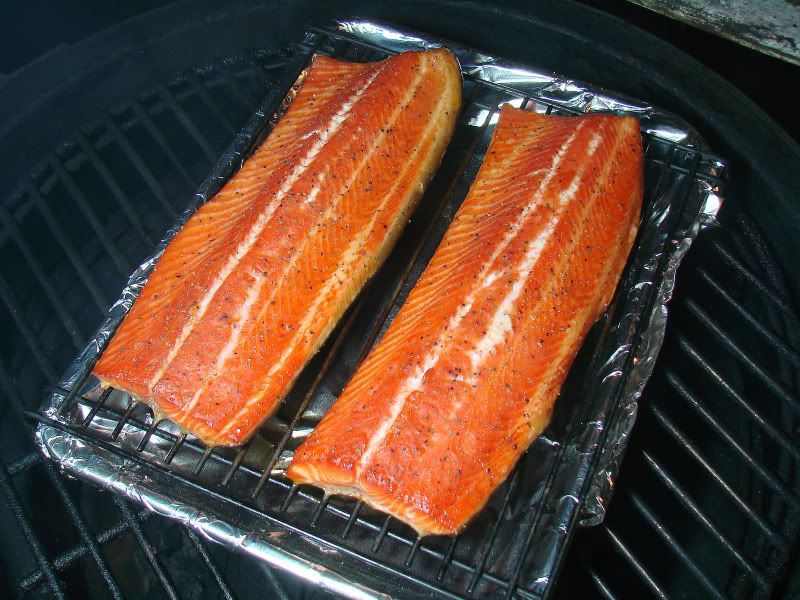
Here is an alternate set up using a pan with a rack on top
When Is It Done? - When the fish reaches about 120° internal, the fish will firm up and you might some white stuff start to ooze from the flesh. Relax, that's the serum albumen, a protein that is part of the blood. It will set up and congeal just like the albumen in egg whites. This is a signal that you need to watch the fish for doneness. (You can blot this off later with a paper towel after the fish has rested a few minutes). To discourage the albumen rising to the surface, start smoking your fish around 140° for the first hour. Then keep your smoker temp around 170° for the next couple of hours of the cook, then ramp up the temp to 190° to 200° to get the fish to a finished temp. The intention is to cook the fish as well as smoke it. Please note that processing temperatures used in the industry vary significantly and the minimum internal temperature for hot-smoked fish has been a major issue of concern and discussion for years. Proper heating helps to eliminate food-poisoning bacteria and extend shelf life. Current guidance from health regulatory agencies and Stanley Marianski, author of numerous books on curing and sausage making, is an internal temp of 145°F for 30 minutes. The "30 minutes" of holding time was born in regulations for commercial smoking operations and can result in lively conversation among people smoking fish at home. The primary argument about the 30 minute holding time is simply "If I can grill, fry, or bake fish until the internal temperature is 145° and consume it immediately, why does hot smoked fish have a 30 minute holding time?" By the numbers, Marainski tells us that: At 122°F between 70% and 80% of fish proteins are fully cooked. At 140°F, 95% of the proteins are fully cooked. I have attempted to hold the 145°F internal temperature for 30 minutes and it's extremely hard to accomplish. So hitting 145° to 150° in the thickest areas is good enough for me and on a good day carry-over temperatures with a foil tent might maintain that temp for 10 minutes of so.
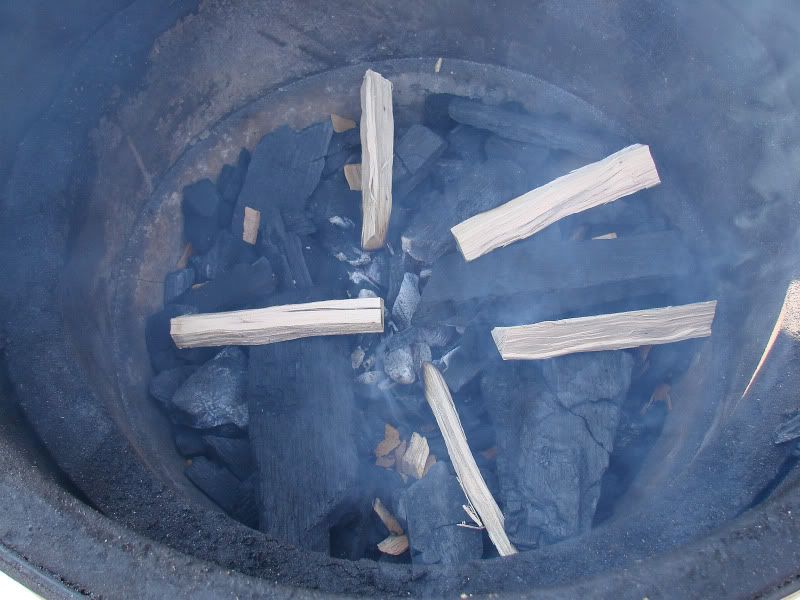
Option 1 Traditional Flavor Wood Method: Start with equal parts of alder wood and
apple wood. When using a charcoal fire, instead of fist sized chunks of wood, I
use smaller splits about a finger or two square. These are arranged in a wagon
wheel pattern with the ends near the small hotspot of coals. I'll also mix a
handful of chips or pellets into the lump. Apple and alder are mild woods and
will keep the smokiness on the light side. Adjust your vents for a low
temperature fire.

Check
in about 30 minutes to make sure the skin is not sticking to the racks. (spray
skin side with more oil if it starts to stick) Later in the cook, switch to
cherry wood or maple wood and smoke until done. This will give the salmon a
nice red color. Remember, there is no need for turning the fillets during
smoking.
When
using my Big Chief or Little Chief, there are two options for flavor wood…
chips and pellets. When using chips I generally add about 2 tablespoons of fine
chips, and a few larger chips to the pan every 30 to 45 minutes. When
using pellets I add a small handful and I will add new pellets every 45 minutes or so. Sometimes I’ll use a mix of chips and
pellets. I do NOT empty the ash pan when adding new chips or pellets. Changing your wood types, or making a custom
flavor blend is easy with chips or pellets, and there are several companies
that sell a pre-mixed blend of pellets.
Option 2 - Smoking With Hickory: Hickory is one of the stronger woods and is not typically used for something delicate like fish. However, if you use caution and small amounts of chips or pellets hickory will produce a wonderful flavored fish. One of the few commercially smoked salmon that I really like is from The Honey Smoked Fish Company in Colorado, and part of their secret process is using hickory for smoke.
Here are a few different set-ups for smoking fish. This is a over-under set up in my large Big Green Egg

Here is a fillet in my Big Chief box smoker

Here is an alternate set up using a pan with a rack on top

When Is It Done? - When the fish reaches about 120° internal, the fish will firm up and you might some white stuff start to ooze from the flesh. Relax, that's the serum albumen, a protein that is part of the blood. It will set up and congeal just like the albumen in egg whites. This is a signal that you need to watch the fish for doneness. (You can blot this off later with a paper towel after the fish has rested a few minutes). To discourage the albumen rising to the surface, start smoking your fish around 140° for the first hour. Then keep your smoker temp around 170° for the next couple of hours of the cook, then ramp up the temp to 190° to 200° to get the fish to a finished temp. The intention is to cook the fish as well as smoke it. Please note that processing temperatures used in the industry vary significantly and the minimum internal temperature for hot-smoked fish has been a major issue of concern and discussion for years. Proper heating helps to eliminate food-poisoning bacteria and extend shelf life. Current guidance from health regulatory agencies and Stanley Marianski, author of numerous books on curing and sausage making, is an internal temp of 145°F for 30 minutes. The "30 minutes" of holding time was born in regulations for commercial smoking operations and can result in lively conversation among people smoking fish at home. The primary argument about the 30 minute holding time is simply "If I can grill, fry, or bake fish until the internal temperature is 145° and consume it immediately, why does hot smoked fish have a 30 minute holding time?" By the numbers, Marainski tells us that: At 122°F between 70% and 80% of fish proteins are fully cooked. At 140°F, 95% of the proteins are fully cooked. I have attempted to hold the 145°F internal temperature for 30 minutes and it's extremely hard to accomplish. So hitting 145° to 150° in the thickest areas is good enough for me and on a good day carry-over temperatures with a foil tent might maintain that temp for 10 minutes of so.
For a another perspective, In his book On Food and Cooking, Harold McGee outlines what happens to the fish at different temperatures during cooking, and its characteristics at those temps. (He prefers salmon to be cooked in the 130°'s).
- 110°F:Protein begins to shrink, flesh becomes firmer, opaque, and juice is exuded.
- 120°F:Flesh continues to shrink and becomes resilient, is less slick and more fibrous, opaque, and exudes juice when chewed or cut.
- 130°F:Sheets of protein begin to separate and become flaky, fiber-weakening enzymes denature and become inactive.
- 140°F:Protein continues to shrink, the texture becomes firm, fibrous and fragile, and little free juice is left. Collagen dissolves into gelatin.
- 150°F:Protein is becoming progressively more firm, dry, flaky, and fragile.
- 160°F:The flesh is stiff and dry. All protein fibers have denatured and coagulated.
In my opinion, and contrary to the popular 'rule of thumb'..., you want to remove the fish before it actually
flakes. An internal temperature of 145° is considered a safe temperature, and I take mine off the smoker between 137° and 150° internal, depending on the moistness I want, and tent the fish with foil. If you want
a drier product, just smoke to a higher internal temperature. Depending on your
smoker, smoke times for thick fillets (3 to 4 lbs) can be 3 or 5 hours, thinner
salmon or steelhead fillets may be in the 2 to 3 hour range, trout fillets
will be less. Just keep an eye on the firmness and internal temperature.
Sometimes, because of the weather I can't get my box smoker to a high enough
temp to finish my fish to 145° - or 150°, so at the end of 4 hours I will move
the fillets into a 175° to 190° oven to bump the internal temperature to
where I want it. This might only take 10 minutes or so, keep an eye on it!!
In this photo the fish is around 120° internal, you can see the albumen starting to show.
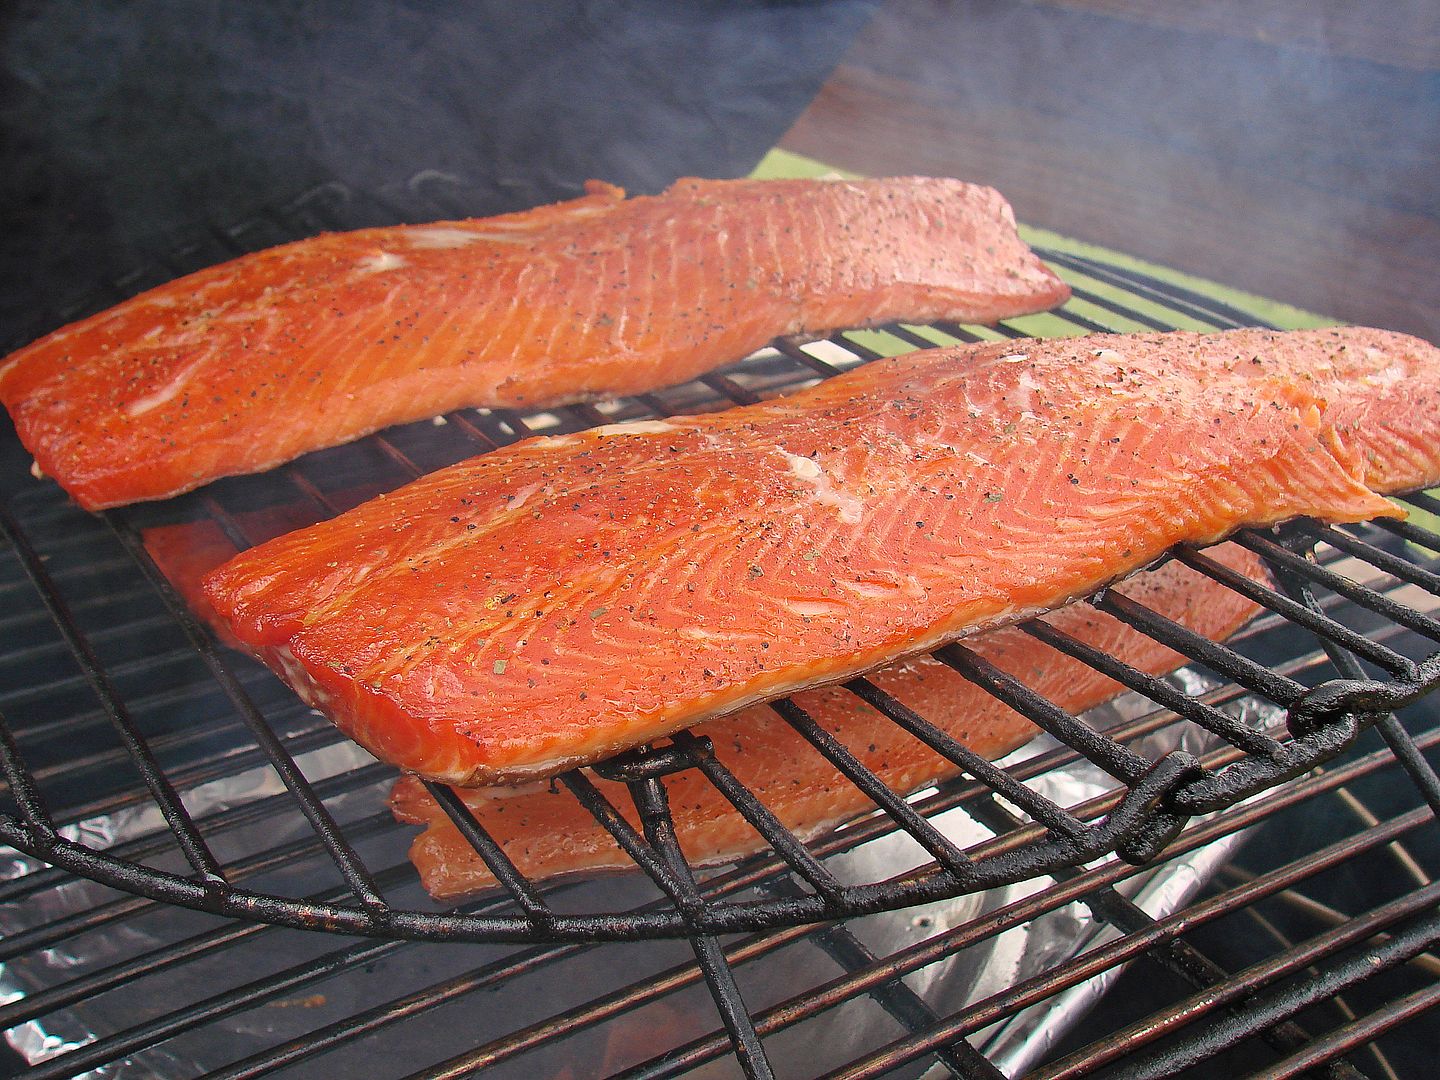
This photo of the same fish is about 30 minutes later. The internal is now 130° and the albumen is very visible. Remember, it can be blotted off with a paper towel when the fillets come off the smoker. Had I been running the smoker at lower temps, the albumen would not have risen to the surface.
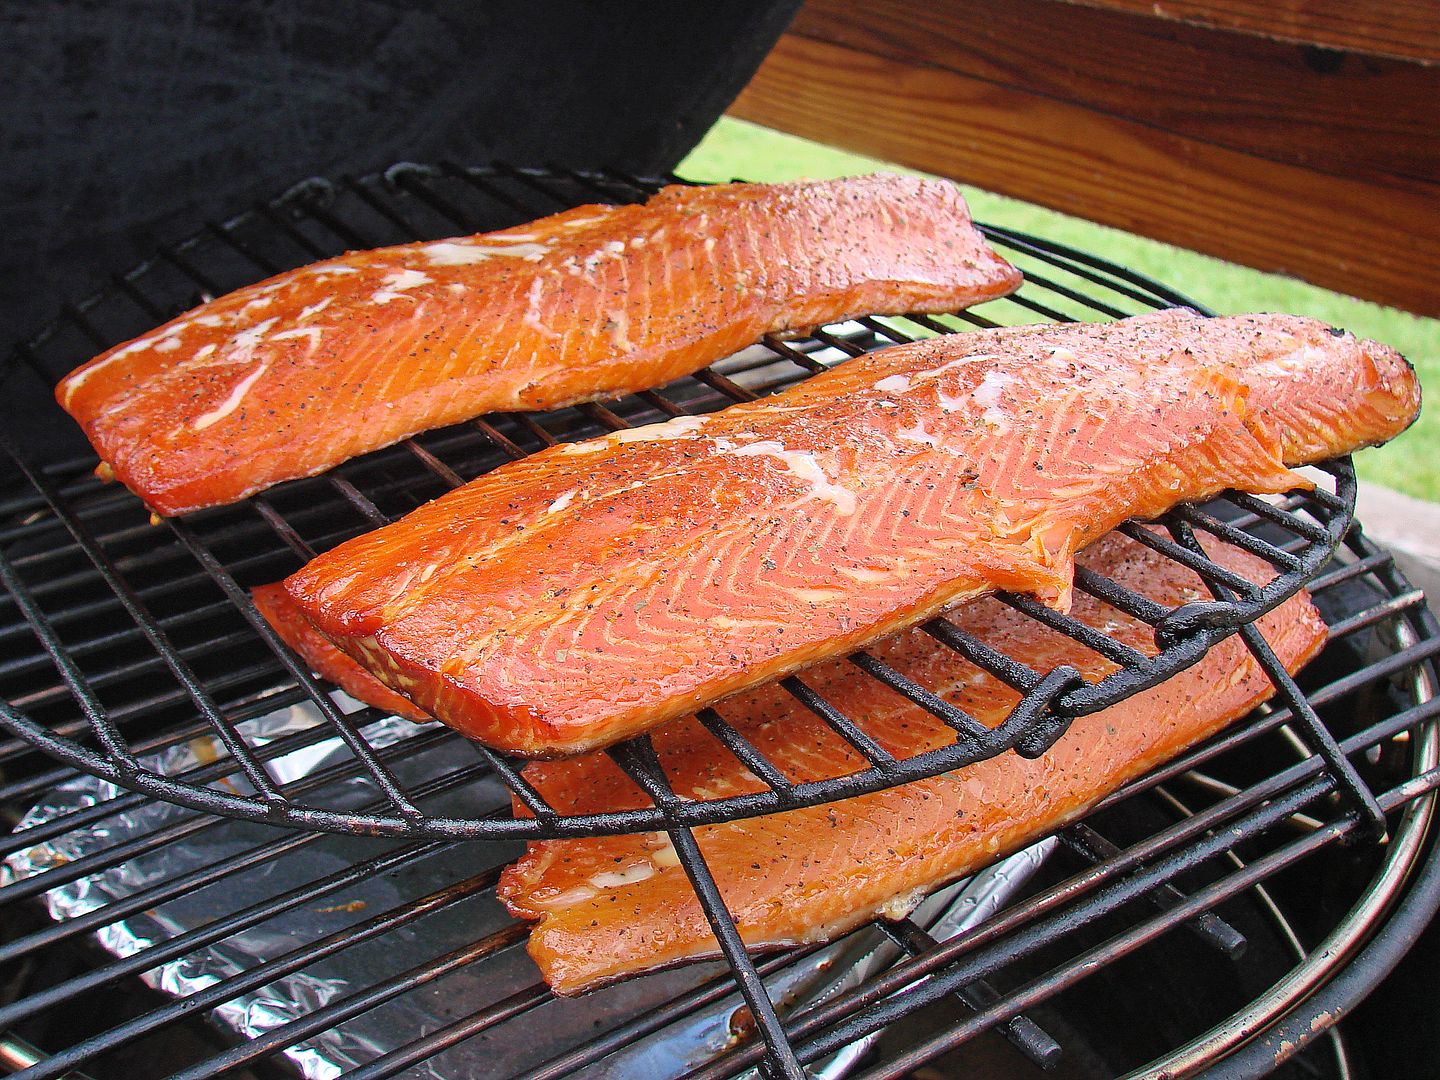
This fillet was smoked at a lower temperature in my Big Chief. Note that no albumen rose to the surface. I prefer my fillets to look like these.
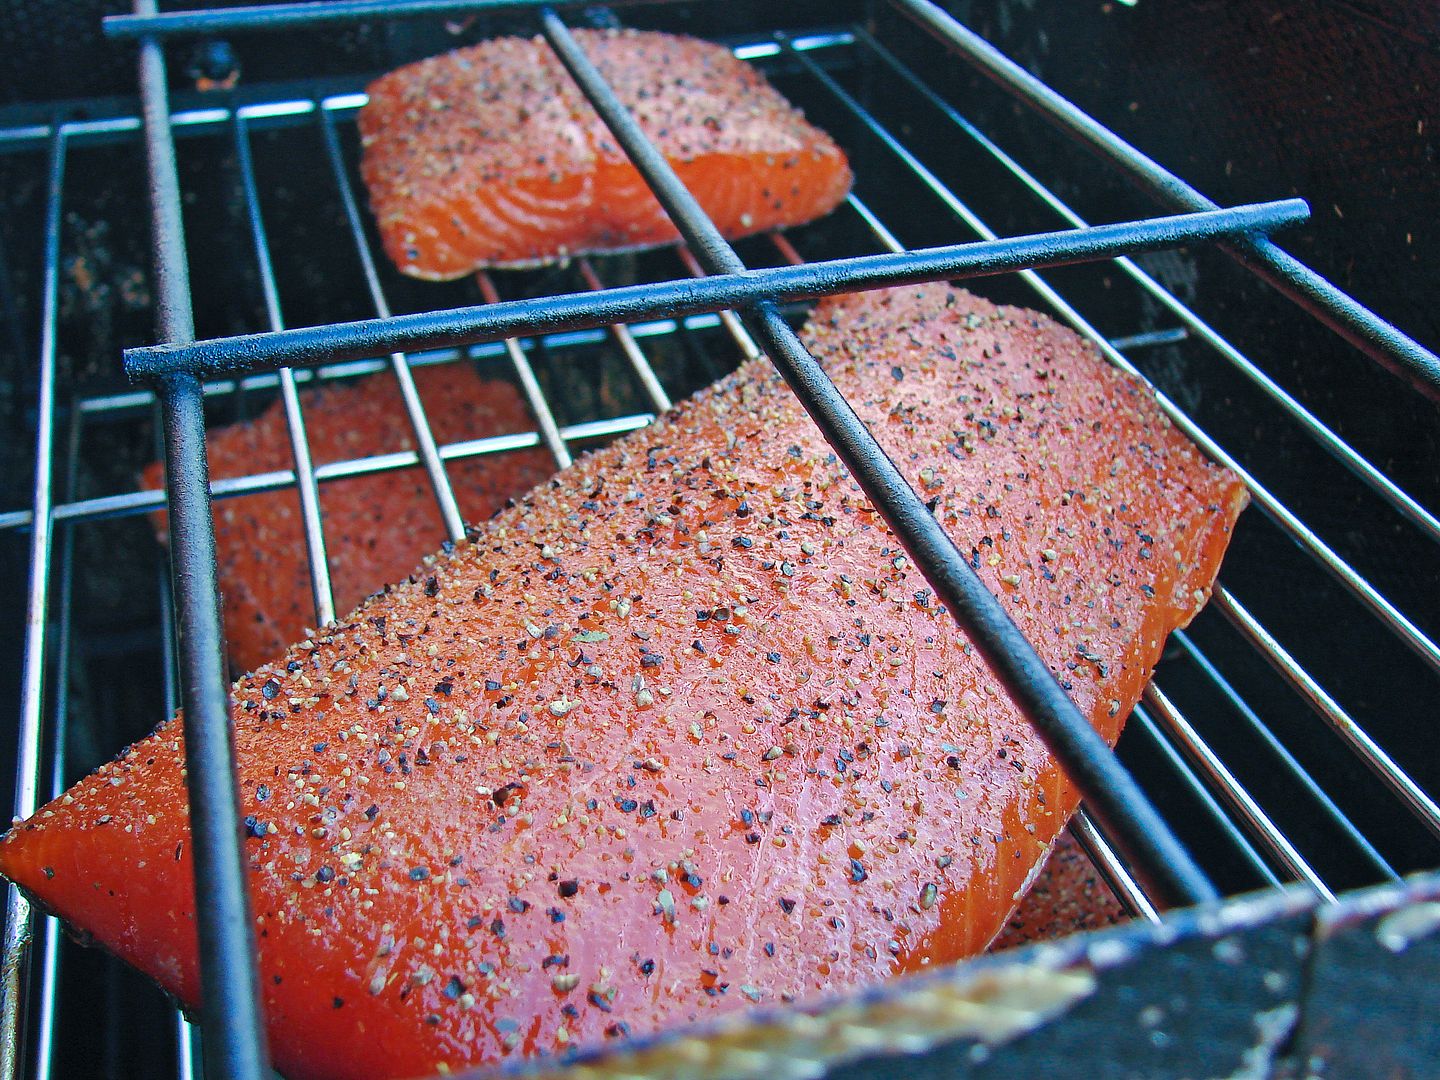
TIP: For smaller fillets a water pan under the fish will prevent it from cooking too fast. Ice in the water pan works great also. The ice pan also will help if you have trouble maintaining low smoker temperatures regardless of the size of the fillets.
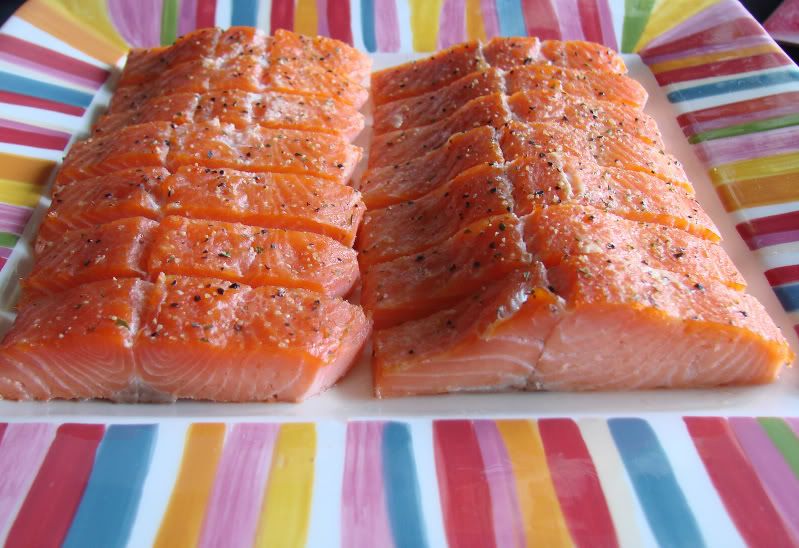
Serving - Serve hot, room temperature or chilled. I prefer to let the fish rest on the counter for an hour or so, then chill in the fridge overnight. This allows the moisture to stabilize, and allows for very nice slicing. A fine serrated knife works well for slicing. This will keep in the fridge for 3 to 4 days, but it very seldom lasts that long.
In this photo the fish is around 120° internal, you can see the albumen starting to show.

This photo of the same fish is about 30 minutes later. The internal is now 130° and the albumen is very visible. Remember, it can be blotted off with a paper towel when the fillets come off the smoker. Had I been running the smoker at lower temps, the albumen would not have risen to the surface.

This fillet was smoked at a lower temperature in my Big Chief. Note that no albumen rose to the surface. I prefer my fillets to look like these.

TIP: For smaller fillets a water pan under the fish will prevent it from cooking too fast. Ice in the water pan works great also. The ice pan also will help if you have trouble maintaining low smoker temperatures regardless of the size of the fillets.
Serving - Serve hot, room temperature or chilled. I prefer to let the fish rest on the counter for an hour or so, then chill in the fridge overnight. This allows the moisture to stabilize, and allows for very nice slicing. A fine serrated knife works well for slicing. This will keep in the fridge for 3 to 4 days, but it very seldom lasts that long.

Thoughts On Internal Temperature - My personal favorite internal is 140°ish. You can see from the photo above that I prefer a moist product, and I usually chill it overnight before eating. A tail section will exceed that temp on the thin end. Some people may opt for a lower internal temperature, but exceeding 145° or 150° is very common too.
Thoughts On Nutrition - Gram for gram salmon packs more omega-3 than many of it's seafood peers. Omega 3's are essential fatty acids and our body does not make them, so we rely on our diet to supply them. In addition, salmon contains vitamins D and B as well as typtophan, an amino acid that produces melatoin and serotonin to help with mood and sleep.
Diet and feed influences a salmon's nutritional profile. Generally speaking wild caught salmon species are nutritionally superior to farm raised salmon. But wild caught is more expensive. Farm raised salmon is higher in saturated fat, which is a negative, but selecting a fattier type of salmon is a benefit when smoking it. A lot of people are not eating enough fish to begin with, so I believe that any type of salmon you consume is better than none at all. Personally I would rather buy wild caught salmon for grilling, and use farm raised salmon or steelhead when smoking.
One downside to smoked salmon in general is the potential for high levels of sodium from the curing process. My curing process is somewhat mild on the saltiness, and I'm very satisfied with the shorter curing times I have developed.
No comments:
New comments are not allowed.