
BEEF - Standing Rib Roast (Prime Rib)
Notice to readers: As you may have noticed I am really lousy when it comes to keeping track of cook times - to make things worse I get asked that question a lot when folks try this technique using low pit temps. So.... I would like you to drop me a line, either on the Questions & Suggestions page (link is at the bottom of the homepage) or via e-mail letting me know the details of your cooks (weight of roast, pit temp(s) and cook time) and I will add those results to this page.
mail.thirdeye@hotmail.com Please put Prime Time in the subject.
Below are some readers replies to my request for cooking times on a Big Green Egg or Primo Oval. I hope this will help you nail your sit down a little closer. This information is for planning ONLY. Use a probe thermometer to watch the progress of the cook.
To give you an idea of what's going on during a full cook, here are the hourly results reported by jagardn who is a regular on The BBQ Brethren Forum and the Primo Forum. This cook was on a Primo Oval with the D-Plates (similar to a BGE plate setter) and a DigiQ pit temp controller. The roast was a 4 bone, 11.2 pounder.
Time ---- Pit Temp ---- Meat Temp
12:40 ---- 220 -------- 49
13:40 ---- 210 -------- 57
14:40 ---- 215 -------- 73
15:40 ---- 215 -------- 91
16:40 ---- 215 -------- 112
17:34 ---- 215 -------- 125
4:54 total took time.
When using these estimates, you must consider the carry over temperature, which is the amount of temperature rise once a piece of meat is removed from the cooker and is sitting on the cutting board. The reason internal temperature continues to rise even after the meat is removed from the pit is because the outside of the meat is hotter than the inside. This heat continues to be conducted into the meat until the heat is equalized throughout the roast. Carry over can be affected by weight and shape of the roast, thickness of fat cap (fat acts like an insulator), whether it's bone-in or an eye of the rib roast, pit temp, and of course the internal temp you pull it. A larger roast will rise more during the rest than a smaller one, bones are a conductor of heat and a fat cap will add mass and contribute to the rise. Likewise a roast cooked with a higher pit temp will rise more than barbecuing one with a lower pit temp. Use caution if you wrap your roast and hold it longer than 15 or 20 minutes (like if you were going to transport the cooked roast across town to a dinner party). Unless you let the roast cool for a few minutes, the wrap will allow the roast to continue cooking and you can really overshoot your target temperature. Obviously the residual heat will be of more concern if you have a 15 pound roast verses a 5 pound roast. The more mass, the more heat will be held.
Using the 220°-250°pit temps, and a smaller boneless roast, you can expect a 5° to 8° rise in the internal temperature stated below while the roast is resting on the cutting board.. A larger bone-in roast might rise 8° to 12°. All the temperatures reported below are when the roast is still in the cooker, so take into account the rise.
5-1/2 pound roast - 230° pit temp - 3 hours to reach 125°
5-3/4 pound roast - 245° average pit temp - 3 hours 45 minutes to reach 127°
6-3/4 pound bone-in roast - 250° pit temp - 4 hours to reach 125°
7 pound roast - 250° pit temp - 3 hours 40 minutes to reach 123°
7 pound roast - 220°-228° pit temp - 3 hours 30 minutes to reach 125°
7.9 pound roast - 230° pit temp (dome temp) - 4 hours 5 minutes to reach 125°
8 pound roast - 250° - 275° pit temp - 4 hours to reach 122°
10 pound roast - 220°-228° pit temp - 3 hours to reach 120°
11 pound roast (4 bones) - 215° average pit temp - 4 hours 54 minutes to reach 125°
14 pound roast - 220°-250° pit temp - 4 hours 30 minutes to reach 125°
15 pound roast - 220°-250° pit temp - 4 hrs 50 min to reach 127°
19.5 pound roast (prime grade) - 240° pit temp (dome temp) - 4 hours 25 minutes to reach 124°
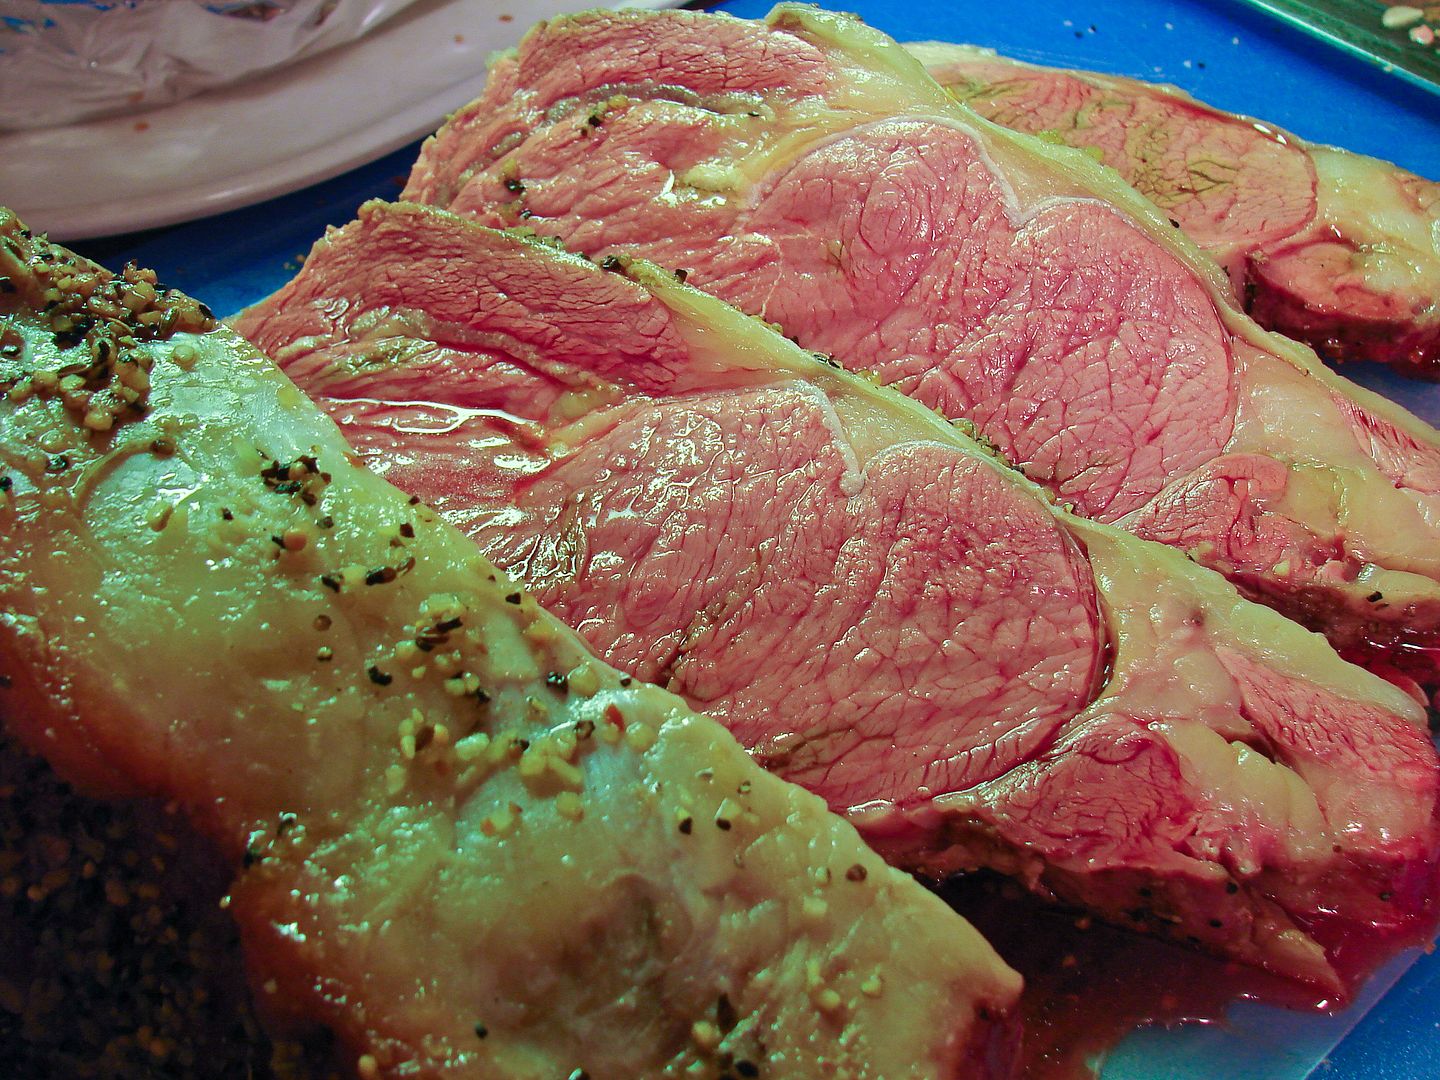
For Example.... if I had a 4 pound roast that I wanted on the high end of medium rare, I would remove it from the cooker at 125° expecting that it may rise to around 132° during the rest. I would pull it off the cooker closer to 120° if I wanted it on the lower end of medium rare. This is what look for when I mention medium rare. The center is warm and mostly pink to red. The texture is firm on the outside, soft and juicy on the inside.
Notice the cook times of all the roasts which are over 10 pounds are really similar. This has to do with the L/D ratio (length and diameter ratio) of the roast. This is most easily demonstrated when cooking pork loin roasts, as a 6" long roast will cook in about the same time as a 12" long one because the length is not a factor anymore, only the diameter is. Now, the cross section shape of a prime rib roast is not as consistent as a pork loin, but you get the idea. The variables you will encounter are the fact that a prime rib has a large end, and a small end, your roast might have a larger fat cap, or a thicker lip muscle.
115°-120° very rare
121°-127° rare
128°-135° medium rare
140°-150° medium
150°-155° medium well
>160° well done
Note below that I have made a change to my description of the "crisp up" step following resting.
~~~~~~~~~~~~~~~~~~~~
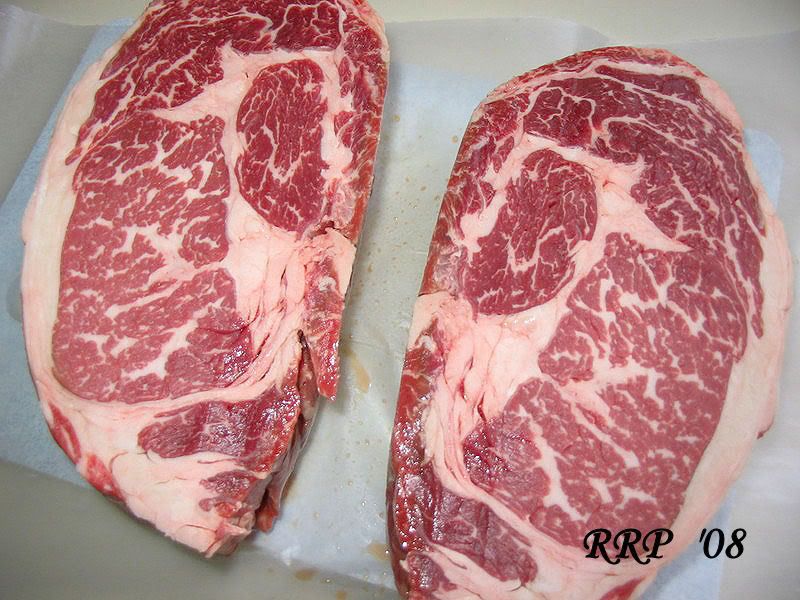
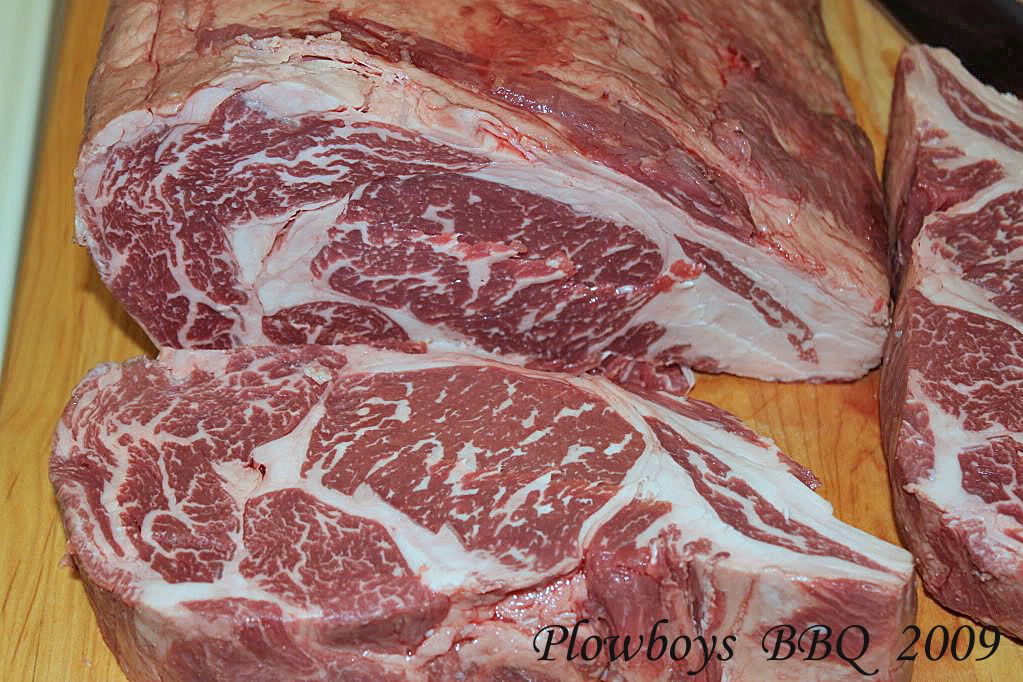
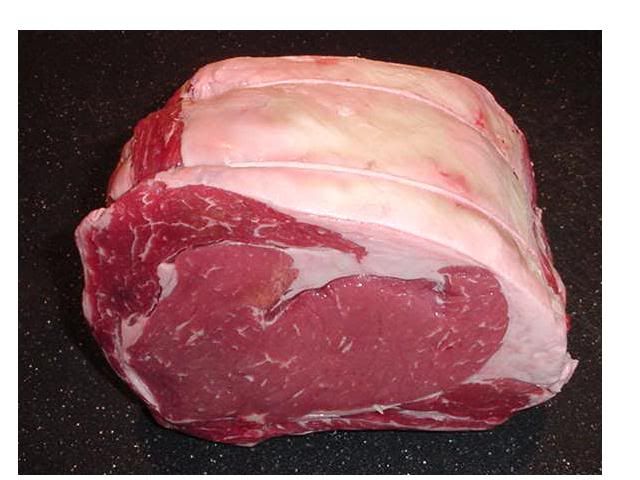
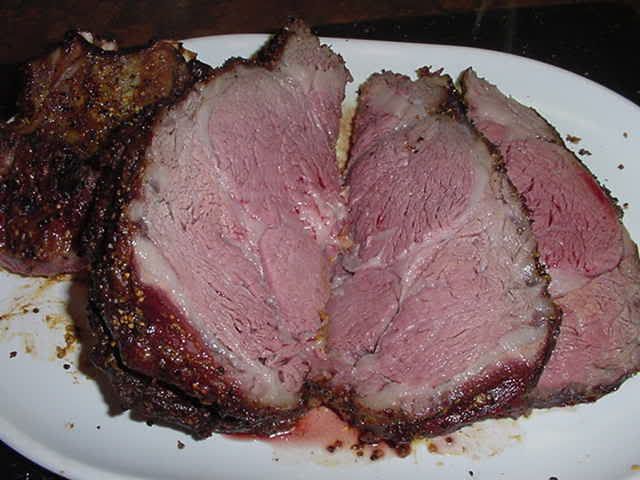
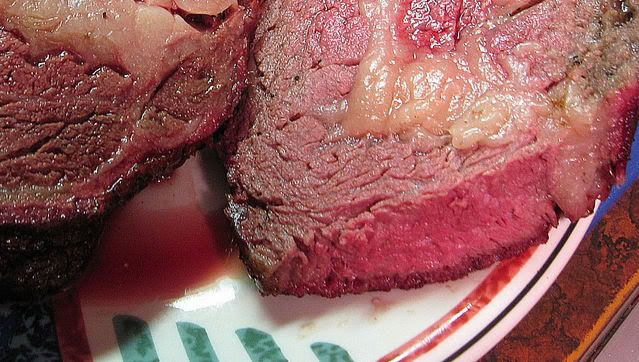
Only about 2% of beef sold today is USDA Prime. Most goes to restaurants. If you can get an actual "prime grade" rib roast, the better off you will be. Prime beef is sort of like a rattlesnake, most folks sort of know what it looks like, but the first time you see it up close, you'll know it's the real thing. These first photos from RRP and Plowboys BBQ show some nice prime beef. The last photo is choice beef. Notice the difference in the marbling. You'll also notice the difference in the price per pound. You might want to experiment with a prime grade steak to see what all the fuss is about. I'd rather eat half a good steak than a whole one that's only half as good.
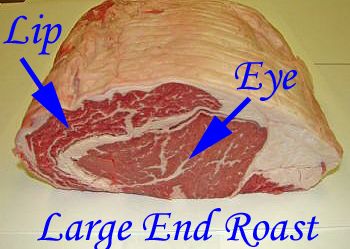
Cut from the upper rib section of the back of a steer a full standing rib roast will have 7 ribs. (Charles Ranhofer, the famous 19th Century chef de cuisine at Delmonico's Restaurant in Manhattan, considered only ribs 7 through 12 as the "prime ribs", but he was before the USDA came around with their rules). Anyway, counting from head to tail, the roast includes ribs 6 through 12. The "front end", aka "large end", aka "chuck end" is known as the "third cut" and is made up from ribs 6, 7 and 8. These cuts are larger in physical size, but have a smaller eye and display "the lip". The "second cut" is made up of ribs 8 and 9. The "small end" or "sirloin end" is the "first cut" and made up of ribs 11 and 12 and will be smaller in physical size, but contain a larger eye.
The large end cuts are a little bit tougher but are flavorful. The small end cuts are leaner. . (If you specify a 4-bone small end roast your butcher will give you bones 9. 10, 11 & 12)
ADVANTAGES - Low-N-Slow Method
This low-n-slo method with the crisp/sear at the end of the cook keeps the roast juicer, and allows for very even cooking. The end cuts are just a little more cooked than the center cuts and the slices do not have that strip of well done meat common with higher temperature methods.
This method will usually give you a little smoke ring too. I seem to get them most often when using my BDS
This step is optional: Age (and I use this term loosely, actually it is more of a drying step) the prime rib in the coldest spot in your refrigerator for 8 to 24 hours by unwrapping it and placing it on a rack over a plate with some paper towels below to catch any drainage. Place a couple of dry towels on top of the roast to cover. Change the towels when the become damp. The following advice (which I have repeated often over the years) followed the opinion of a great many other folks "On cooking day, set out at room temperature for 45 minutes or an hour". I've had a change of opinion on this..... Now days, I may have a roast on the counter 15 minutes or so before going to the cooker.
COOKING METHOD #1 Indirect
Season with at least coarse salt and coarse pepper (or any other rub). An option is to lightly brush with a yellow mustard / Worcestershire slather. This will anchor the seasonings. Set up your cooker (or oven) for barbecue temps of 220° to 250° (grate temp), and cook indirect until the internal temp is 5 to 8 degrees below your personal target doneness. Remove from cooker, tent with foil for at least 10 minutes. If you need to hold the roast longer, pull the roast a couple of degrees earlier, wrap in foil and place in a cooler (no ice) and add some newspaper for insulation.
TIP: Estimated cooking time on a 4-1/2 pound roast is 25 to 30 minutes per pound, but it is best to use a cable thermometer to monitor the internal temperature. This way you can ramp your pit temp up or down as needed.
Meanwhile, ramp up the cooker or heat oven to 500°. Unwrap, add a little more rub to the roast and return to the cooker (or using a roasting pan & rack, put in the oven) just long enough to achieve desired crust. Your objective during this "crisp up" step is to allow the Maillard reaction to occur, as well as improve the appearance with a some browning. Depending on the size and the color of the roast before doing the "crisp up", the time required for this step may range from 2 or 3 minutes to maybe take 8 or 10 minutes. This step is intended to influence the surface only...it's really a visual thing, watching for the surface to sizzle a little. Too long of a time in the 500° heat may cause the internal to rise beyond your target doneness. When you are happy with the color, remove to a cutting board for carving..
COOKING METHOD #2 Raised Direct
Season with at least coarse salt and coarse pepper (or any other low sugar or no sugar rub). My current favorite is Kreuz Market "house" beef rub, it is coarse black pepper, fine grain salt, and cayenne pepper. Prepare your cooker using a very raised direct set-up and barbecue temps of 220° to 250° (at the grate). In my Egg I use my Woo ring, grate and then the BGE grate extender, in my BDS I use the top rack. Start with the rib side down and turn in about 20 minutes if needed. Turn as needed to balance out the color, but most of my cook time is with the bone down. Sometimes I never turn them. Barbecue until the internal temp is 5° to 8° below your personal target doneness. Remove from cooker, tent with foil and let rest for about 10 minutes. No end sear is needed with this method and the fats dripping into the coals during the cook add a great old-time flavor. Be sure and use a cable thermometer early in the cook as meats tend to cook a little faster with a raised direct set-up.
TIP: If anyones slice is too rare, just toss it back on the cooker and flip once or so, or heat some butter in an iron skillet and give it the same treatment.
~~~~~~~~~~~~~~~~~~~~~~~~~~~~~~~~~~~~~~~~~~~~~~~~~~~~~~~~~~~~~~~~~~~~~~~~~~~~~~~~~
A great accompaniment to serve with a standing rib roast, and a must have dipping sauce if you are lucky enough to have sandwiches the next day is Au jus. This thin sauce is basically beef broth stirred into the degreased roasting pan along with some other seasonings, and brought to a boil. But with a barbecued roast I don't use a roasting pan. There is however an easy solution.
The first two recipes come by way of Guest Pit Boss RRP who is a regular on the Big Green Egg forum. Over the years, he has made changes and I thought it would be a good idea to make his latest version available as well. You can see the changes are slight, but it just goes to show that developing a recipe is a journey, not a destination.
RRP's Au jus #1
1 - 14 oz can Swanson Beef Broth
1 - 10-1/2 ounce can of Campbell's French Onion soup
½ - of the soup can cold water
½ - teaspoon white sugar
2 - teaspoons Worcestershire sauce
¼ - teaspoon of garlic salt
2 - Wyler's brand beef bouillon cubes
Bring ingredients to a boil in a saucepan, letting it boil for 1 minute then
strain and discard onions. Serve hot. Can be made 2 days ahead. Makes 3 cups. TIP: Freeze the unused Au jus in small containers or in an ice cube tray
******
RRP's Au jus #2
(This version uses broth from the box, omits the white sugar and has an increase the bullion)
1 14 oz Swanson Beef Broth (box – not the can)
1 10-1/2 ounce can of Campbell's French Onion soup
1/2 of the soup can cold water
2 teaspoons Worcestershire sauce
1/2 teaspoon of garlic salt
2 Wyler’s brand beef bouillon cubes
Bring ingredients to a boil in saucepan, letting it boil for 1 minute then strain and discard onions. Serve au jus dipping sauce hot. Can be made 2 days ahead. Makes 3cups. BTW, I also make a batch of this and then pour it in large ice cube trays. Two melted cubes make a wonderful Bloody Bull cocktail.
******
As you know, I test ALL Guest Pit Boss Recipes exactly as written before sharing them with my readers, and as you can guess I might make a change over time.... That said here is my latest version of Au Jus which was inspired from RRP's first Au Jus.
******
RRP AuJus - ~thirdeye~ version
(My version begins with beef consume for a deeper beefy flavor, uses dry onion soup mix, and more water as the consume is saltier and thicker than beef broth. I went heavier on Wooster and added soy sauce to increase the umami*, and added a couple of other ingredients).
1 14 oz can Beef Consume
1 packet Lipton Beefy Onion Soup (dry mix)
1-1/2 of the soup can cold water
5 teaspoons Worcestershire sauce
2 splashes of Soy Sauce
1 teaspoon of garlic salt
2 teaspoon Herb-OX beef bullion
2 teaspoons Montreal Steak rub
1 teaspoon Smokin’ Guns Rub**
1/2 teaspoon celery seed
1/2 teaspoon black pepper
Bring ingredients to a low simmer in a saucepan, and cook for 15 to 20 minutes. Try to avoid having the liquid come to a boil. Additional water can be added if flavors are too strong, or if liquid gets too thick. AuJus is a thin table sauce, NOT a gravy. Pour through strainer to remove the onions and coarse pieces from the Montreal Steak rub. Serve warm
*Umami - Unofficially, umami can be called the "fifth taste", the others being sweet, sour, salty, and bitter. Umami loosely translates from Japanese to mean "pleasant savory taste". Umami comes from natural glutamates found in fish sauce, soy sauce, Parmesan cheese, Worcestershire sauce, and many other things we just love to use. Natural glutamates enhance other flavors. Man made glutamates called MSG, or "Accent" brand seasoning do the same thing. Google "umami", and you will find volumes of information about it. But let me bend your ear just a little more...
When talking about umami, most folks say "U-what?". So my favorite question is to ask folks if they have a bottle of Worcestershire at home. They usually answer "sure, I always have that around". Then I ask "what do you use it for"? And they might say "on a burger", "in some soup", "in a sauce", "in a bloody Mary", and my favorite answer "it's my secret ingredient in many things". Then I ask "what does it taste like"?. They usually can't quite define it, or just say it has it's own taste, or that it's a seasoning. Next I tell them that anchovies are a main ingredient in Wooster, and that's what gives Wooster umami. At this point, 75% of these folks are thinking "What??, I don't like anchovies". Then I ask them "when was the last time you saw a commercial for Wooster on TV, or an ad in a magazine. Heheheee, they can't recall ever seeing advertisement. Okay, now I've got them.... In other words I suggest,..... "You like the flavor, but can't really tell me why, you like the results so well you keep buying and using the stuff...., and it's such a great product the manufacturer doesn't need to advertise it." Folks usually scratch their heads and say "yeah... you are right". Man, that's umami.
**Smokin' guns is a competition grade BBQ rub which contains MSG.
![]()
No comments:
Post a Comment