
Beef Chuck Roast
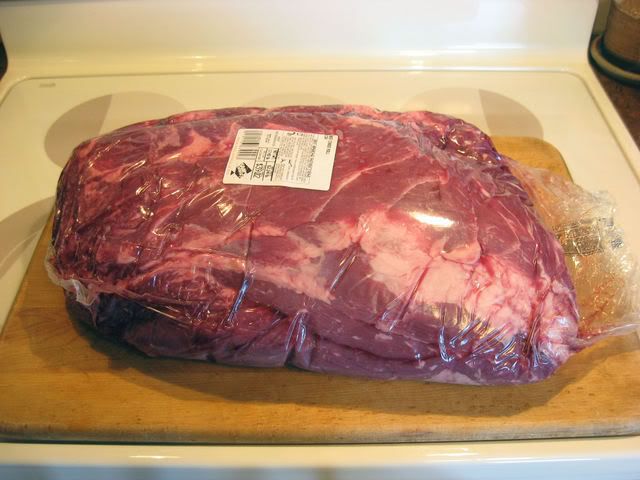
One of the best values on a steer is the chuck, which is basically the front shoulder of the animal. The upper portion of the chuck is called "shoulder clod" and the lower portion is a "chuck roll". Both of these are big pieces of meat, weighing in at 20 to 25 pounds. The meat is nicely marbled and contains several muscles. If you have been lucky enough to eat your way through the barbecue belt in Texas, you have most likely had clod. Clod is common in meat markets that cater to barbecuists. Chuck roll is a little more common in my neck of the woods, so from here on out I'll focus on it, I just wanted to point out that they are neighbors and are similar when cooking. This is a picture of a boneless chuck roll.
First off, do not get intimidated by the size of a chuck roll. It can be cooked whole, in halves, or in thirds. In less than 5 minutes you can cut it into several 6 to 7 pound roasts, which works good for me. Remember they are boneless, you just measure and slice.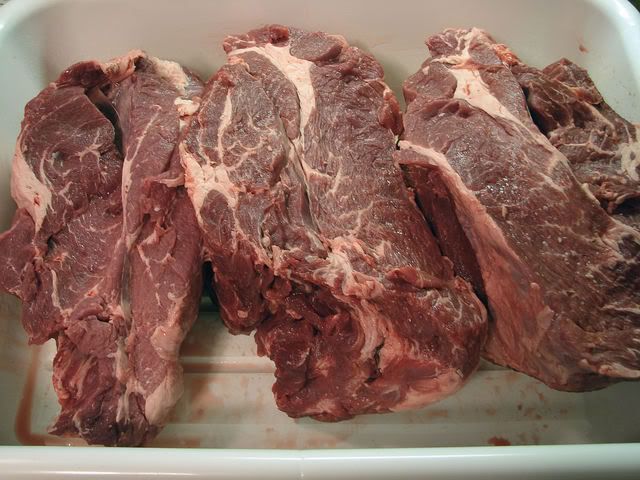
With a little more creative knife work, and about 10 minutes, you can break it down laterally (horizontally) into a chuck eye roll and a blade roast, which can be further cut into chuck steaks. Here is a cross section of a chuck roll showing the seam you would follow to wind up with these two roasts. If you own a meat grinder, you can get any variety of roasts (or steaks), then cube and grind the rest for some of the best burger you have ever tasted. I wanted to point this out to support buying a chuck roll....If you can't get one, or don't want to deal with one, get the thickest heaviest chuck roasts you can fine. A 4 pound one is good, a 5 pound or larger is better.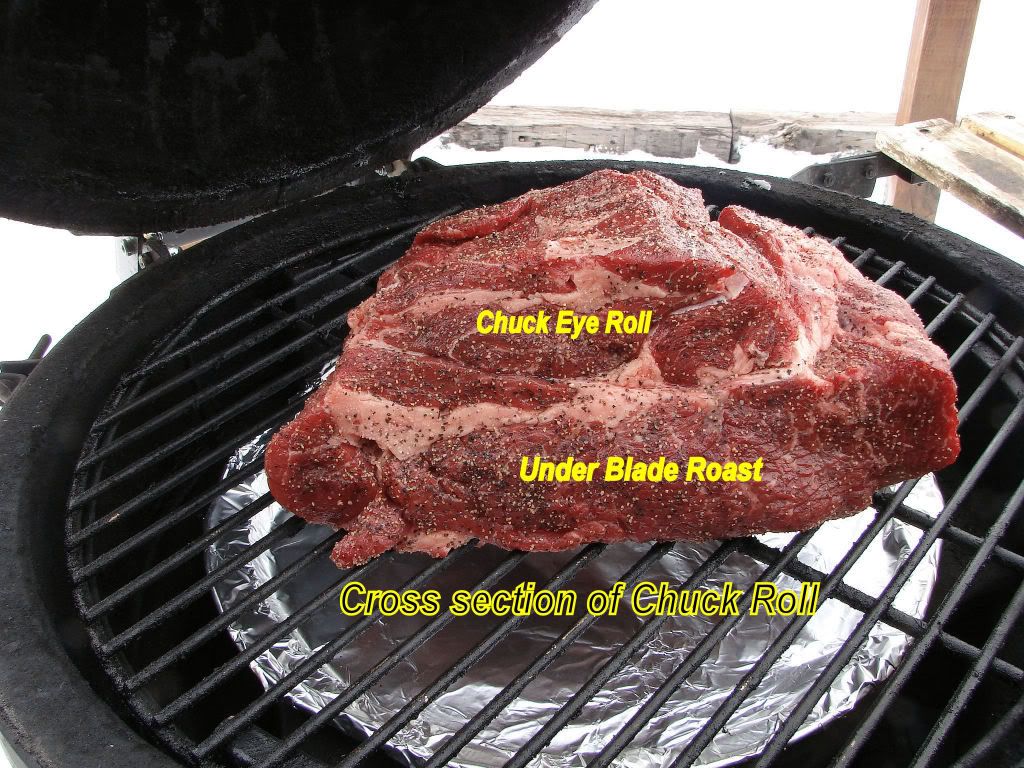
Okay getting back on track, you have some big chuck roasts, and you are going to barbecue them. Now I don't know what your opinion is regarding the use of foil or pans, but they have a definite place when cooking chucks. It can be sheet foil, foil pans or actually, any other type of roasting pan or a Dutch oven....so make sure you have one of these options on hand as they are needed toward the end of the cook. The first decision is whether the chuckies will be sliced or pulled. Slicing quality chuck is easier to cook as it is ready at a lower internal temperature. Flavorwise, it's right up there with brisket and I think has a better yield too. Pulling quality chuck requires more time, a higher internal temperature and some liquid in the foil to braise or steam it tender.
As far as seasonings go, a minimum of salt, coarse black pepper, and a sprinkle of cayenne should be used. Going one step further you could use a Montreal Steak seasoning. Dizzy Pig Cowlick or Raising The Steaks are also excellent choices. If you have a favorite beef rub, by all means use it. I stay away from anything sweet on beef, but that is my preference. Season the beef at least an hour before cooking and keep it in the fridge. If you like to mop consider a salt & pepper mop.
The S&P mop I use is:
10 ounces of water
2T to 3T kosher salt
1T cayenne
Splash of Wooster
Splash of Olive oil
Heat the water, add ingredients, dissolve. Wait at least an hour or two into the cook before using it, and at most mop once an hour. This will not weaken any of the rubs mentioned above. Keep this warm and reheat it during the cook if needed....don't use cold mops. Ever. By the way, you will not use all of this mop on this cook, so after making a batch put some in a Mason jar in the fridge, it can also be used on steaks.
Now comes my favorite part - the cooking. I don't care what kind of cooker you have, but at the beginning you must start with a low pit temp and your favorite wood for cooking beef. Mine would be pecan, oak and pecan. Yes, I mentioned pecan twice. That's because I really like it. Build a proper fire that is capable of producing a 200° to 225° pit temp, let it stabilize and let the smoke settle down. With the exception of my Big Drum Smokers, my set-up is indirect. Now, take your seasoned roasts out of the fridge and put that cold beef on the pit. The pit temp will immediately drop. This is fine, leave the vents alone and it will recover in no time. While it's recovering, the beef is taking the good smoke flavor.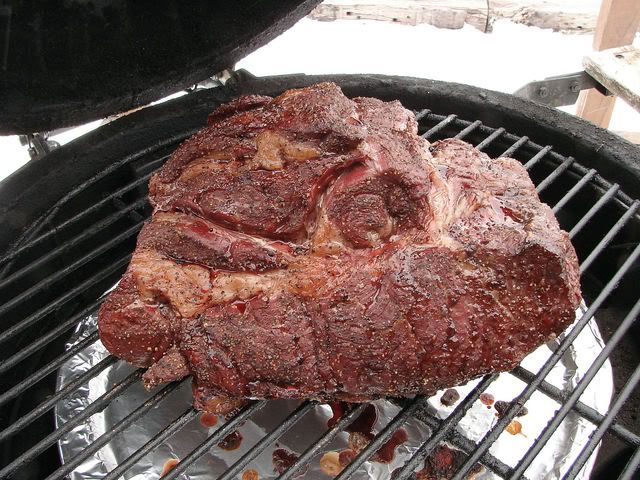
In the next few hours, the fats will migrate to the surface and co-mingle with the seasonings on the surface. The next decision you will have to make will be slicing or pulling. The method for slicing is easier, so I'll start there.
Cooking Method #1 - Sliced Chuck
First off, the bigger the piece of meat you have the better. Better flavor and better moisture. I don't trim slicing beef at all. After 3 hours or so at the lower pit temps, ramp up the pit temp to 250° or 275°. You can most likely cook it until the internal is around 160° to 165°, unless the color is getting too dark for your tastes, then wrap it in foil with minimal beef broth (like 1 ounce) and cook it until the internal gets to 185° or so. Gently unwrap it and test for tenderness with an ice pick or your thermometer probe. You will feel some resistance when probing. Wrap back up and rest in a warm cooler with newspaper for insulation.
Cooking Method #2 - Pulled Chuck
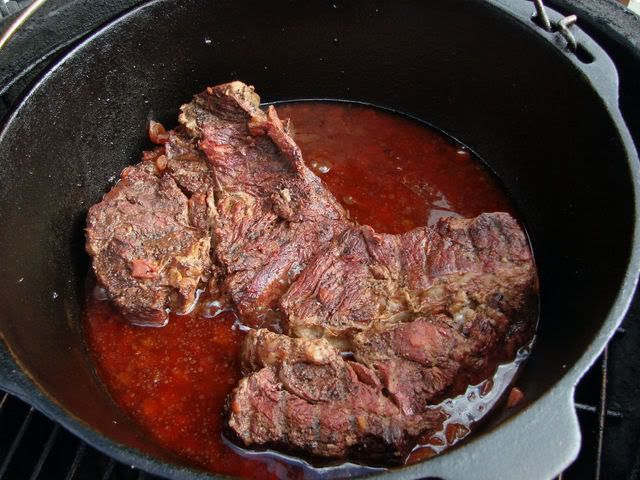
Big pieces of meat work fine, but smaller ones will work too. I trim the all of the heavier fat and leave the remaining fat thin, like an 1/8". Your starting pit temp should be in the 200° to 225° range to allow for plenty of smoke flavor. Start monitoring your internal temp after the second hour as your objective is to remove the roast from your cooker when the internal temperature is 160°. During this first part of the cook, allow the pit temp to rise to the 250° range ...don't go too much higher or you could overshoot the target temp of 160° internal. Plus we need a 250° pit temp for the second part of the cook (which I'll call the "covered finish") if you elect to finish the roast on your pit. If you are going to use something else to finish the cook (oven, roaster, Crock Pot, etc, you can leave the pit temp alone. Covered will refer to foil, foil pan, Dutch oven, roaster or crockpot. Whichever you feel more comfortable with will be your best bet, so which ever you choose, get it ready as the roast is coming up to the 160° internal temp. Also get some braising liquid ready. The braising liquid can be beef broth, a jazzed up beef broth, apple juice, apple juice and broth, or even BBQ sauce thinned with broth. Be sure and heat your braising liquid. Using a foil pouch will require 1/3 to 1/2 cup of liquid. A crockpot or Dutch oven will need a bit more, and a pan or roaster will need still more. In pans I like to go with a depth of 1/3 the thickness of the roast. Don't start with too much, you can always add a bit more as needed while you are cooking the beef tender. Likewise you don't want to cook the vessel dry either, so keep an eye on it. I prefer to monitor the tenderness by probing the beef instead of going my internal temperature alone. Here are a couple of my cooks. I have added a can of Rotel tomatoes to the broth in the Dutch oven.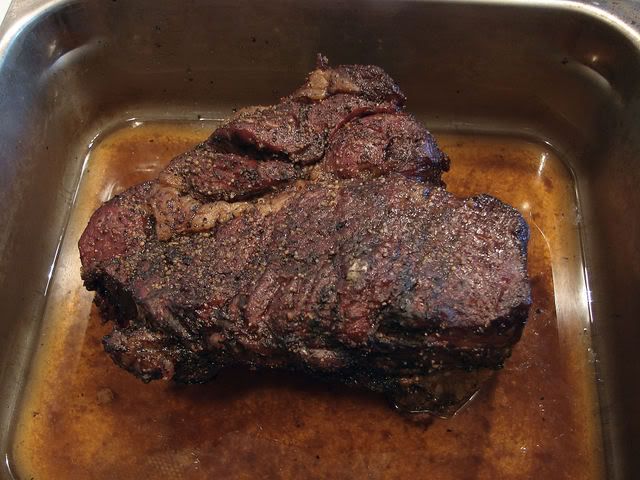
If you want take the meat to the pulling stage, monitor the tenderness with a fork. Here is some shredded beef.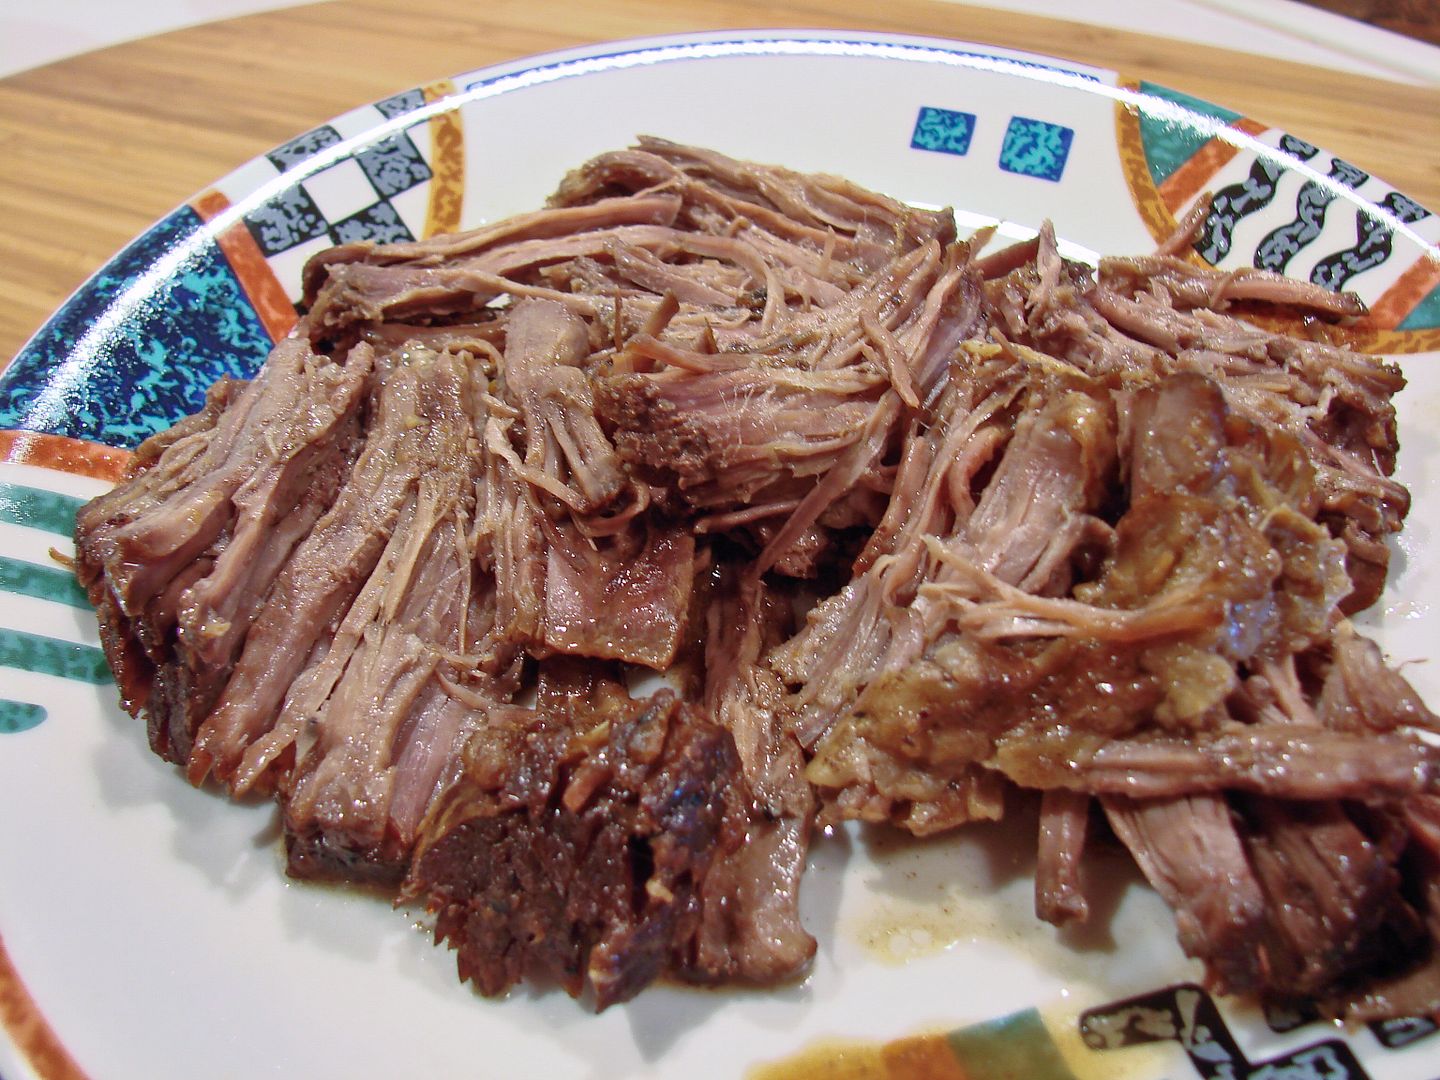
Experiment with different liquids or adders like the canned tomatoes or maybe some herbs or just a few chopped onions. There is a Pepper Beef recipe in the BEEF section, take a look at it and you can see what a little variety can do to a chuck roast.
![]()