
The Perfect Thigh ~ A Work In Progress
Usually I do a lot of testing before publishing an article. This time I'm throwing some of my notes together and want you, the backyard cook, to let me know how this is working out for you. The ideas behind this article came from several sources, and as my article takes shape and then comes together, it will be a combined effort. I would appreciate it if you would drop me an e-mail (put "Perfect Thighs" in the subject) with your observations.
UPDATE: The reviews (about 40 of them) are coming in favorable. 6 or 7 folks have told me it's the best chicken they have cooked. The negative comments all involve the time involved in the prep.
~thirdeye~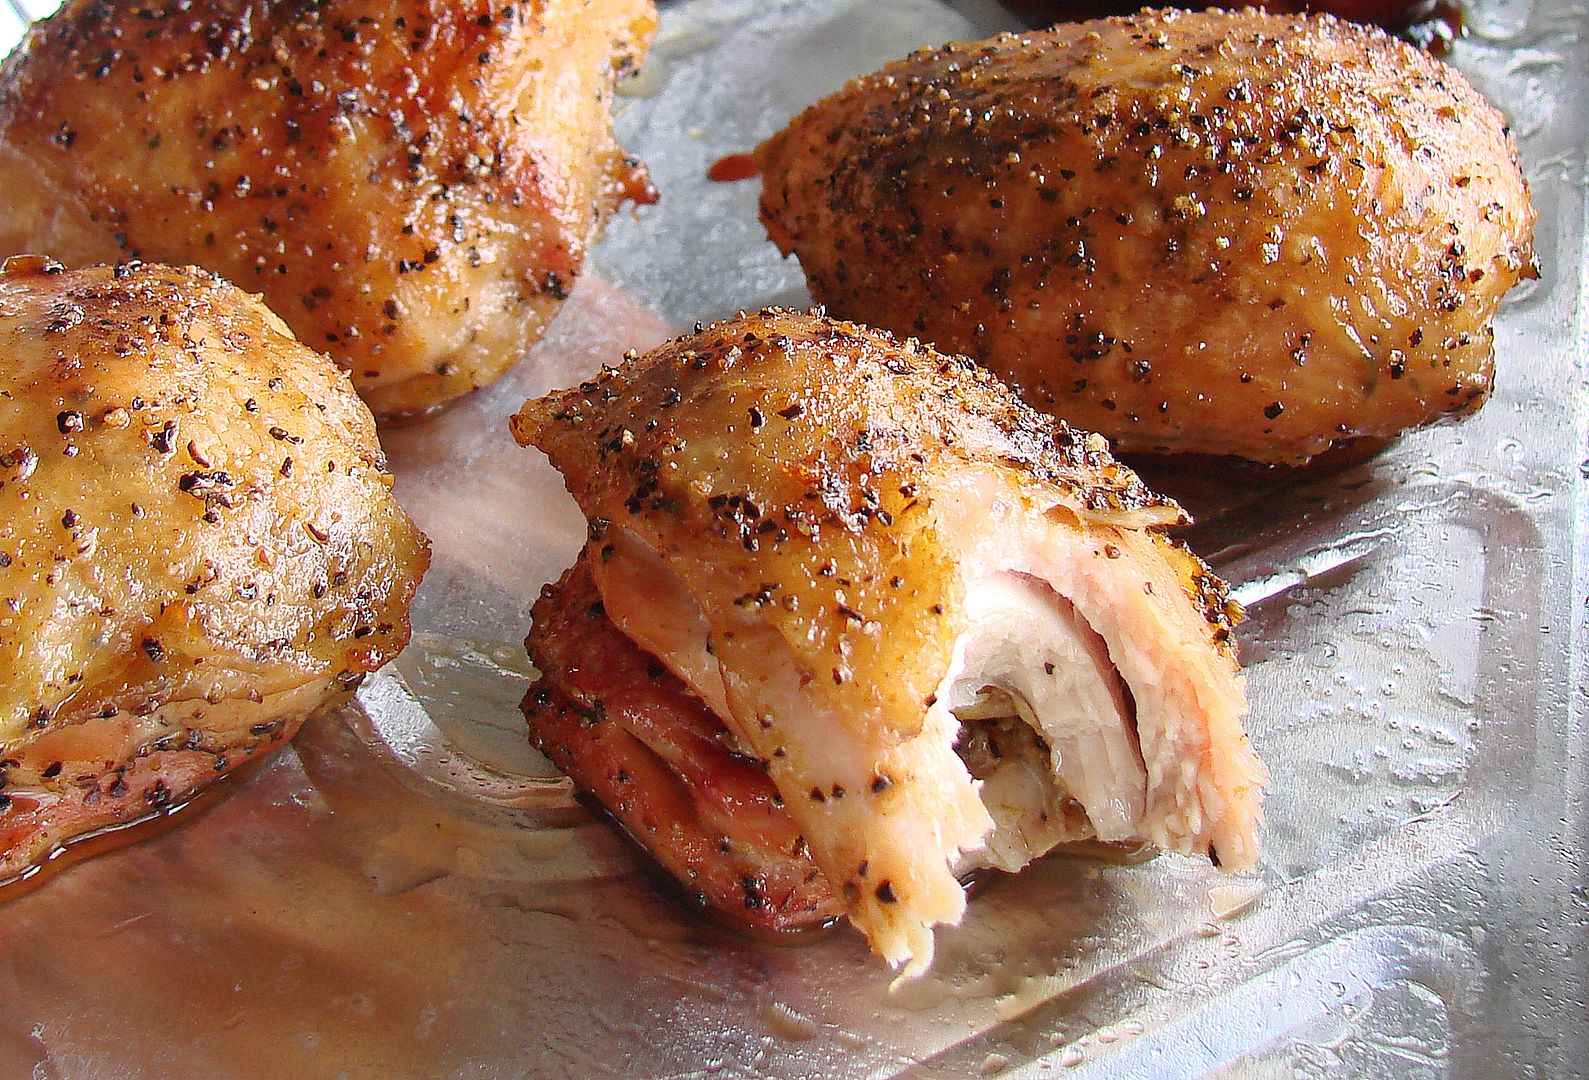
Chicken was one of the earliest things I learned to cook, and is one of my favorite foods. It's actually one of the most versatile and inexpensive things to cook. I've always had a pretty good handle on cooking it, but a couple of years ago I really started to focus on improvements to my chicken and found out that the best approach is taking baby steps. In other words, changing one thing at a time. This article is all about thighs, actually the perfect thigh. I'm defining the perfect thigh as one that is flavorful, moist, tender, has a nice color and bite through skin. I'm going to start off with the skin, and later move into several variations in cooking methods, as well as some finishing options.
PART 1 - The Skin
Overall, one of the biggest complaints I hear about chicken is the skin. It's either not crispy enough, or it's rubbery. The skin is where I will start. One of the most generally accepted techniques for getting a good skin has always been a hot finish over direct coals. This works well, although with the high fat content of skin, your fire and your timing have to be spot on. Otherwise, you risk burning the skin or drying out the meat... or maybe both. Then there is the Jumpin' Jim Method which calls for marinated thighs to be placed in a pan of simmering sauce when they come off the cooker, which softens up the skin. I've had good success with this technique but frankly, I'm not a sauce guy. A recipe by Julia Child in one of my favorite cookbooks calls for scraping the fat off the underside of duck skin in order for it to crisp up. Hmmmm, how would this work on chicken skin? Well, this is where I started. I would remove the skin from bone-in thighs, scrape it with a knife and toothpick it back in place.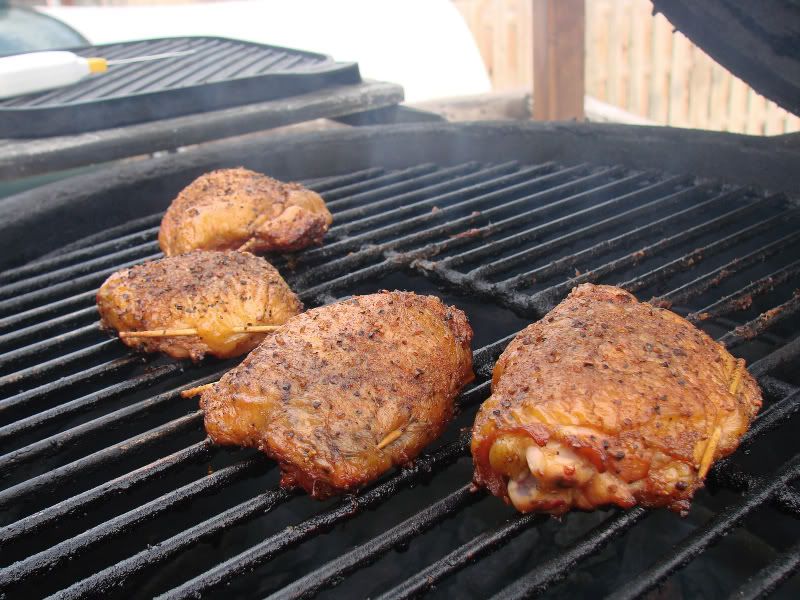
My notes from 2007 show a one line comment by Jeff in KC that said "scrape all the fat off the skin". Later on, my friend Chuck Marting (Bossman) mentioned scraping in one of his articles. Whenever I asked about scraping fat, usually about 2 people in 5 bought into the theory. A competition tutorial known as the Pickled Pig Method also subscribes to scraping the skin, but went one step further in recommending removal of the bone, which makes it easier to replace the skin without the need for toothpicks. See what I mean about baby steps? So here is where I am at to date....
For starters, you will need to stop by the hardware store and pick up a triangle shaped paint scraper. This tool works much better than scraping with a knife. Mine was fairly sharp, but I lightly worked the backside (not the bevel side) with my whetstone to remove any burrs).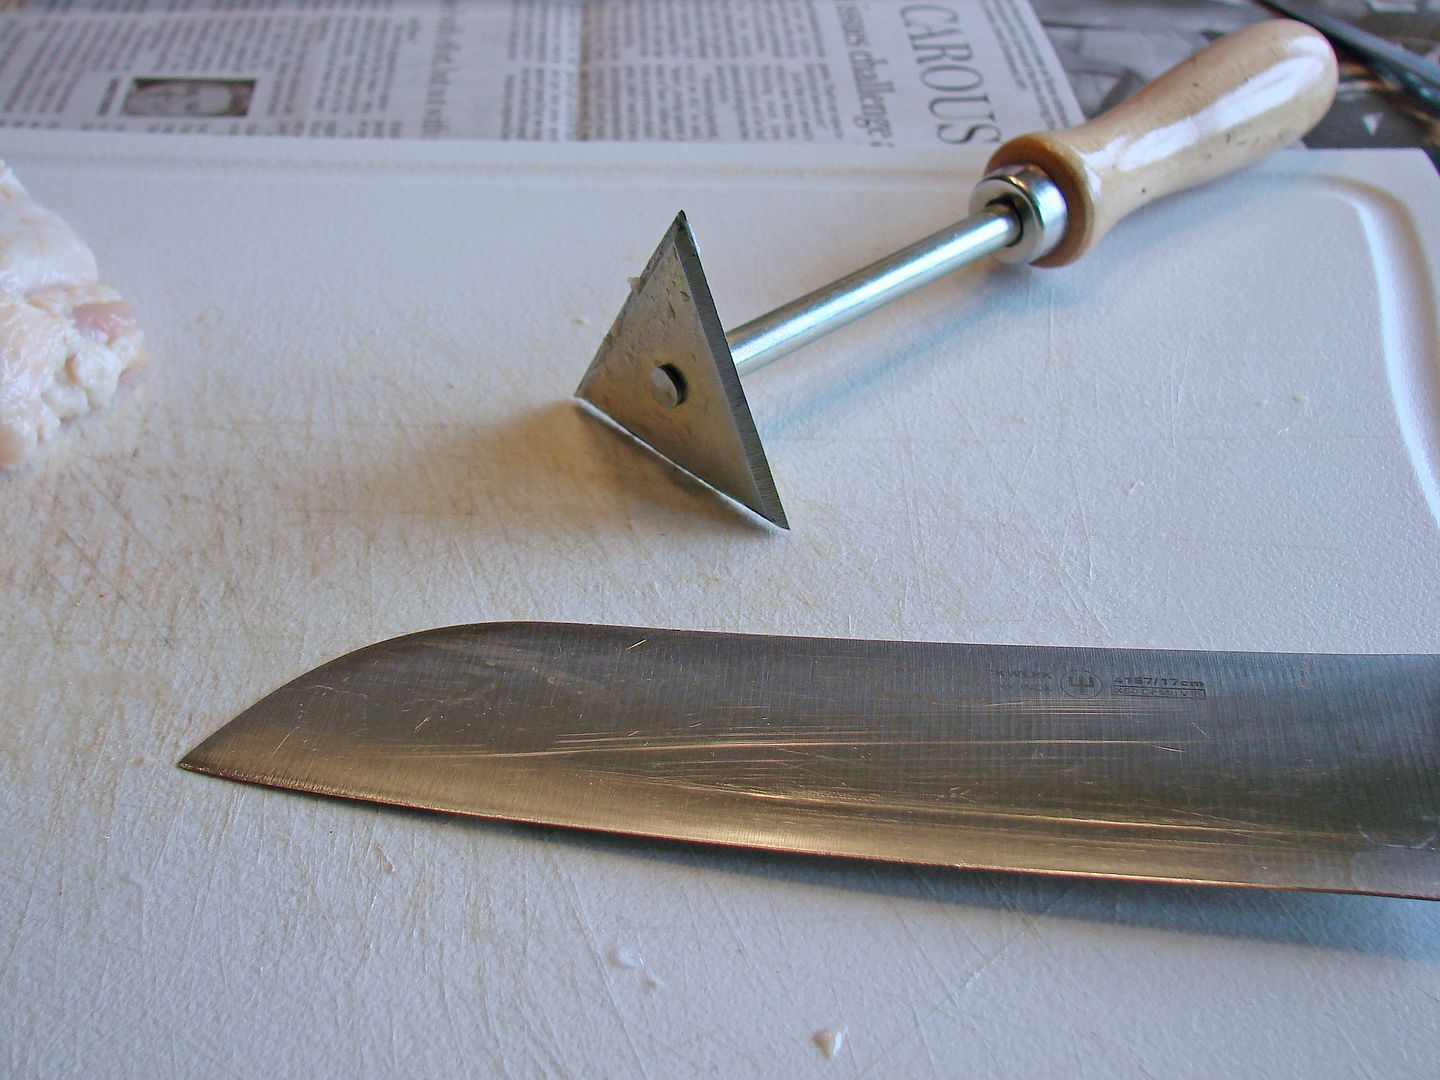
Next remove the skin from your thighs. (It's best to work in assembly line fashion, doing all of one function before moving to the next one). For boneless thighs, turn the thigh over and remove the bone. Trim as little or as much of the fat from the thigh as you like. There will be a good sized piece hidden in one of the folds. Trim some of the loose ends or tags of meat. Return the chicken to the fridge.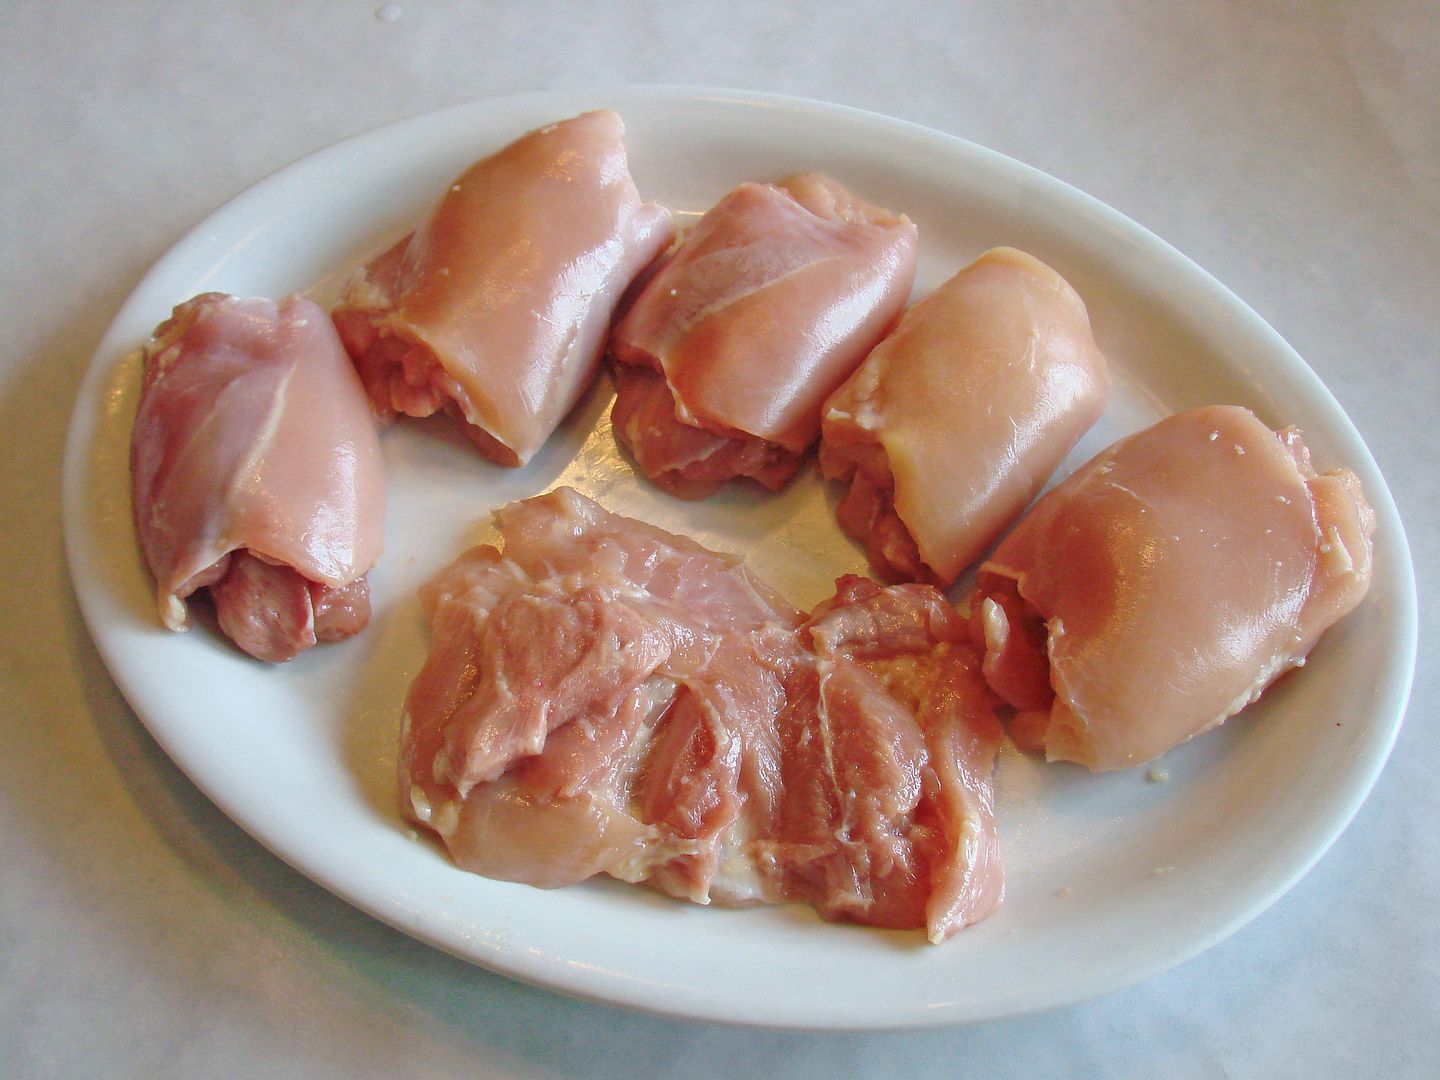
Lay your skin out fat side up, and sort of stretch it out on the cutting board. Using the scraper, start near an edge and remove a 1" wide band of fat. Repeat this across the width, then advance another inch and repeat. You will get a feel for the proper angle and pressure. I prefer to scrape away from me. Hold the skin with your other hand to avoid slipping. When you are done, trim the loose edges. NEW METHOD: I have started using a 5 X 9 cutting board on top of my regular one. It's about the right size for the skin, plus I can rotate the small cutting board instead of picking up the skin and repositioning it.
The preparation does take some time, but the results are well worth it. I'm thinking that I've done a couple of hundred thighs this way and when I did my last batch of 24I timed the prep from start to finish.... It took me 2 hours, which works out to 5 minutes per thigh. First I removed all the skins and stacked them on a small plate, then I scraped all of them transferring to another plate (these went back in the fridge). To keep the chicken as cold as possible I worked with batches of 8. I removed the bone and the more obvious fat from the thigh, then I lightly seasoned each one, formed it into shape and set it on my tray. When I had all of them seasoned and formed, I added the skins, added a second rub to the skin and returned them to the tray and in to the refrigerator for about an hour before going to the cooker.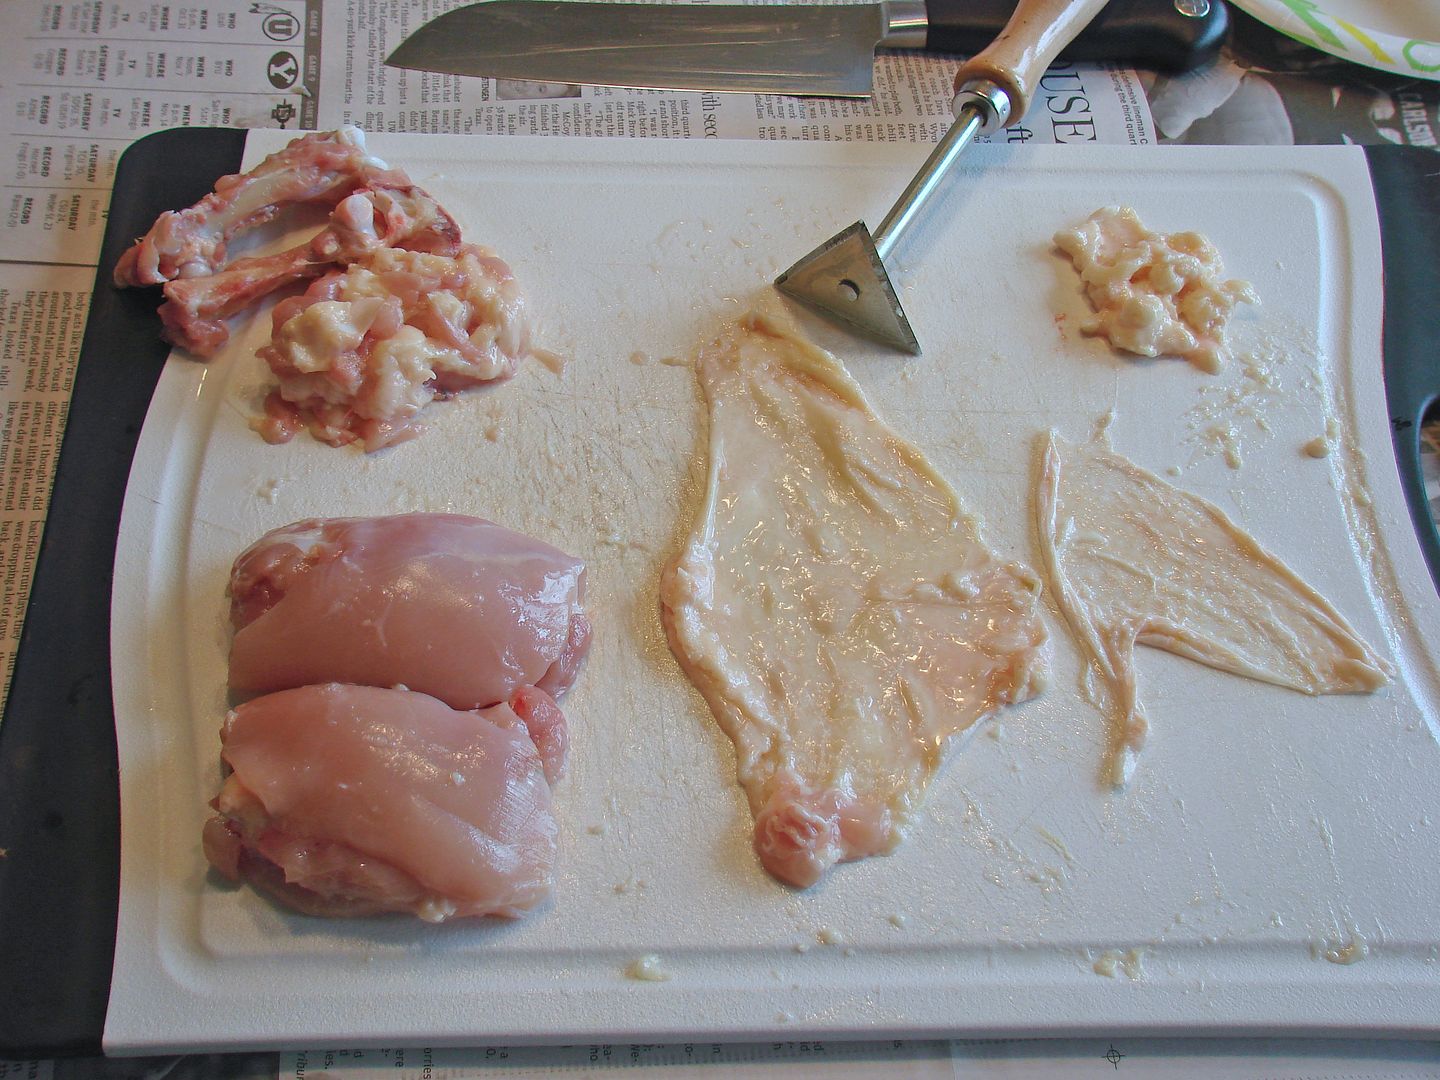
When all your skins are ready, take the thighs out of the fridge and season both sides lightly. If you have gone the boneless route, fold the ends under. You don't have to roll it up, just fold. Select any skin and put it back on any thigh, tucking it under on the sides and ends. If I have a skin fit problem with bone-in thighs, I just stretch and use toothpicks to secure it. Lightly season again. Return to the fridge to chill for at least 30 minutes.
A flavor option is to use fresh herbs under the skin. A single basil leaf or sage leaf adds a lot of flavor. For presentation purposes, position it on the center of the thigh because the skin is so thin the leaf will become visible during the cook.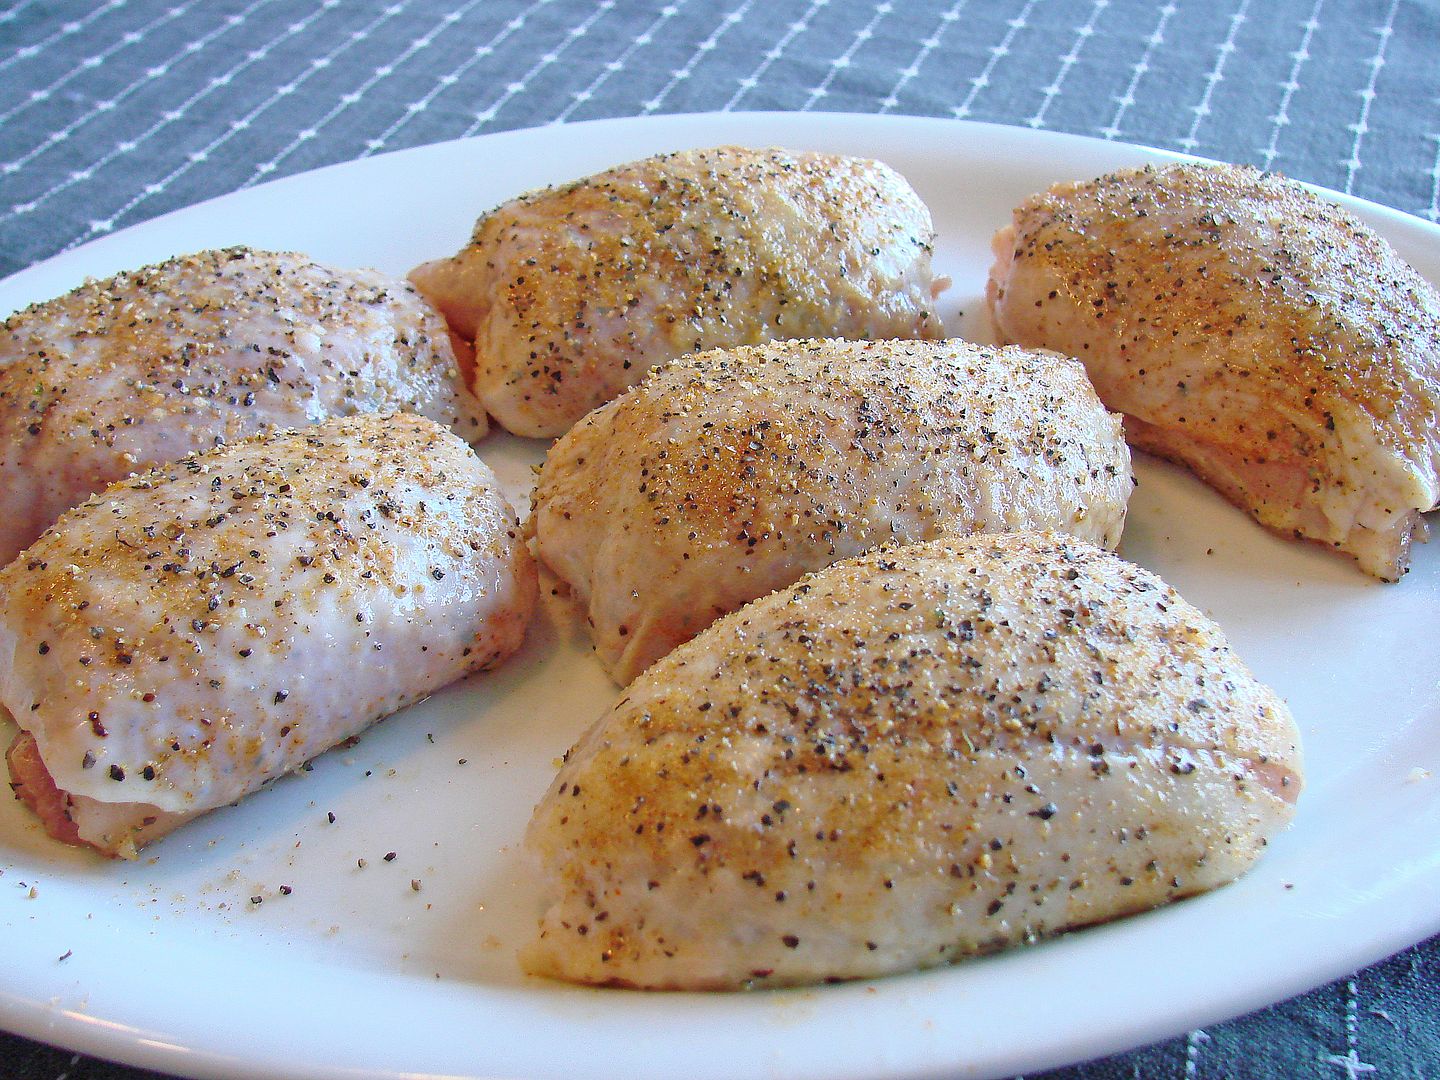
A side note here, all of this fat removal really drops the calories on the average thigh. It looks like 275 to 300 calories can be knocked off each thigh. This should be a big incentive to try this out.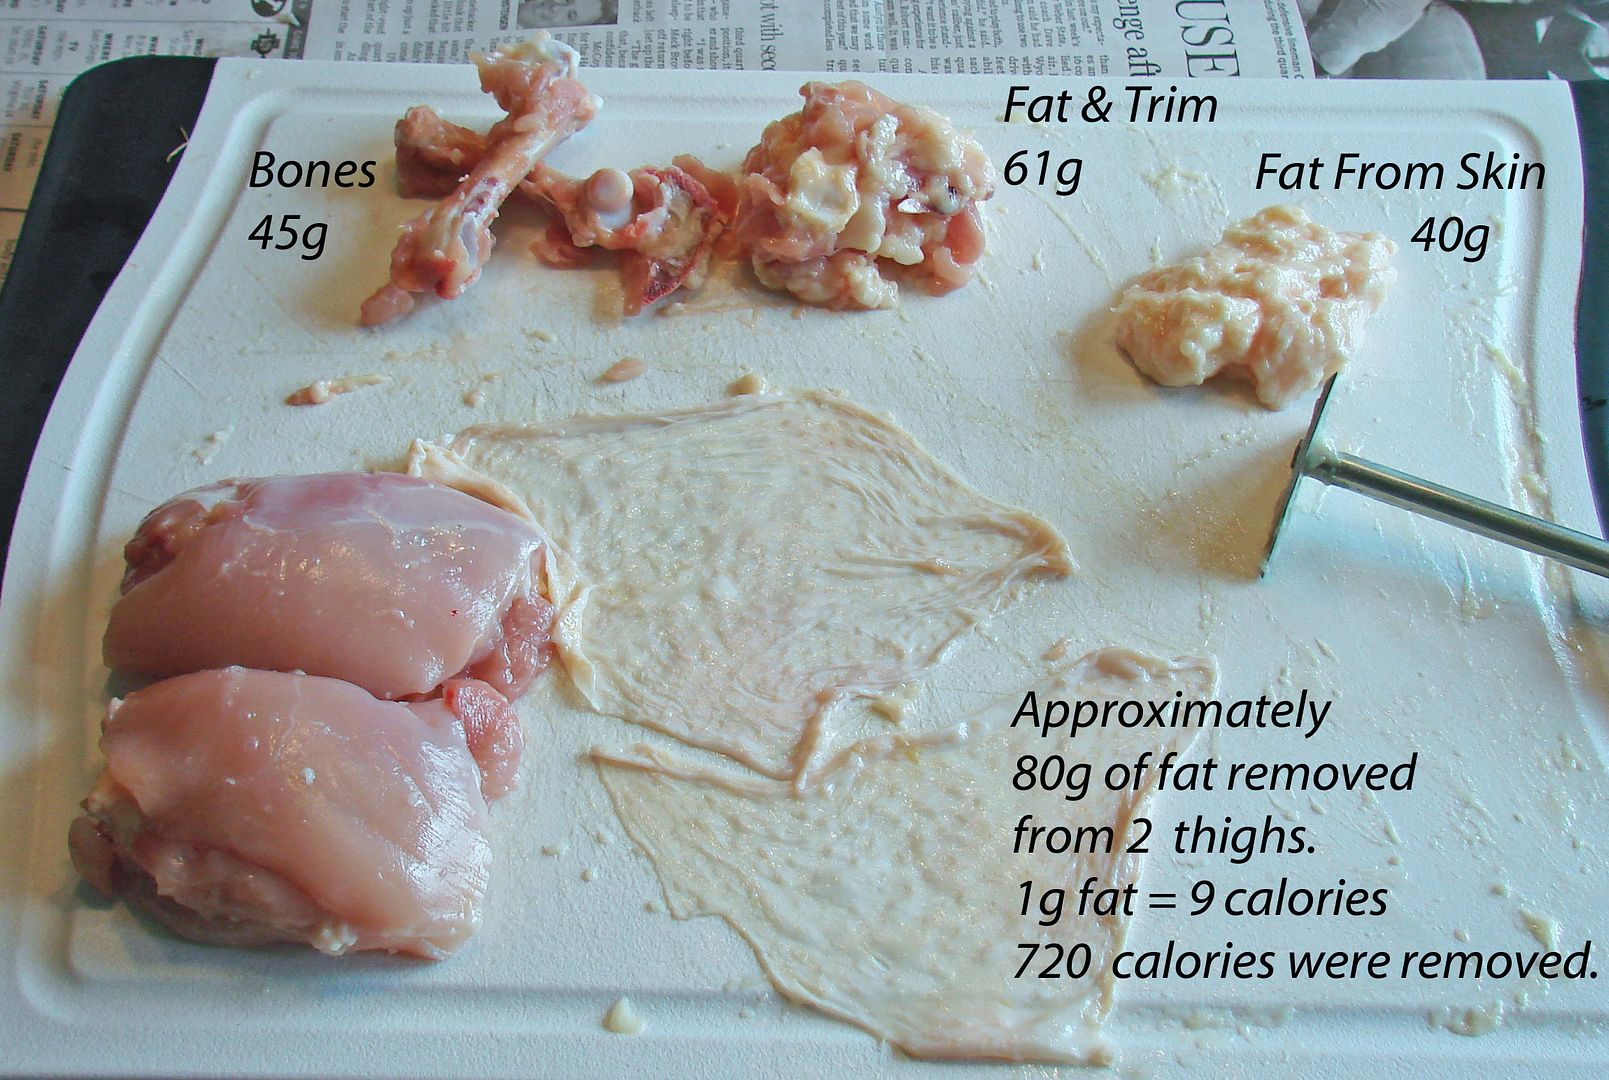
PART 2 - The Cook
What is the best method? In my Egg, I prefer thighs to be cooked using a raised direct set-up with a small fire. I like 250° to 275° grate temperature. I generally start them skin up for the first 15 or 20 minutes, then turn them skin down so I can get some color on them. I'm pretty picky about the color, so I may rotate the grate or move them in or out of a hot zone. I want the color to be balanced. While they are skin down, I also may lightly baste them. Once the color is right I turn them skin up again...... At this time the thinness of the skin will be obvious, it's not quite transparent, but you can easily notice the difference between it and skin that has not been scraped. Treat it with care when using tongs, or it may slip or tear.
In my drum cooker, I tend to run a little hotter, say 275° to 325°. I use the same turning procedure as above.
If you want to do an indirect cook, you can increase the grate temperature to 325°.
If you are going boneless, you can expect them thighs to cook faster than bone-in ones. But like with most things, don't rely on time alone. You need to temp them and monitor the internal temperature through the finish. I also take note of the appearance of the bottom side as well as the firmness (using tongs). Bone-in or bone-out, I generally serve my thighs at an internal temperature of 175° to 180°. You will want to pull them off the pit several degrees early to account for the carry over rise in temp while they rest. Because I have removed so much fat, I don't go much higher, because I might dry them out.
PART 3 - The Finish
Crispy skin or a sauced finish are the options here. The objective is to have bite through skin with either choice. Since going with the scraped skin, I have not really done the direct hot finish I mentioned earlier. This doesn't mean it's out of the question. Just be really careful if you go that route. Once I'm close to the internal temperature I want, I size up the tenderness of the skin by probing with a toothpick. I generally go for the crispy option, so if I think the skin needs a little more crisp, I just turn them skin down. Sometimes I brush on a little butter or margarine to give them the wet look.
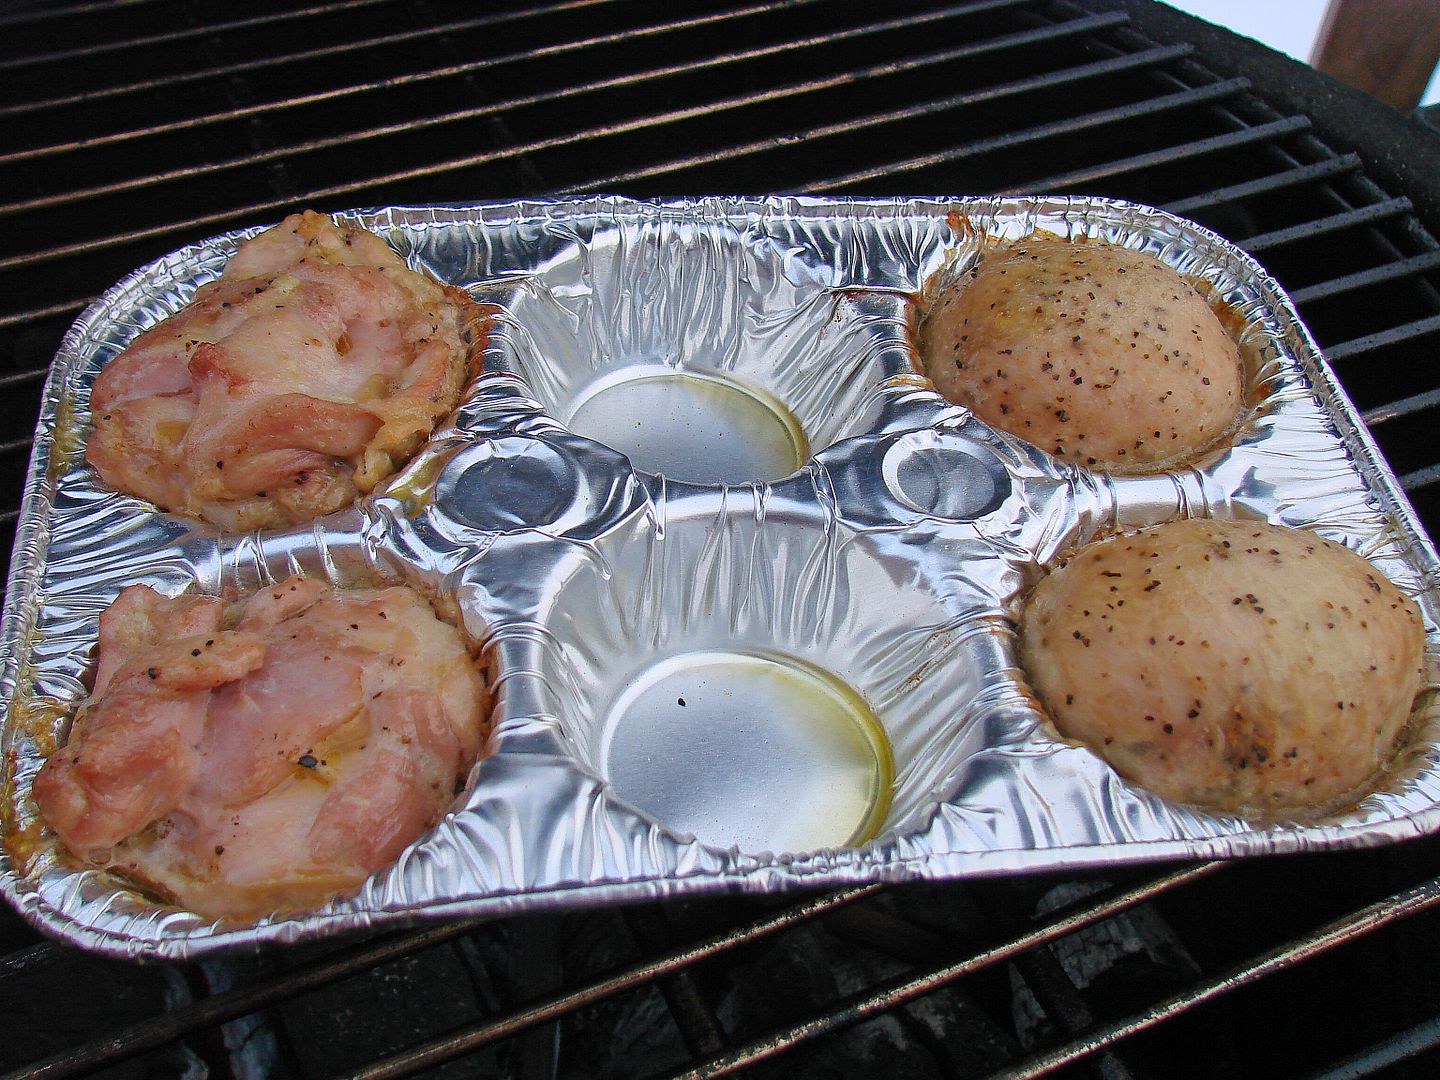
For a sauced finish, I mirror the Jumpin' Jim method. I prepare a tray with about 3/8" of thinned and warmed sauce in it, with some margarine added. Then I either dunk the thighs or paint on a coating of sauce. (since the skin is not pinned on with toothpicks, be careful with the handling). The pan gets covered and goes back on the cooker or into the oven for about 10 minutes. I've done test cooks with the skin down and skin up. When I used this method on non-scraped thighs, I liked the skin down in the pan. Now that I'm scraping the skin, I like them finished skin up.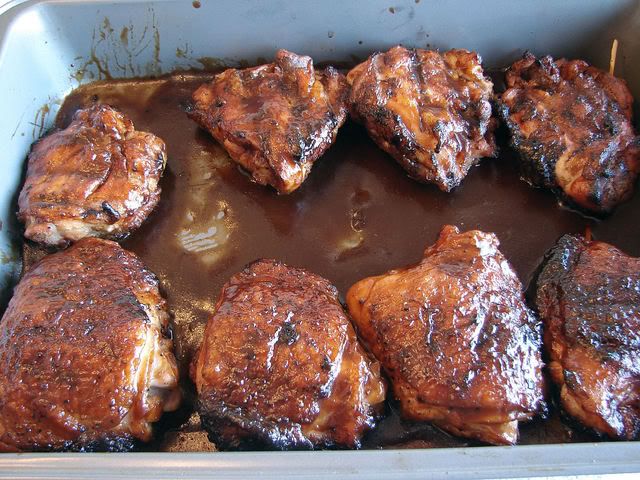
PART 4 - Fine Tuning
The Jumpin' Jim & The Pickled Pig Methods have deep roots in competition barbecue. It would be a fair guess that many folks have used them as a guide, then added or subtracted a personal thing or two.
In addition to the sauce finish I mentioned, the Jumpin' Jim method calls for marinating the chicken in Italian salad dressing for several hours minimum, (and up to overnight), then cooking for about an hour skin up, and about an hour skin down. When I plan on scraping the thighs, I remove the skin and bag it separately, then marinate the thighs in another bag. The fat keeps the skins "workable" and I scrape them about an hour before the prep and cook.
An interesting part of the Pickled Pig method calls for braising the boneless thighs in a pan of seasoned Parkay on the cooker until they set up, (15 to 30 minutes) then transferring the thighs onto the cooking grate. I have tried this a couple of times, but that was not enough to decide how I like this step. Parkay is a popular adder to sauces, basting liquids and injections, so this braising step has merit and is worth exploring.
In this photo, I underestimated the amount of Parkay, and had to add more warmed margarine to bring the level up. Having a pan this size on your cooker lets you know in a hurry if your deck is level or not. I had to shim the pan with a piece of flavor wood.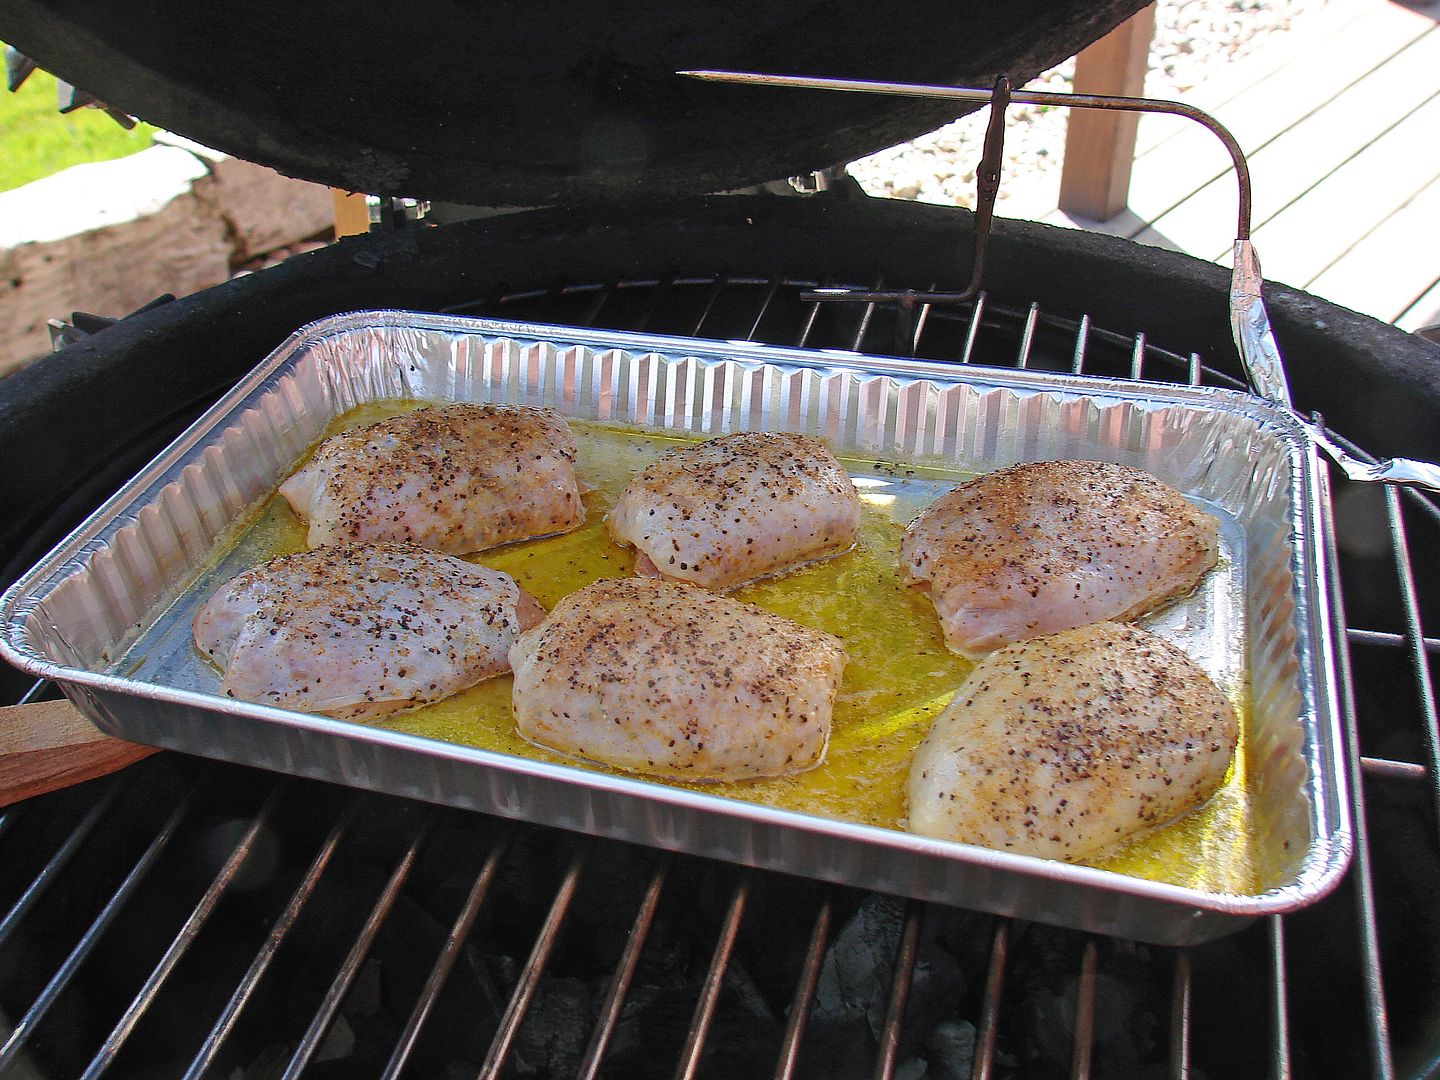
Part 5 - Cupcake Pan Chicken
The basic idea for this method was introduced to TV audiences by Myron Mixon, barbecue champion and one of the TLC Pitmasters on The Learning Channel. Viewers got a peek at it on the show as well as on late night television or clips from You Tube. By basic idea, I mean the use of a cupcake pan early on in the cook to set up the shape of the chicken. Myron has his combination and amounts of seasonings and butter, as well as specific times that work on his cooker.
I have just done my first cupcake chicken and I'm going to share a step-by-step description of what I did, and then discuss the results. I have used some of the techniques discussed above. First you need the necessary equipment...
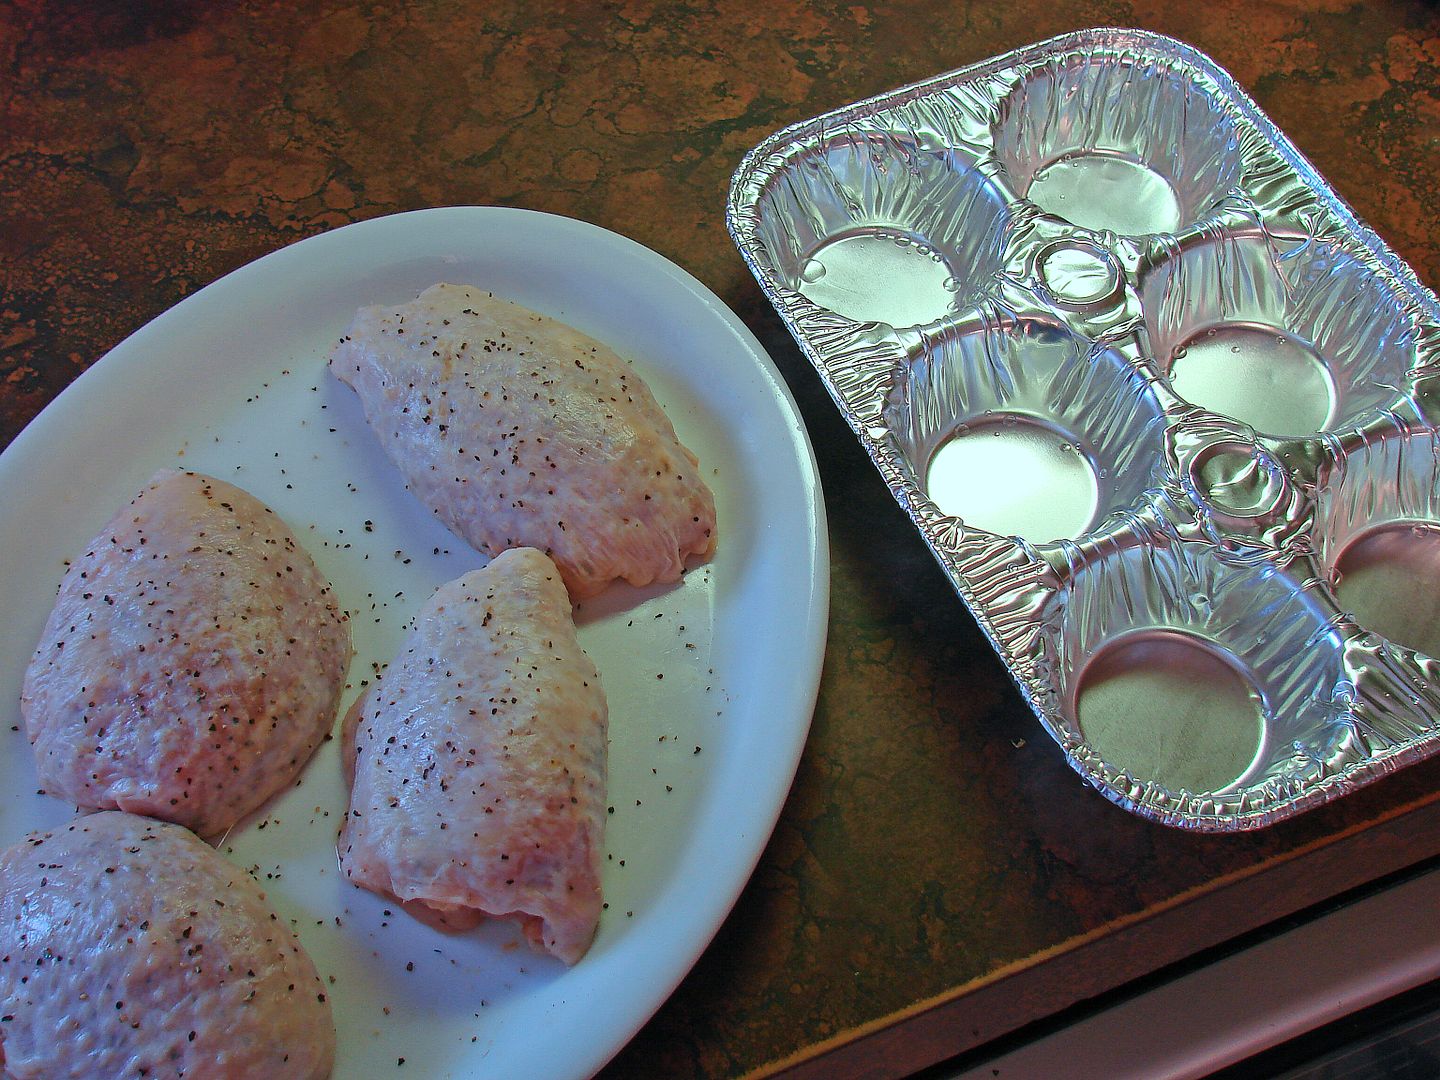
My experiment started with bone-in skin on thighs. I removed the skin and scraped the fat off (see above for details) and lightly sprinkled sea salt on the meat side. The skins were stacked on a saucer and placed in the refrigerator. Next, I removed the thigh bone, and trimmed most of the obvious fat, including the quarter sized kernel that hides in the flesh. The thighs were flavor brined for 2-1/2 hours, rinsed and patted dry. I seasoned them lightly with a dry rub. The skin was replaced, slightly stretched and tucked under each thigh. A light sprinkle of black pepper was added to the outside of the skin. These were returned to the refrigerator for 3 hours.
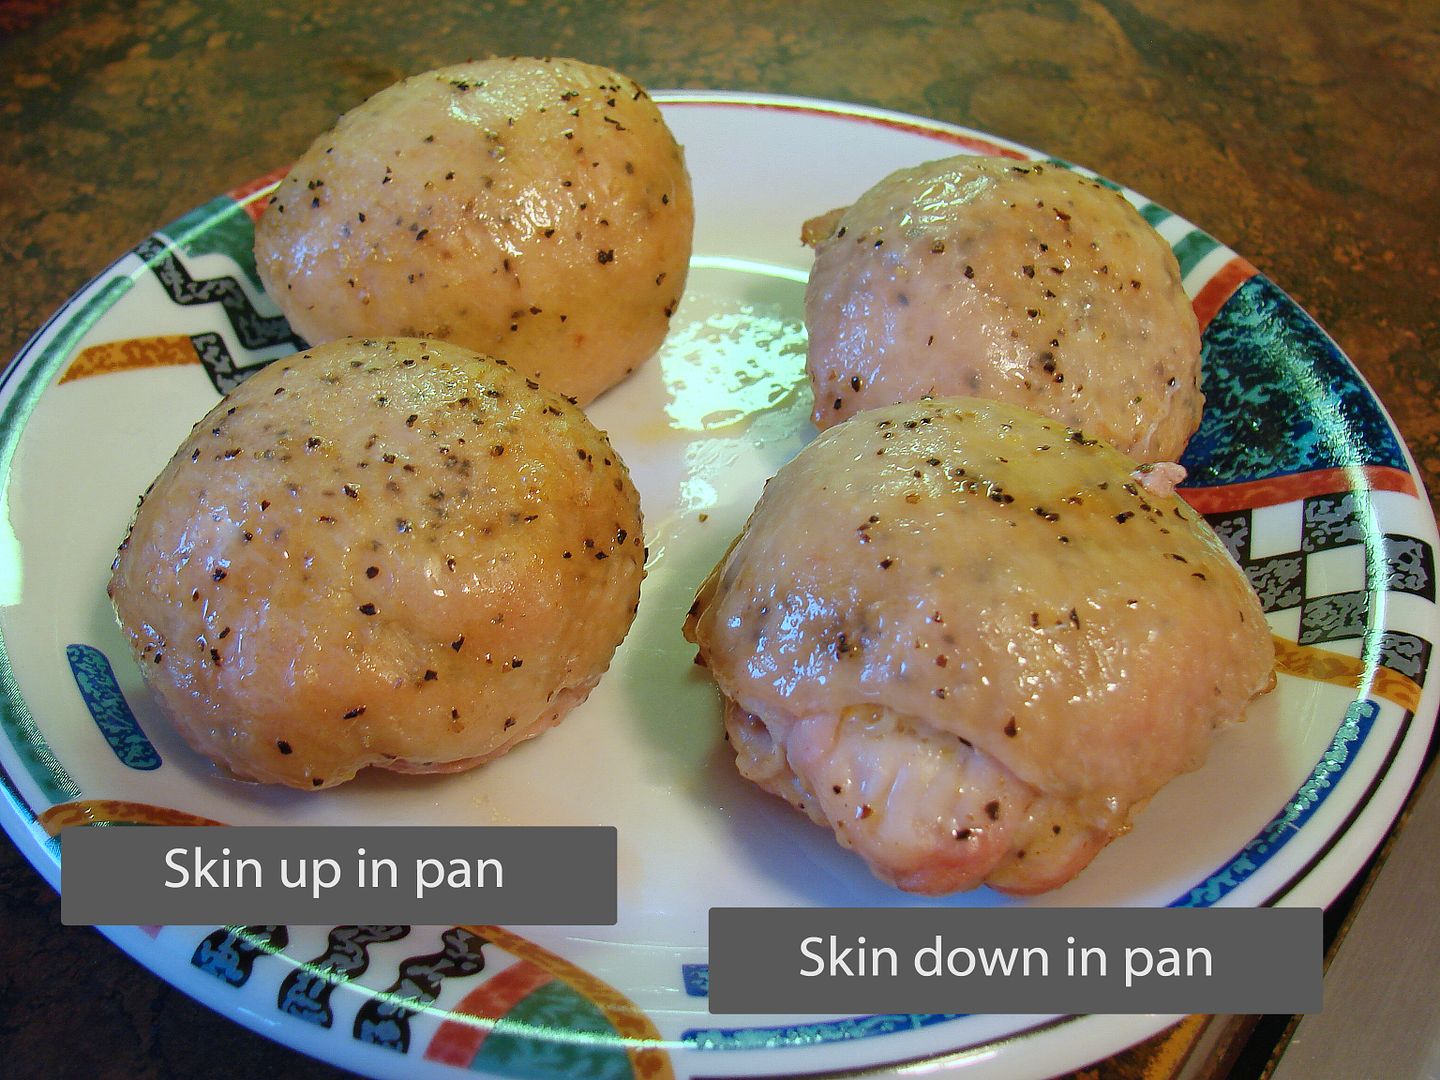
Because I had been in conversation with cooks that have already tried this method, I had made note of the fact that some went skin up in the cupcake pan, and some went skin down. I did two each way to see what worked best for me.
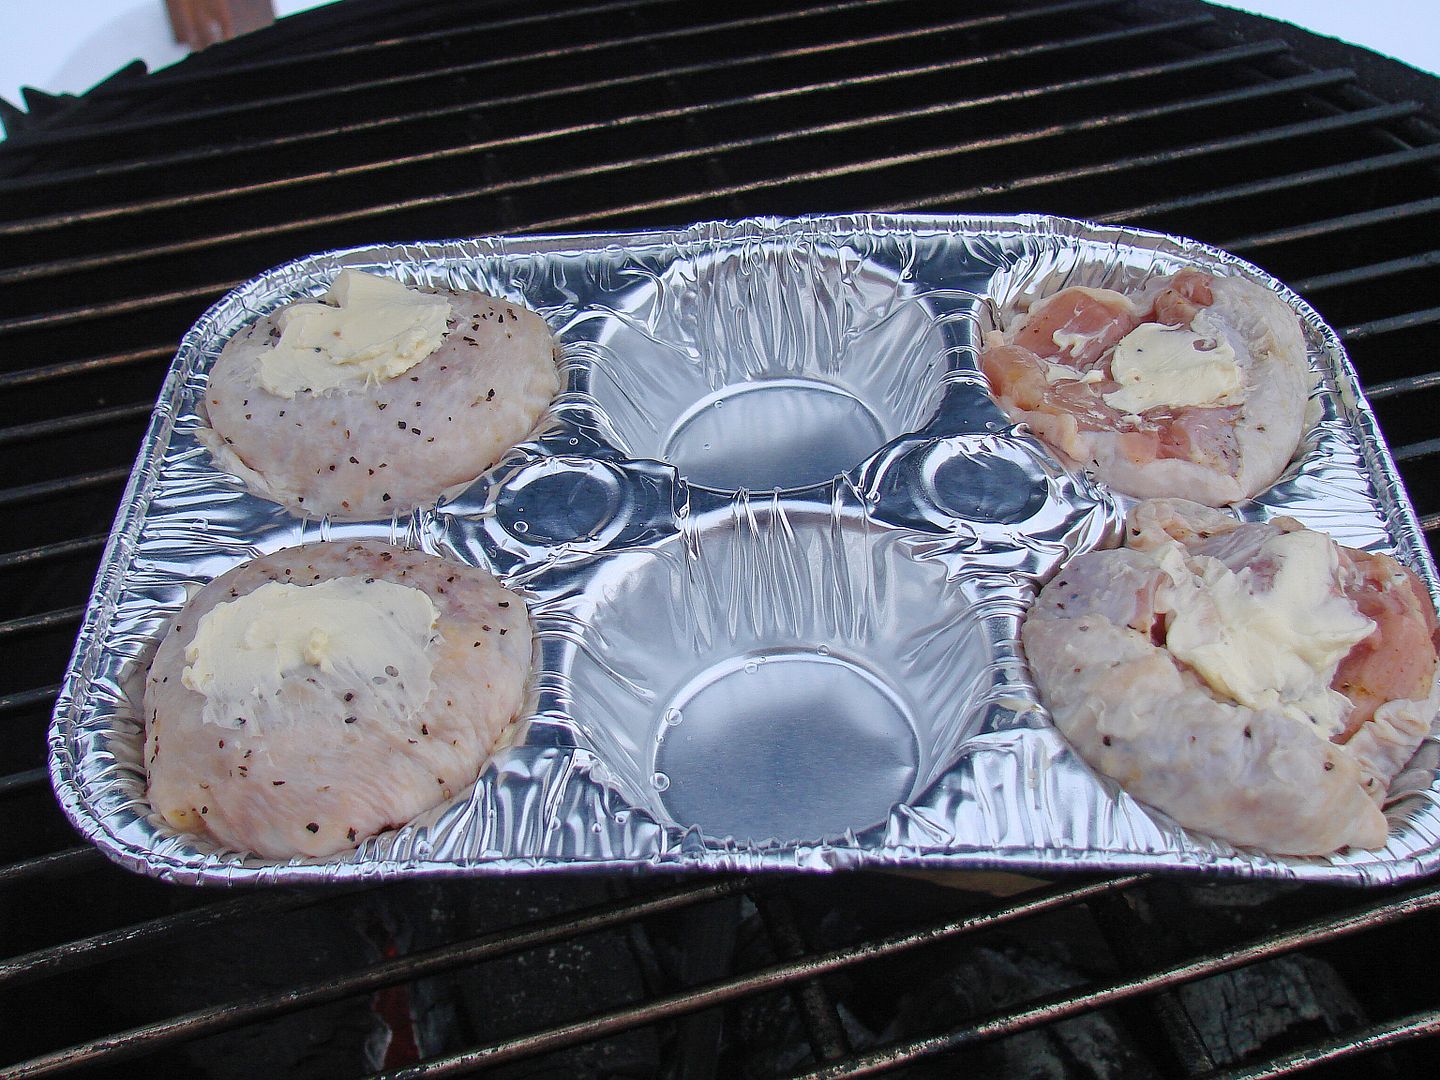
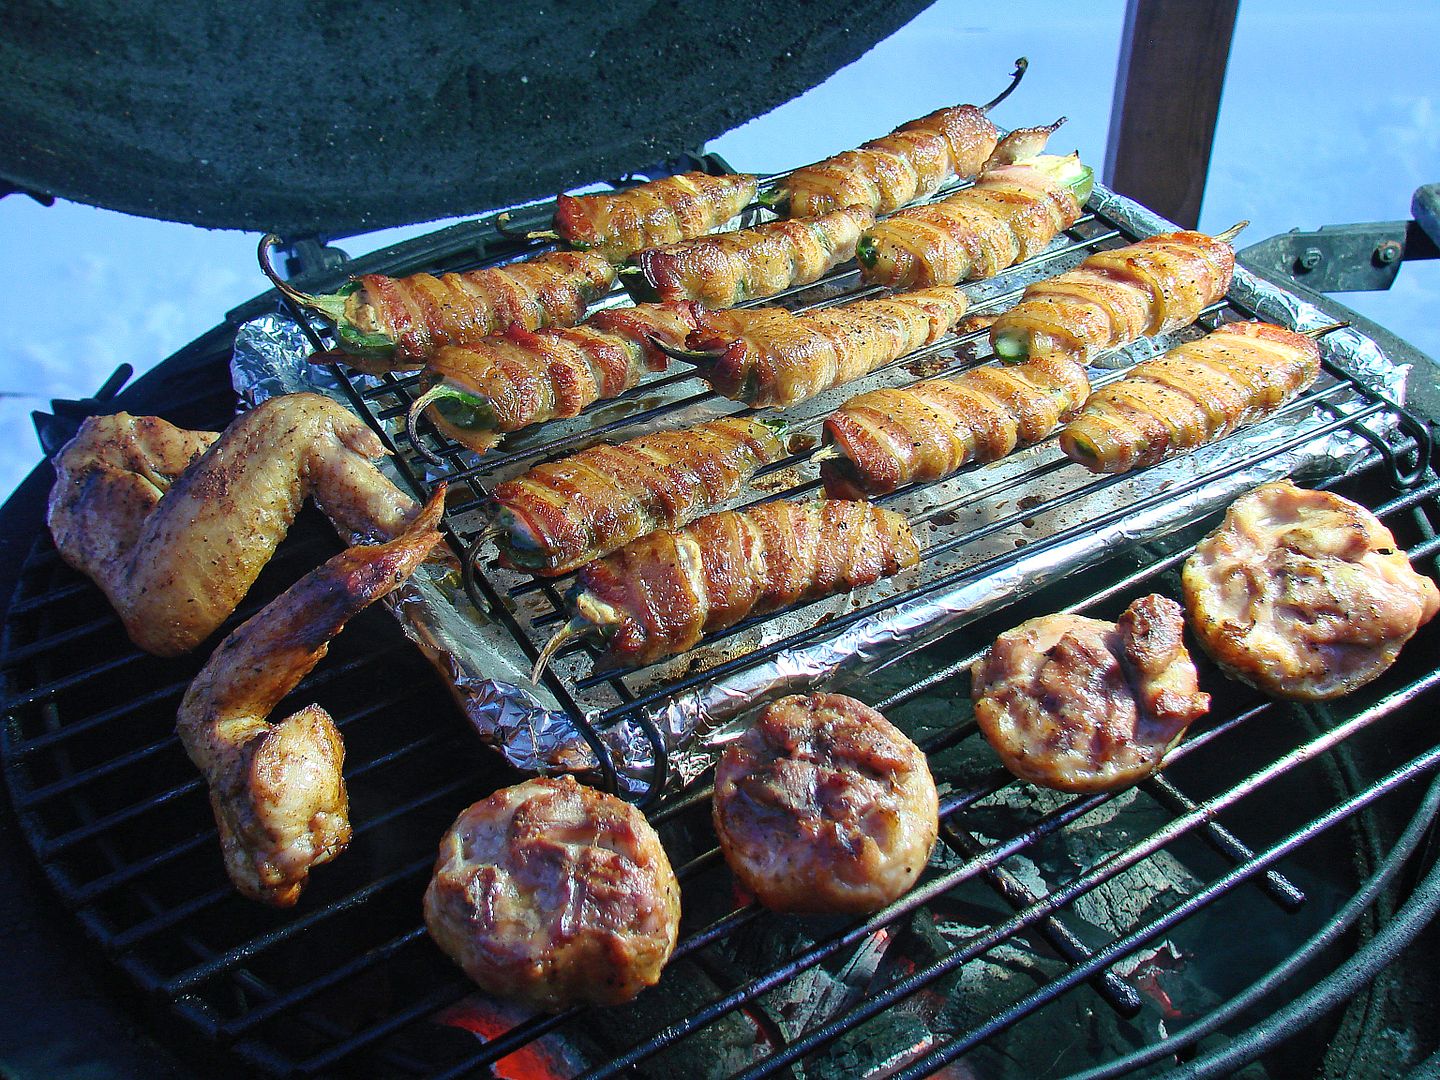
Some kind of liquid is needed as the thighs are poached (or braised) a few minutes to set their shape. I used a dab of Parkay in the pan and atop the thighs. (Another choice may be some flavored oils, broth or even some wine). The pan went on the cooker (mine was about 375°) on a raised grate. You could use an indirect set-up too (like a heat shield, or coals on one side of a kettle - pan on the other, or only one burner on your gas grill, and the pan on the unlit side). After about 15 or 20 minutes the chicken began to firm and was browning slightly, and the pan was removed.
Now is when it got real easy, I had an established fire, my set-up was still raised direct and my chicken was partially cooked. I started off with the thighs skin up on the grate. I turned it skin down to put some color on the skin and balance out the doneness, then finished it off skin up. My target internal temperature was the low to mid 180°'s. It took another 20 or 30 minutes to finish cooking.
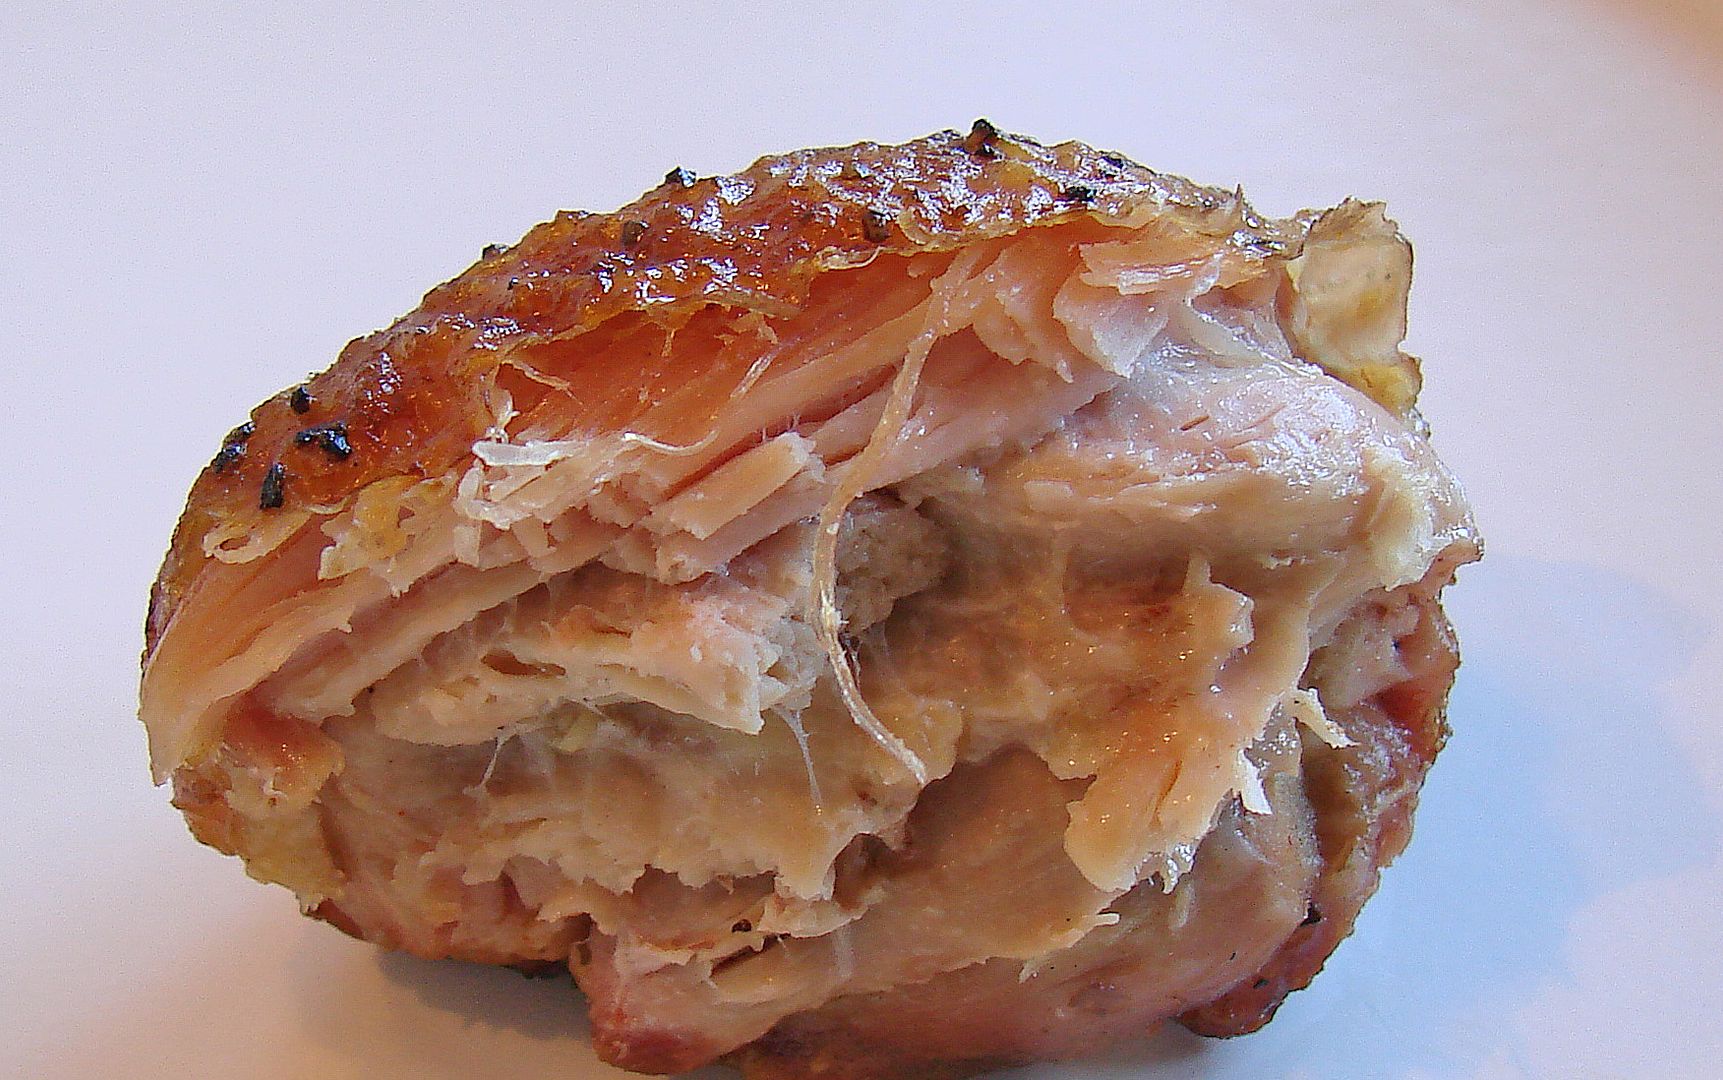
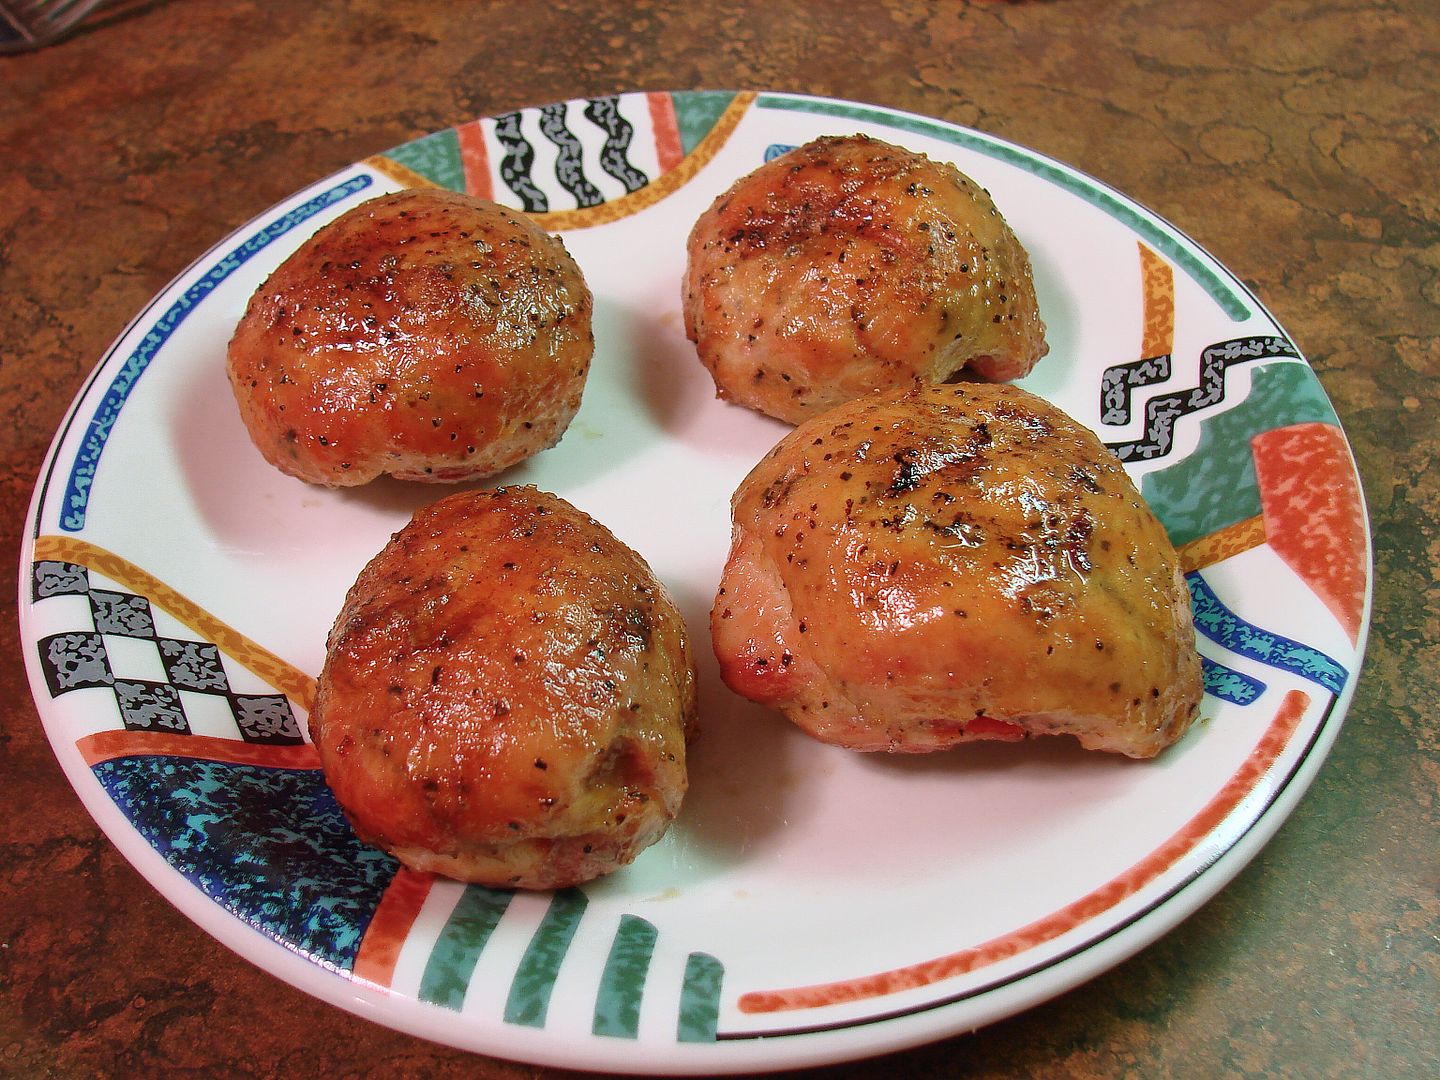
Observations: The shape was very consistent, and I could not tell a big difference between the ones I started skin-up or skin-down in the pan. The skin had a great texture, was tender and slightly crispy. The meat was moist, and the doneness was very even across the cross section. They really looked nice when sliced into medallions, and even though I'm not a sauce guy, I could see a drizzle of sauce across some medallions as being very attractive to guests.
I liked the fact that these can be prepped way ahead of cooking time, and could even be placed in pans ready to go on the cooker. I also liked the fact that there was essentially no tending during the first part of the cook, and the fact that a lot of moisture was locked in. The second part of the cook was also very easy and I believe I could have dialed in any amount of crispness, or put a very nice glaze on them. Because I scraped the skin and removed most of the fat I really reduced the number of calories in these thighs.
The biggest downside is the prep time. Scraping the skin and de-boning is time consuming until you get the hang of it. It's best to work on one task at a time, but in small batches keeping the rest of the thighs refrigerated. Another downside is that these things are too easy to eat....
![]()