
PORK - Spare Ribs - Preparing
Spare ribs are the classic barbecued ribs. They are the bones left over (spare) when a pork belly is trimmed for making bacon. They consist of the lower portion of the rib bone along with the cartilage that joins the ribs to the breastbone. I think the taste and texture of these "belly ribs" is much better than baby back ribs. They come in slab form or a rack, trimmed down to St. Louis cut. Serious pit bosses will select spare ribs that are “three and under” meaning that the rack weighs 3 pounds or less, but don't worry if you can't find them in smaller sizes. Given time, they will cook themselves tender.
Here is how to trim the slab:
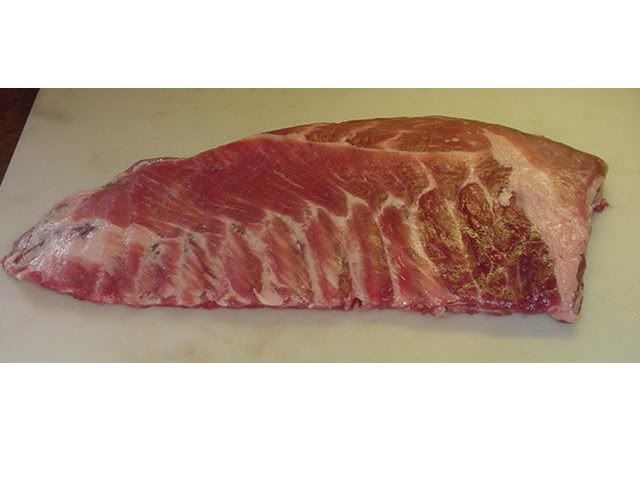
First, the ribs need to be trimmed and prepared. Turn the slab rib side up and slice off the skirt meat, flush with the bones. (the skirt is the lean muscle that covers the breastbone and cartilage)
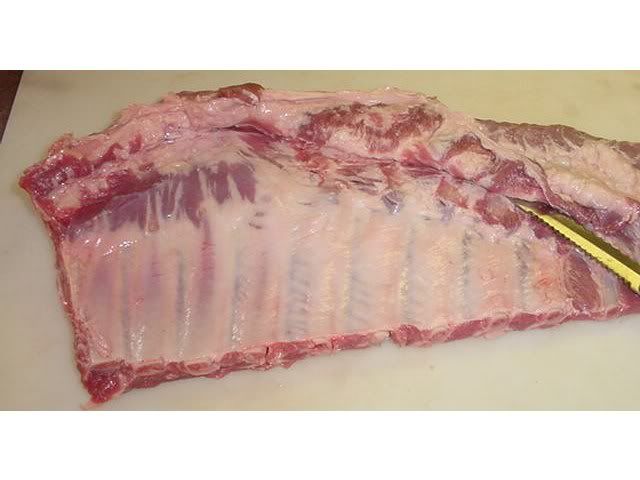
Next, remove the membrane. Start in one corner, work an edge loose then use a paper towel to grip it, and peel it off. If it is really stubborn, coil the ribs with the meat side to the inside of the coil. This will stretch the membrane and make it release easier.

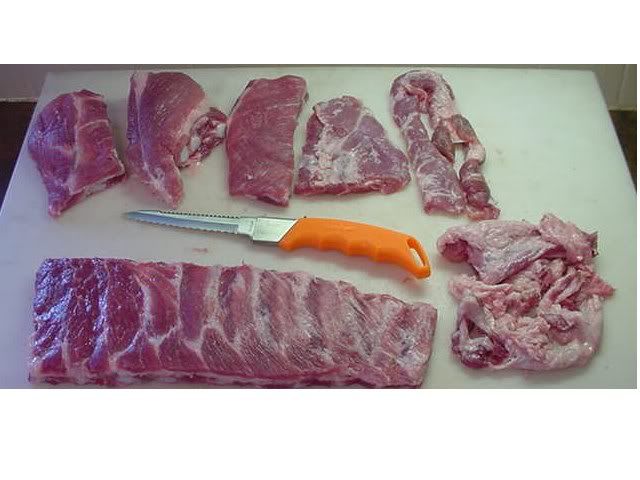
Using a sharp knife and starting at the wide end of the slab, cut just above the ends of the bones down the length of the slab, cutting through the cartilage. (You can cut off one or two of the ribs on the small end if you wish). Trim off any large areas of fat. Fat deposits, like the ones seen on the 5th & 6th ribs from the left should be scraped off with a teaspoon or the back of a knife. Many refer to this method as a KC trim. A St. Louis cut still has the skirt meat intact.
Save the strip or “rib tips” and the skirt to cook along with the ribs. They are good snacks or can be chopped later for beans etc.
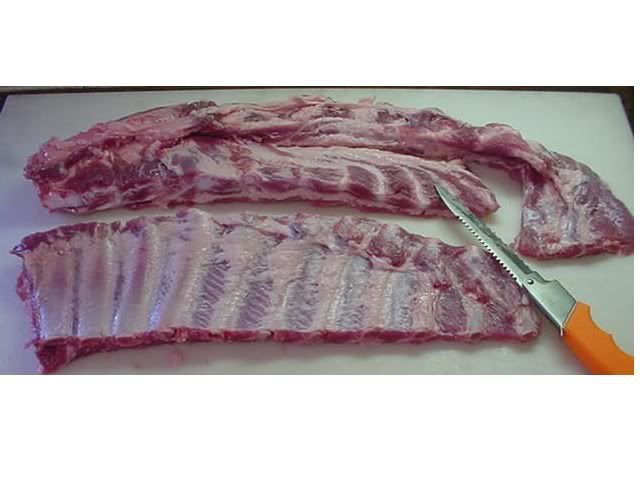
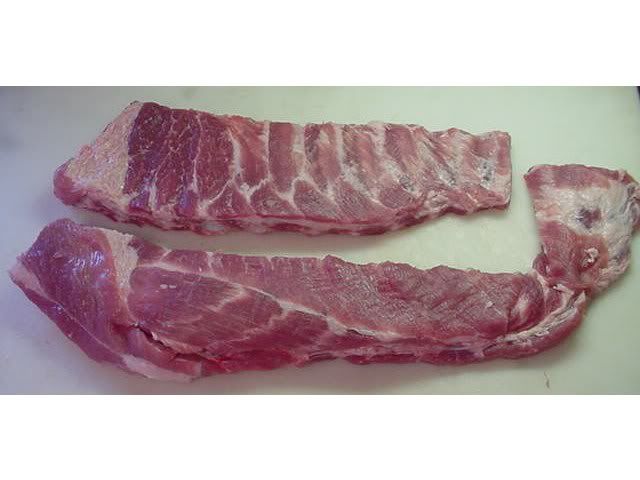
Here is a picture showing the trimmed ribs, the skirt and the strip (cut into pieces) and the amount of fat trimmed off. Note the triangle shaped area of fat that was trimmed off of the wide end of the rack.
After blotting the meat, a sprinkle of rub was added, then a thin coating of mustard, then a little more rub. The "slather" of mustard is optional. It will help anchor the rub and may improve the bark. Many folks feel it locks in some moisture and a few feel the vinegar in the mustard helps tenderize the meat. Anyway, mustard or not, the ribs are now ready to go on the cooker. If you prepare them an hour or two ahead of time, they can be wrapped in plastic wrap and kept refrigerated. TIP: If you prepare the ribs the night before, go light on the rub especially if your rub has a high amount of salt. This will prevent any "curing" or a "hammy" texture of the meat by the salts. Just add a little more rub before going on to the cooker.
Here is how to trim the slab:
First, the ribs need to be trimmed and prepared. Turn the slab rib side up and slice off the skirt meat, flush with the bones. (the skirt is the lean muscle that covers the breastbone and cartilage)
Next, remove the membrane. Start in one corner, work an edge loose then use a paper towel to grip it, and peel it off. If it is really stubborn, coil the ribs with the meat side to the inside of the coil. This will stretch the membrane and make it release easier.
Using a sharp knife and starting at the wide end of the slab, cut just above the ends of the bones down the length of the slab, cutting through the cartilage. (You can cut off one or two of the ribs on the small end if you wish). Trim off any large areas of fat. Fat deposits, like the ones seen on the 5th & 6th ribs from the left should be scraped off with a teaspoon or the back of a knife. Many refer to this method as a KC trim. A St. Louis cut still has the skirt meat intact.
Save the strip or “rib tips” and the skirt to cook along with the ribs. They are good snacks or can be chopped later for beans etc.
Here is a picture showing the trimmed ribs, the skirt and the strip (cut into pieces) and the amount of fat trimmed off. Note the triangle shaped area of fat that was trimmed off of the wide end of the rack.
After blotting the meat, a sprinkle of rub was added, then a thin coating of mustard, then a little more rub. The "slather" of mustard is optional. It will help anchor the rub and may improve the bark. Many folks feel it locks in some moisture and a few feel the vinegar in the mustard helps tenderize the meat. Anyway, mustard or not, the ribs are now ready to go on the cooker. If you prepare them an hour or two ahead of time, they can be wrapped in plastic wrap and kept refrigerated. TIP: If you prepare the ribs the night before, go light on the rub especially if your rub has a high amount of salt. This will prevent any "curing" or a "hammy" texture of the meat by the salts. Just add a little more rub before going on to the cooker.

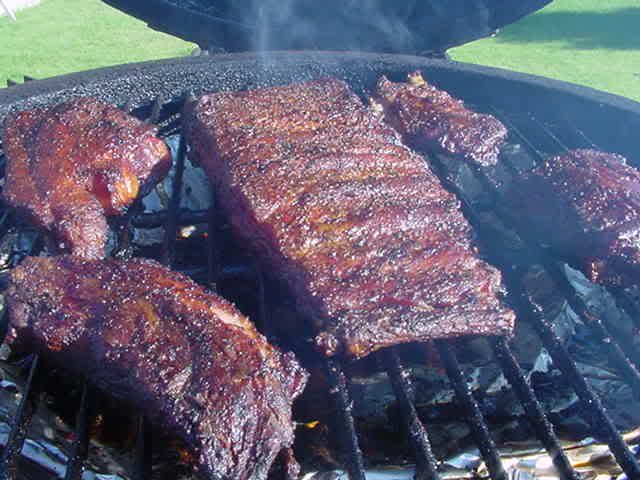
Here we are after 5 hours at 225 degrees (grate temp), indirect setup. Cherry wood was used for more flavor. The skirt only made it 3 hours.
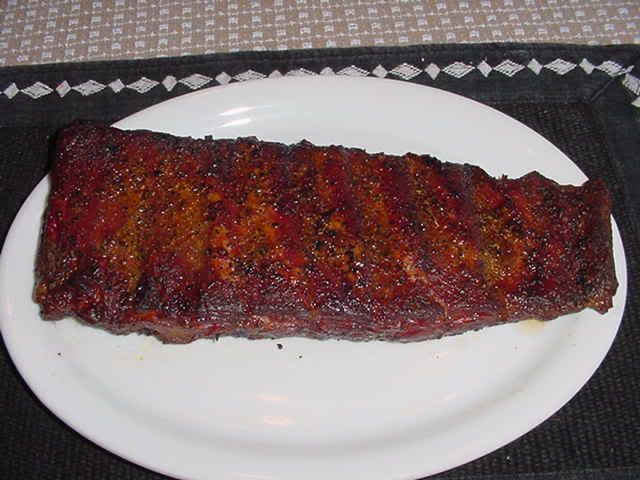
Here is the rack at serving time. These are served "dry" or "Memphis Style".
Here are three options to the cooking method above using aluminum foil:
1. Ribs can be "tented" with foil early in the cook. Just place a piece of foil over the ribs for the first 1 to 3 hours of the cook. The tent will keep the ribs a little moister, slightly decrease the cook time and still allow them to receive some smoke. Remove the tent for the last couple hours of barbecuing to allow the bark to mature.
2. A foil "boat" can be used under the ribs. About 2 or 3 hours into the cook described above, lay a piece of heavy duty foil on the grate and carefully set your ribs on top of the foil with the meat side up. The foil needs to be long and wide enough to allow you to to fold the sides and ends up making a shallow tray. Brush or spray the ribs with your favorite basting liquid every 30 minutes until the ribs are done. I like to use an Eastern North Carolina style mop, but something as simple as apple juice will work. The basting liquid and drippings trapped in the "boat" will produce a lighter steaming effect than using a foil pouch.
3. Foil can also be used to braise the rack and make for a more tender finished product. The ribs are cooked as usual for the first 3 hours. Then they are removed from the cooker and wrapped in a foil pouch with the meat side down. Before makng the final seal on the pouch, 1 to 3 ounces of some liquid is added. Liquids like beer, wine, apple cider, apple juice or broth all work well. TIP: Warm your liquid before adding to the pouch. In addition to adding a cooking liquid, the rack can sprinkled with brown sugar and more rub. It can also be brushed down with thinned barbecue sauce, honey, apple jelly, jalapeno jelly, hoisin sauce etc. These extra steps will add flavor to the juices that will accumulate in the foil pouch. Once sealed, the pouch is returned to the cooker (or to a preheated oven) for about an hour. Foil time can be adjusted to obtain the desired level of tenderness. (Much longer than an hour will result in the meat falling off of the bones). The pouch is removed, the ribs are unwrapped and returned to the cooker and finished to your liking using either an indirect or direct set up. This method is referred to as 3-1-1, 3-2-1, etc., which identifies the time in hours of each step. My personal preference is more like 3-1, as I very seldom return the ribs to the cooker after the time in the foil. TIP: Catch the juices from the pouch and reduce it by half to use as a finishing sauce for the ribs.
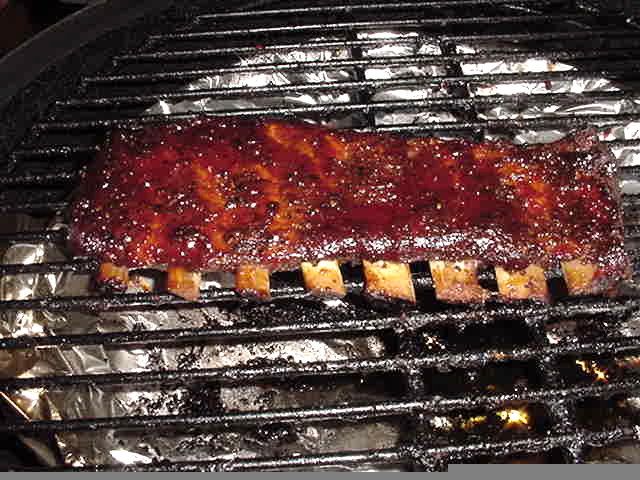
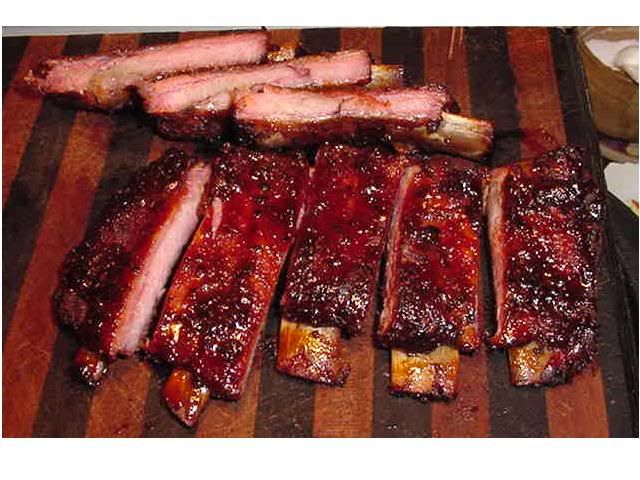
Here are some 3-1-1 ribs finished in the foil pouch and finished indirect. Finishing sauce has been added and they are ready to remove from the cooker. These are "wet" or "Kansas City Style" ribs. You will notice there is more pull-back on the bones than on the ribs above. The wrapped time did contribute to this, but I also "chase the bones", which means taking a paring or thin fillet knife and inserting it along the bone to a depth of about 1"... then using the blade to follow (or chasing) the bone all the way around. Chasing encourages pull-back.
And here is the same rack sliced.
![]()
No comments:
Post a Comment