
PORK - Pork Shoulder (butt & picnic)
Pulled pork is made using the front shoulder of a pig. The shoulder can be purchased whole or will be separated into a butt (Pork butt, Boston butt, blade end shoulder or blade end butt) and picnic (picnic ham) cuts. The butt end is upper portion of the shoulder and the picnic is the lower portion, closer to the foot. The butt can be bone-in or boneless. The picnic is most always bone in and they usually have the skin left on. TIP: Three options regarding the skin on a picnic are as follows: 1. The skin can be left on and scored. 2. The skin can be easily removed and discarded. This will allow more surface area for the bark. 3. The skin can be removed. and the picnic seasoned with rub or a slather, then the skin is replaced and held in place with toothpicks or twine.
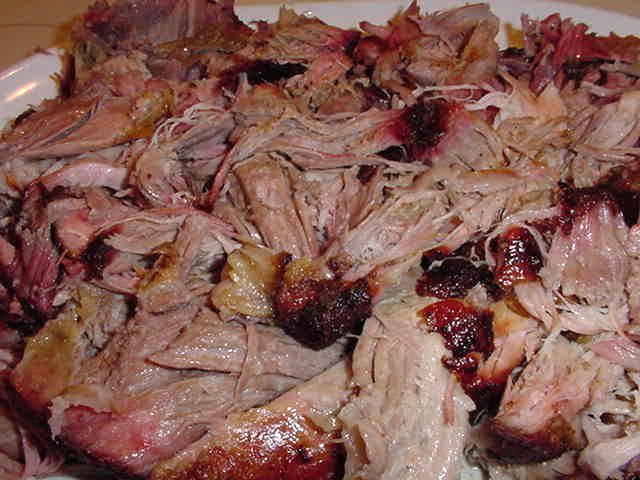
Compared to a butt, the meat on a picnic is a little darker in color, has a slightly stronger flavor and a texture more like ham. At all costs avoid buying any pork product that has been enhanced or injected with water or other liquids. Pork shoulder has the perfect amount of fat and connective tissue, which results in a very moist end product after many hours of "low and slow" cooking. The meat will nearly fall apart on its own and can easily be pulled, shredded or even chopped. It is wonderful as a main dish, for sandwiches, as filling for fresh tortillas, etc. After pulling it can be seasoned with rub, sauced or served with condiments on the side. Include some of the bark with the pulled or chopped meat for extra flavor. Many BBQ joints will offer "inside meat" or "outside meat" choices. The inside meat being a little moister, the outside meat will include more of the bark.
Below I explain how I normally barbecue a pork shoulder, how I change up a little if I'm cooking ahead and freezing for later, and offer several tips for reheating. I also have a separate page which deals with reheating liquids for several kinds of barbecued meats.
COOKING METHOD - PULLED PORK
Butts can be barbecued without any seasoning at all or you can use your favorite rub. The more sugar in the rub, the darker the crust or “bark” will be. Even a simple rub of salt and pepper is effective. I like to put a light spray or brushing of olive oil on the meat before applying my rub.
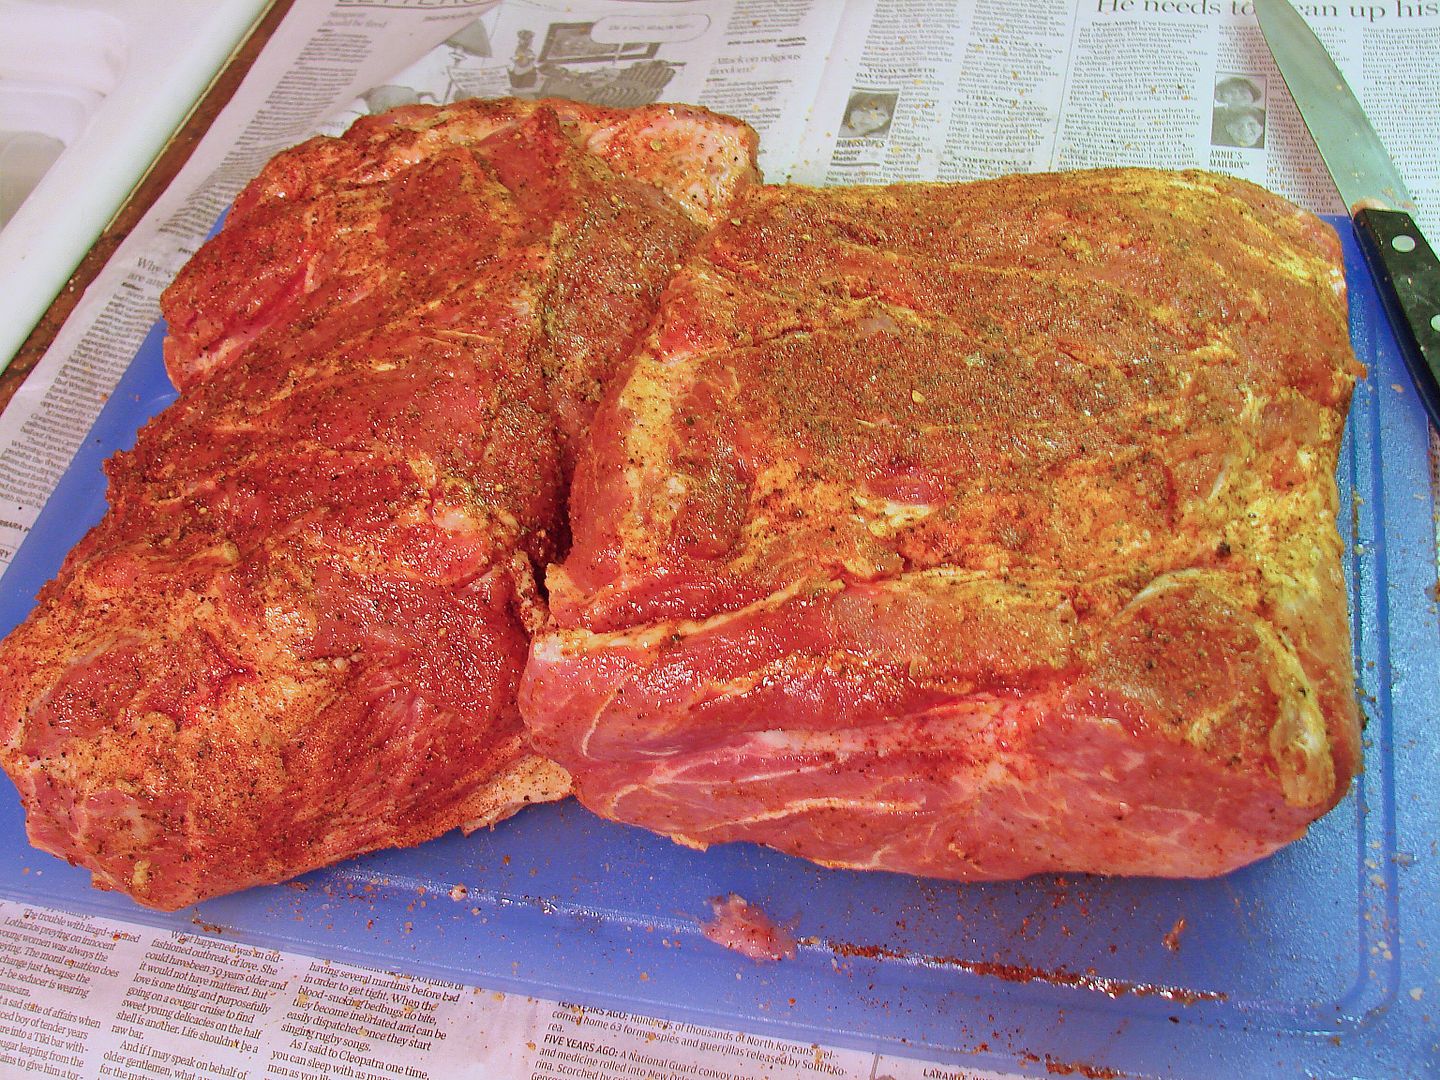
SLATHER OPTION: A wet mustard "slather" is popular on pork butts, If you want to try this technique just sprinkle on some rub followed by a thin brushing of yellow mustard (which has been thinned a little with Worcestershire), then another sprinkle of rub. The seasoned butt can be wrapped in plastic wrap and left overnight in the refrigerator if you like.
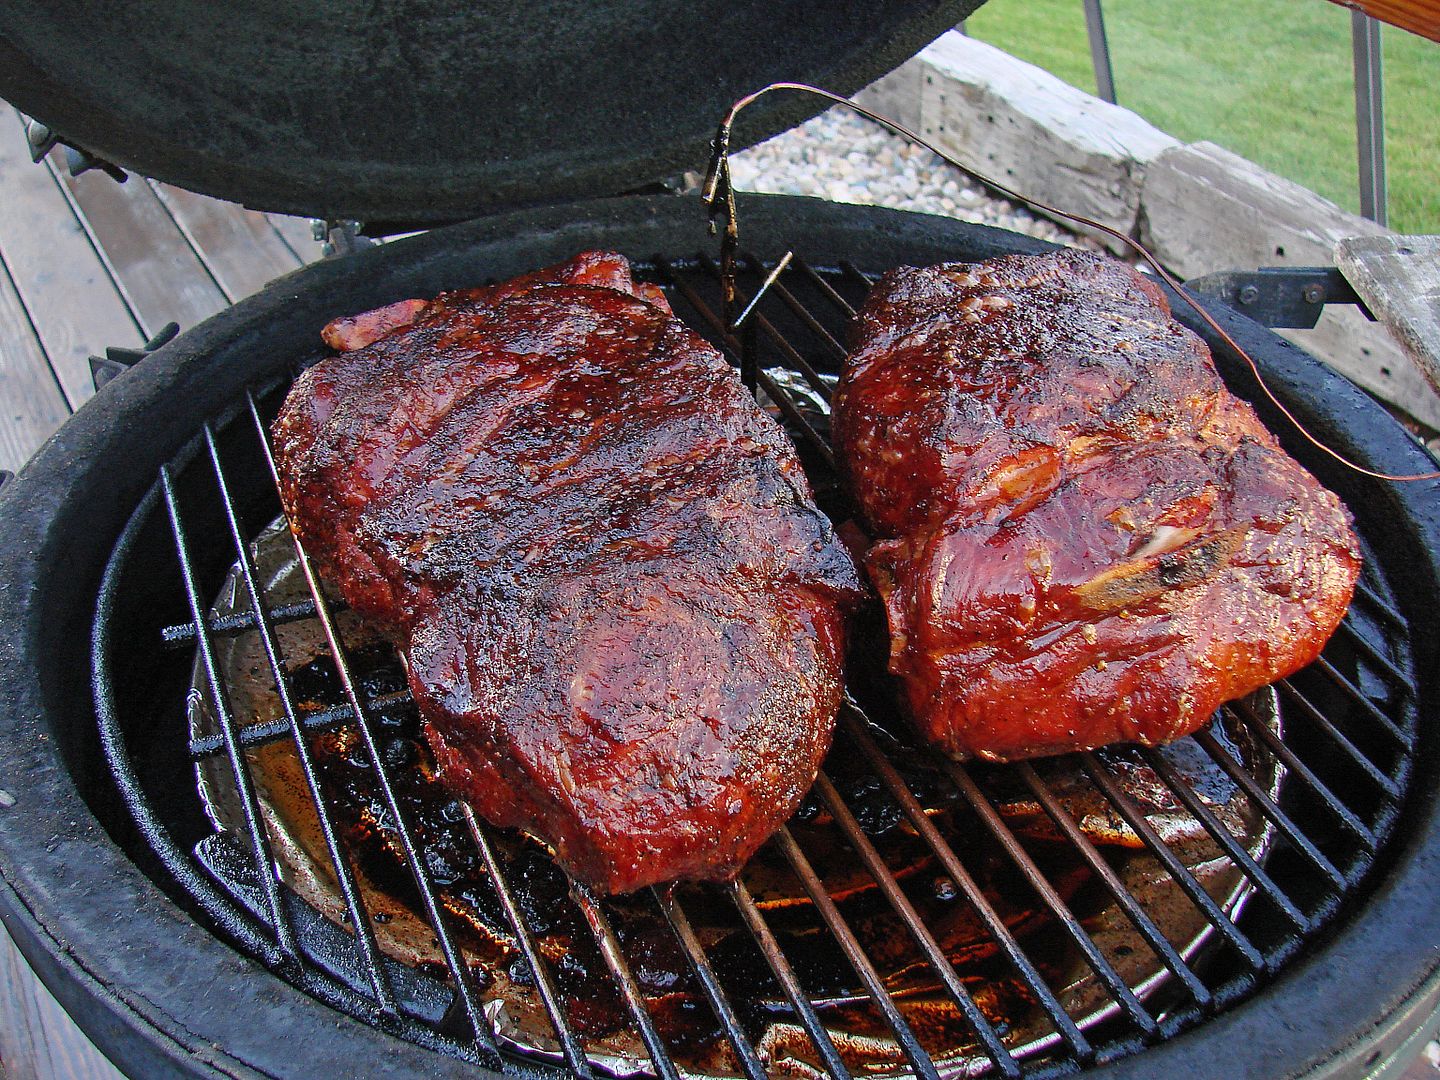
BASTING OPTION: Basting during the cook is optional, just wait several hours for the bark to set before basting. I like to start spraying my butts with apple juice about halfway through the cook. I usually spray them 3 times. These butts have been sprayed with apple juice starting at hour 8 on the cooker.
INJECTING: Injecting the butt before cooking is also an option to explore. Many different flavors of injectable marinades are sold or you can make your own. See another option regarding injecting during the plateau or toward the end of the cook.
Prepare the cooker for a long cook. Use barbecue temperatures between 225° and 275° (at the grate) with an indirect set up and the wood of your choice. A drip pan is necessary to catch the fat. Start your butt with the fat side down. After a few hours you may elect to turn it to balance the color. In a few more hours, turn it fat side down again. Depending on your cooker you may be able to finish the cook without turning again. Plan on 1.5 to 2 hours per pound of cooking time, so a 7 pound butt may take 14 or more hours. Your internal target temperature is around 200°, but some may be done earlier or later. The butt will hit a temperature plateau or stall at 160° to 170° as moisture in the meat finds it's way to the surface and begins to evaporate, don't worry about this, it will pass. Above 170° the collagen begins to melt and convert to gelatin, which is a good thing. Each butt cooks differently. Do not raise the temperature of the cooker to hurry through the plateau. The internal temperature will begin to rise on its own and the butt will be done in 2 to 4 more hours. You can opt to wrap the butt in foil (adding some liquid, maybe brown sugar, or spray butter, or Parkay. Meat in foil will not go through the sweating and evaporation process so this can help the butt or picnic get through the stall.
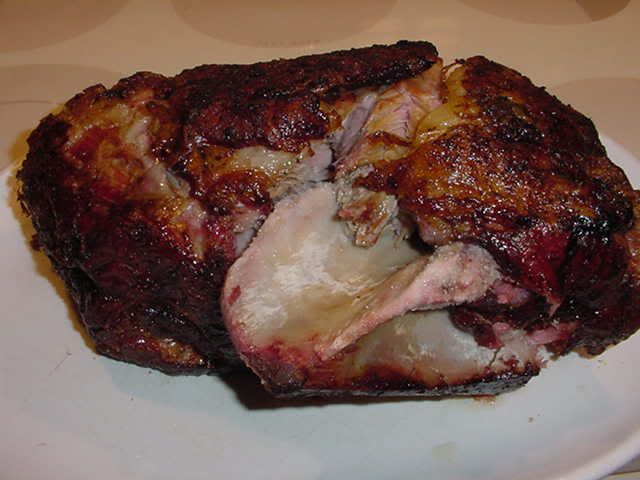
When it is done, remove and wrap in foil. Rest the butt for a couple of hours in a prewarmed ice chest wrapped in newspaper or towels for insulation before pulling.
TIP: Once the internal temp is above 180° the cooker temperature can be raised to shorten the time for the butt to finish. Another option is to wrap the butt in foil at this time and return to the cooker until the target temperature is met. The quality of the bark is not as good when using foil.
LATE INJECTION OPTION: Using an injection when the butt is in the plateau will improve moistness and flavor. Don't use a heavily seasoned injection since there will only be a few hours of actual cook time remaining.
Using an injection before wrapping in foil for a foil finish (see below) has similar results. I use mostly apple juice, a few shakes of Worchestershire and a couple sprinkles of a seasoned salt.
FOIL FINISH OPTION: A foil finish can speed up your cook if you are running behind. It can also help retain moisture. Basically it involves double wrapping the butt in foil and either returning to the cooker or to an oven until it has cooked tender. I like to use an apple juice injection (mentioned above) right before wrapping in foil. Competition cooks will often wrap their butts when the internal temp is 165°, add some liquid, then return to the pit to cook tender. This is a handy trick to have in your arsenal.
FLAVOR STEP - If you still have a low fire in the cooker when you are ready to pull the pork, add just a few wood chips. Put the pulled pork in a disposable aluminum pan and when the smoke settles down, put the pan in the cooker for a few minutes. Sample often and be careful not to dry it out. Sauce can be added for this step too.
COOKING BUTTS AHEAD - FREEZING - THEN SERVING LATER:
I slightly change up my pulled pork method specifically when I plan on freezing & reheating later..... I season it heavier as freezing/thawing/reheating does seem to dull the rub. I also do a foil finish from about 185° on with some apple juice in the foil, and a mix of apple juice and broth injected into the butts. The foil finish does soften the bark, but the freeze/thaw/reheat will anyway, so I'm going for as much "just pulled" flavor as I can get. Plus, this gives me a real moist product.
I rest it at least two hours, then reserve the foil juice (and there will be plenty) and pull it. Next I mix come Coca-Cola into the foil drippings and add to the pulled pork. Then add a little more seasoning. I like my meat to set a little before going into the foodsaver bags, if you use zipper bags you can skip this step. I layer the meat on sheet pans and move to the freezer for 20 or 30 minutes, then break apart partially frozen sections, load into bags and vacuum seal. With zipper bags, I just load the meat, and freeze.
For reheating I use 80 quart Nesco roasters as my hot water bath. An alternate heating method is using large foil pans in an oven at 250°. Coke or a really thin mixture of sauce and Coke is what I use if any additional moisture is needed. My sauce is served at the table or at the end of the serving line. ADDITIONAL REHEATING TIPS ARE BELOW.
Here are two 9 pound butts.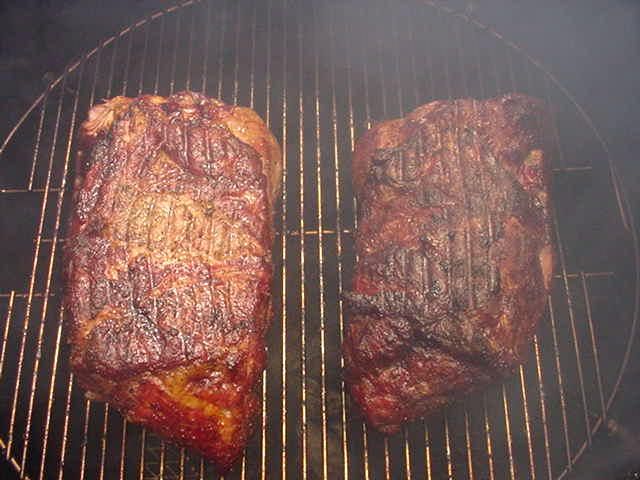
This is a picnic with the excess fat and skin trimmed off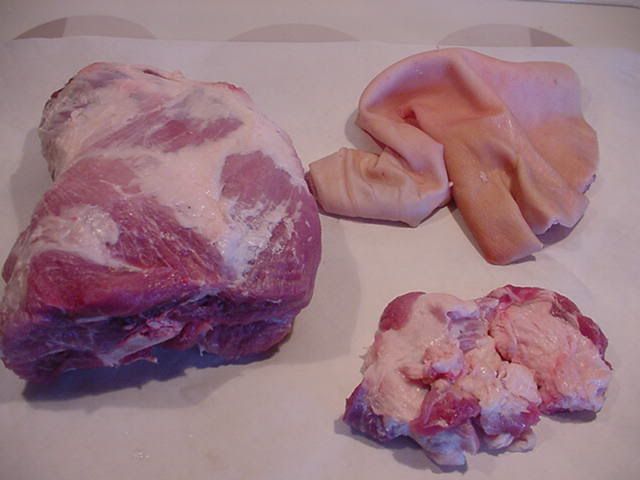
Here is a picnic with the skin on and scored.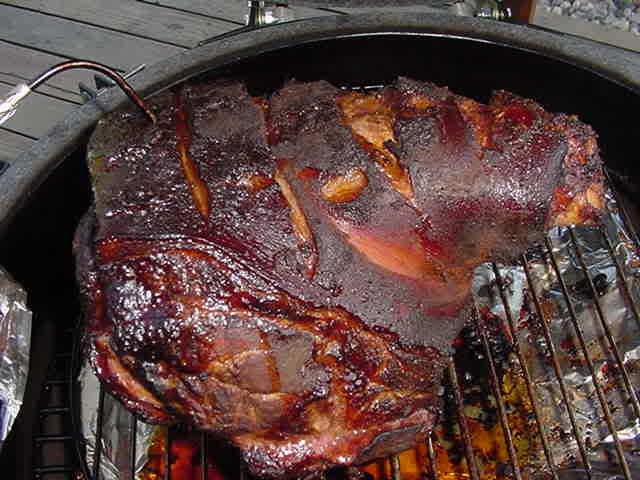
REHEATING & FREEZING LEFTOVER PULLED PORK
Pulled pork freezes well. Liquid can be added to zipper or Food Saver bags prior to freezing for moisture.
For reheating pulled pork, use covered aluminum pans in a 250° oven for about an hour or try Food Saver bags in a hot water bath. Some liquid for moisture should be added to the pork. A diluted sauce, CocaCola, apple juice, broth or a mixture of any of these works well.
![]()
No comments:
Post a Comment