
EZBB Ribs
Baby Back ribs are pretty easy to cook, but what's the easiest way to cook them? Well, after getting a lot of e-mails about ribs it seems there are a lot of folks that want good results the first time out, don't want to spend a lot of time cooking them, and also want a very tender almost fall-off-the-bone type of rib. Now, it's only fair to point out that in barbecue circles, the general opinion is that finished ribs should have a slight "tug" to the meat, while at the same time, leave the bone clean after each bite. But hey....you can figure out how you like them because you're the one eating them right? With this in mind, here is a good method to try. You will get consistently good ribs and there is room for some personal changes so you can dial them in to your tastes. I may bend a few of the rules, but that's okay.....Anyway, I call these EZBB Ribs.
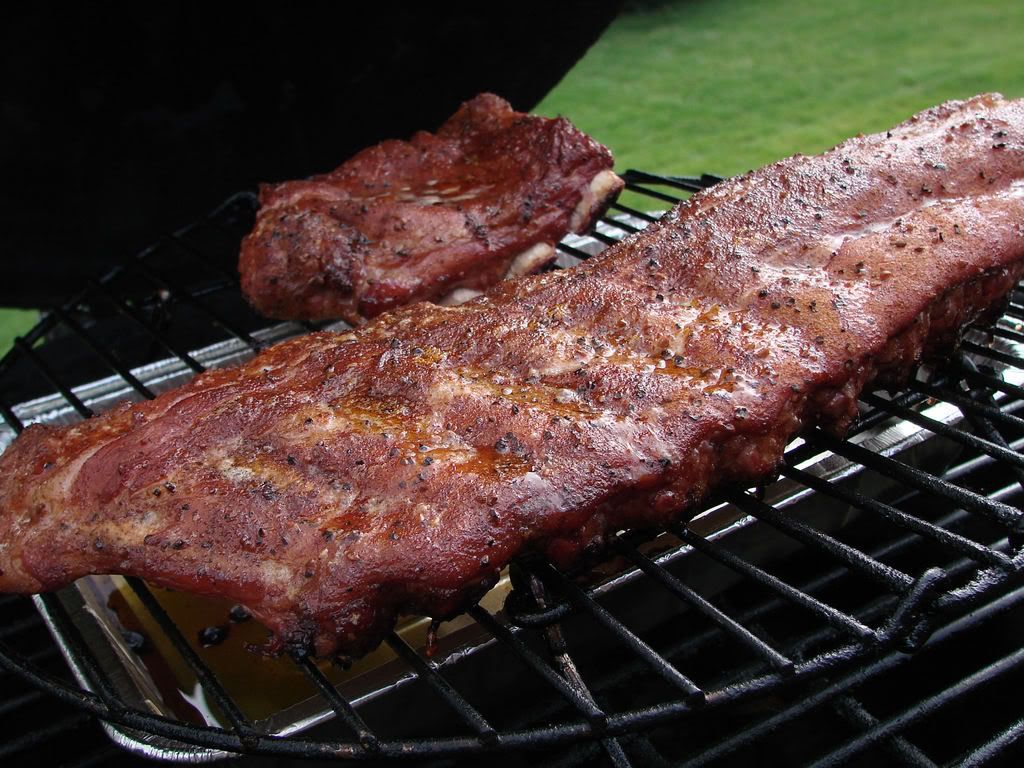
Remove the membrane from the bone side of the ribs. Rub or spray on a light coating of olive or peanut oil. Season your ribs with your favorite rub, as a minimum use salt and pepper. Keep the ribs in the refrigerator, they should be cold when they go on the pit. I like cherry wood for flavor. Set up your cooker for an indirect cook, I like to use a raised grate, drip pan and a second grate to hold the ribs. You can also use a pizza stone or a plate setter to baffle the heat with a drip pan on it. Use a 275° to 285° pit temp. Make sure that your rack will not overhanging the heat shield (you can see that I cut the small end off the rack above because they were so long) Let your fire stabilize for about 45 minutes, this also will let the smoke settle down a bit. Don't worry about that higher pit temp, the "high on the hog" cuts like loin, tenderloin and BB ribs can take higher heat. They are naturally more tender to start with and are leaner than say belly ribs or a butt.
Place the ribs on the grate above the drip pan, bone side down. This part of the cook will require about 2 or 2-1/2 hours. If you want to baste or spray the ribs, do this at the one hour mark, then again twenty minutes later. If you want to turn the ribs do this at the one hour and twenty minute mark. At two hours of cook time, check them for color and check the tenderness with a toothpick poked between the ribs. You should feel some resistance and you should notice the meat starting to pull back on the bones. You can leave them on another half hour if you have some really meaty ribs.
For the second step of this cook, (the tenderizing step) make a double layer of heavy duty foil or large enough to make a pouch for the ribs. Warm up some thinned (with water or broth) BBQ sauce and some apple juice. I like to either use some some honey or agave nectar for sweetness, or some squeeeze Parkay. I guess you could use both honey (or the agave) and Parkay if you want... Anyway, make a figure 8 pattern on the foil with either the Parkay or the honey. Add a couple tablespoons of the apple juice inside the figure 8, it works like a dam to hold the liquid. Then paint the meat side of your rack with the warm sauce and put the meat side down on the foil. Do the same thing on the up side of the ribs (paint that side with sauce, add Parkay, agave nectar, honey, apple jelly, jalapeno jelly.... then add some apple juice. (You can substitute other liquids for the apple juice. Pork or ham broth, wine, beer, etc., will work too).
When your ribs are prepped, seal the foil. Put the pouch into a 260° oven. If you are doing more than one rack, put each rack in a separate foil pouch. Put the pouches on a baking pan just in case you have a leak, then into the oven with the top seam up. These will cook for about one hour. Carefully sneak the top seam of the pouch open, watch out for the steam. Lift with tongs and test for tenderness using the toothpick, be careful not to poke a hole in the foil. They should be tender. Reseal the pouch and let the ribs rest about 20 minutes. You can place them into a cooler with some newspaper for insulation if you need to hold them longer. You can go back to the oven for 20 more minutes, but that extra time may make them too tender. You will notice that they are not super saucy, just sort of sticky. So have some sauce on the table....just do me a favor and try one without any sauce first.
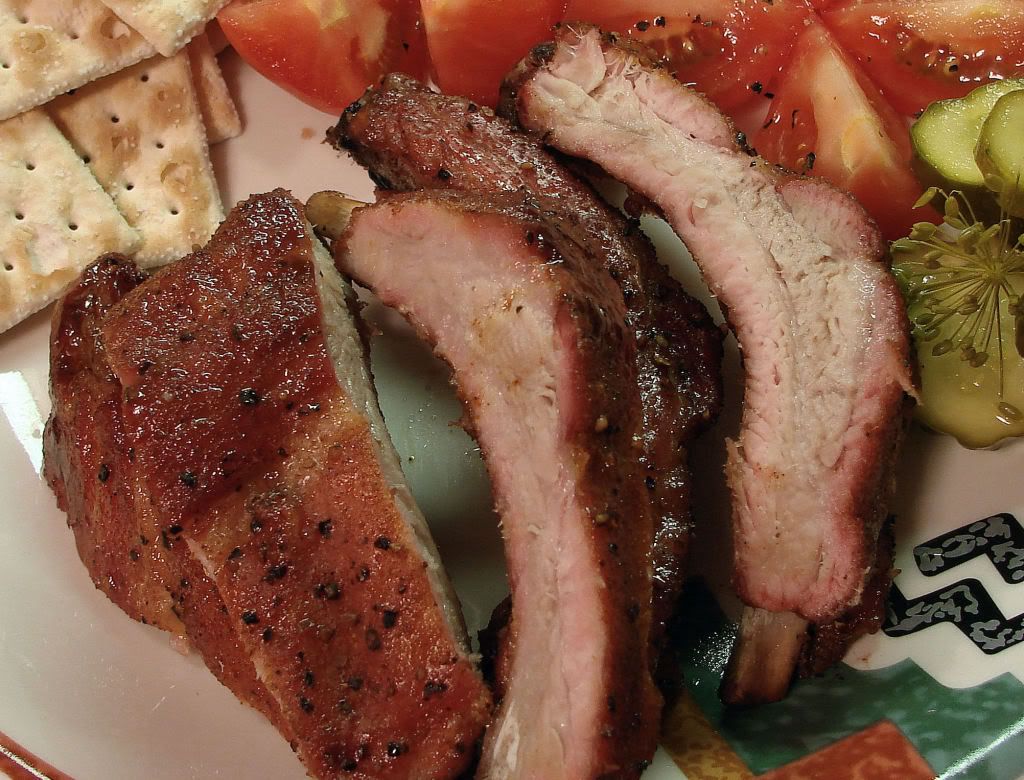
Here is what the sliced ones will look like....
~Cook Ahead EZBB Ribs ~
Right about now you might ask "What could be easier than thirdeye's EZBB Ribs?" Well, cooking them a day or so before you eat them is one way. Suppose you want to eat ribs Saturday night, but have other things to do that day. Or Maybe you want to take a couple of racks to your friends house for a Sunday lunch or football party, but don't want to get up at 6 AM to start cooking them... If you want to enjoy ribs that are almost as good as right-off-the-pit ribs, you can cook them the day before, chill them and reheat/restore them the next day. Now, I'm not talking leftovers.... I'm talking about planning your cook specifically around reheating and restoring those ribs. In fact you will be slightly under-cooking the ribs knowing that you will complete the cook the next day. Here is the process:
Cook your ribs exactly like I explained above, and when you come to that 2 to 2-1/2 hour mark, and you are testing tenderness with a toothpick.... move them to the foil with the same Parkay, honey, sugar, and liquid and so forth, mentioned above..... but only return the foiled pouch to the pit or oven for about 40 minutes (a little longer if you really want tender ribs). Remove the pouches, vent the foil and let them cool down for about an hour. Then move the foil pouches into your freezer for an hour or so to really knock the chill off. I set my foil pouches on a chilled aluminum 1/2 sheet pan in case I spill some of the juices. Do not seal the pouches at this point. You do not want any condensation to form inside the foil, and your goal is to get those ribs chilled down to 40° quickly...(USDA mentions a 4 hour window for food to be in the 140° to 40° degree range). After an hour or so, seal the pouches and transfer them into the coldest part of your refrigerator. You now have up to 24 hours to reheat and serve the ribs.
Okay, now it's the following day. You will need a 250° oven and about 1-1/2 hours. Allow the pouches to sit at room temperature for about an hour, and move them into an oven on a sheet tray. Check them after 45 minutes and judge your time accordingly. When they are heated through, remove and serve. The juices in the foil will keep the ribs moist, so moist in fact you might not even need to use sauce..... If you want a drier rib, read Option 1.
OPTION 1: You can turn the ribs meat side up when you check them at 45 minutes into the reheating/restoring. If you leave the foil open the surface will dry slightly during the rest of the time in the oven. You could also add a sprinkle of rub on them too.
OPTION 2: Old barbecuists will use butcher paper for wrapping cooked meats because the paper can breath a little and this keeps the bark from getting too soft (like it can in foil). You want regular butcher paper, not coated wrapping paper or freezer paper. Butcher paper is un-coated, and comes in white and pink/red. If you don't have (or can't find) butcher paper, it's no big deal. Folks have been cooking barbecue in foil for years, it works just fine.

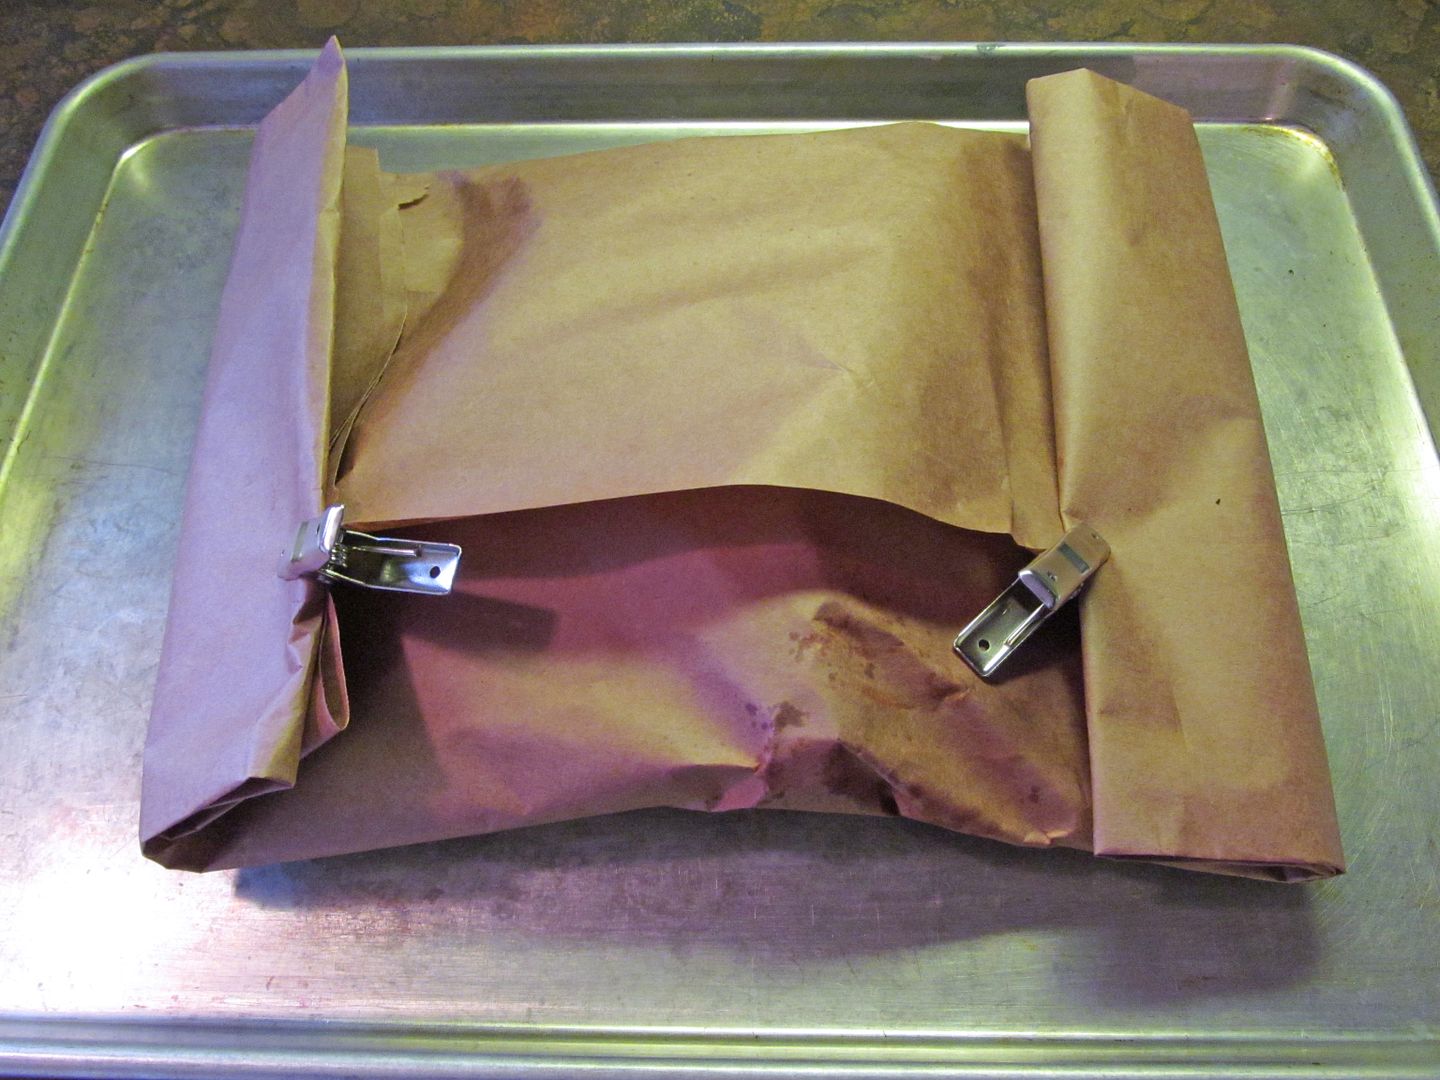
When I want to show off, I'll transfer my warming ribs from the foil pouch to paper after they have been in the oven for 20 minutes. I reserve some of the foil juices in a separate cup, (you might need them for basting, or when serving) but add some foil juices to the ribs in the paper. The ribs should be meat side up. Fold up the paper to make a pouch (seams on top) and proceed with reheating/restoring the ribs. Check them in 30 minutes, add more liquid if needed. Liquids and fats will bleed through the paper, so keep the pouches on a sheet pan. Below is the general idea... I have some fancy metal clips, but you could use a couple of wooden clothespins or paper clips.
When I want to show off, I'll transfer my warming ribs from the foil pouch to paper after they have been in the oven for 20 minutes. I reserve some of the foil juices in a separate cup, (you might need them for basting, or when serving) but add some foil juices to the ribs in the paper. The ribs should be meat side up. Fold up the paper to make a pouch (seams on top) and proceed with reheating/restoring the ribs. Check them in 30 minutes, add more liquid if needed. Liquids and fats will bleed through the paper, so keep the pouches on a sheet pan. Below is the general idea... I have some fancy metal clips, but you could use a couple of wooden clothespins or paper clips.
![]()