This site contains a collection of techniques for barbecuing, smoking and cooking over fire. The techniques shown here are not the only way or the best way to prepare a certain item. This site is just a starting point and these techniques are a guide to creating your own recipes. Recipes included here come not only from personal experiences, but from many knowledgeable folks kind enough to share their secrets. ~thirdeye~

20060219

Welcome to the Neighborhood

My cookin' site features some recipes and other information I hope you find enjoyable. Click on any of the green underlined links to go to that page. Visit the Question & Suggestion page to read or leave a comment or ask a question. For links to other sites, check out the Web Sightings page in the TIPS section. ~thirdeye~

NEW for 2008 - Videos !!!! Cookin' Video Page
NEW in the Recipe Section:
  • Au jus recipe from RRP added to the Standing Rib Roast page
  • Austrian Potato Salad - BBQinMaineiac's favorite recipe
  • Stuffed Chicken Breasts
  • Gumbo - Traditional & EZ Gumbo
  • The Rice - Norco's Mom's recipe with a twist
  • EZBB Ribs - Easy baby back ribs
  • The Chuck Roast page is finally up
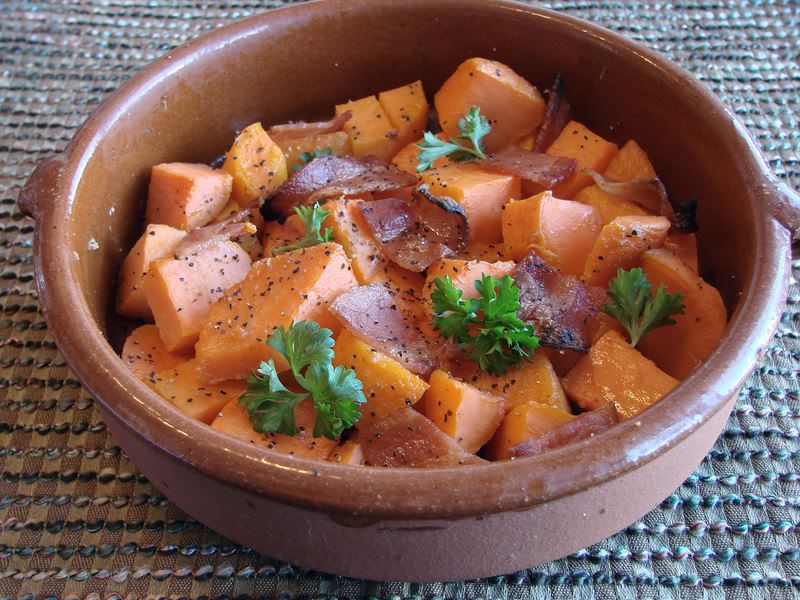
  • Pig Candied Yams - A classic, modified by thirdeye
  • thirdeye's Grilled Fish Tacos
  • Plum Pork - A Chinese Appetizer
  • thirdeye's Dry Cured Bacon
    • ~Keep your eye on your vent!! "If it's puffin' wihite, it ain't right, If it's blowin' blue it's good for Q"~

      GRATE TOOLS

      Image hosted by Photobucket.com

      If you have questions about the ThirdHand, ThreeFinger, Wiggles or Custom Tools ..... Click this link for more information. 4 NEW demonstration videos have been added. Check them out. SNAPSHOTS It's official.....I'm a MOINK Baller

      Image hosted by Photobucket.com

      Here is a nice birthday greeting I received in November of '06

      Image hosted by Photobucket.com

      Blast from the Past!
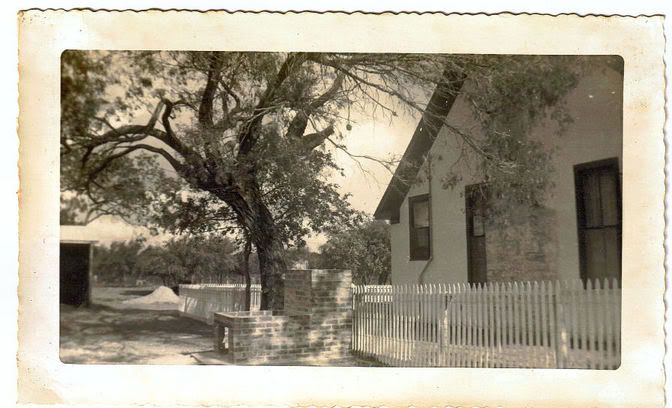
      This is a picture of one of the first pits I ever played with fire on. It is a front loading stick burner and the grate was about 20" from the coals. A wooden cover was used for slo cooks.

      Image hosted by Photobucket.com

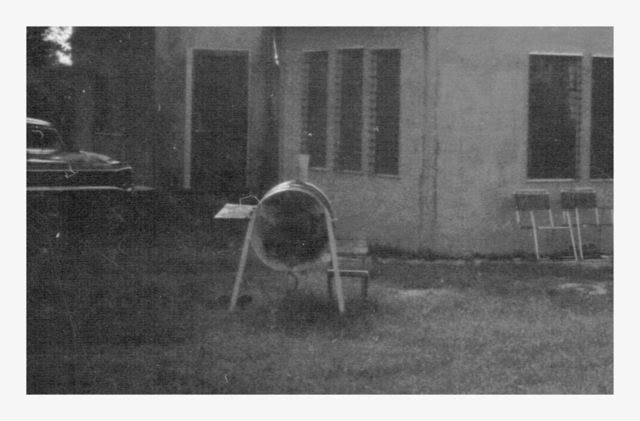
      Here is a home-made drum barbecue/smoker my grandpaw made in the late '60's. It had a layer of concrete in the bottom and two cooking grates.

      Image hosted by Photobucket.com

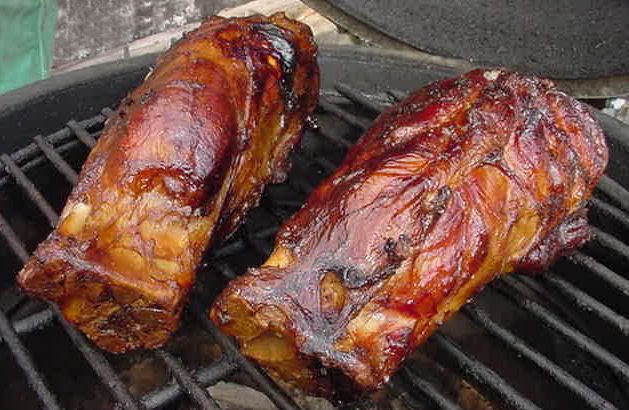
      Pork Shanks
      Pork shanks are a great way to flavor a pot of beans. These are twice smoked shanks

      Image hosted by Photobucket.com

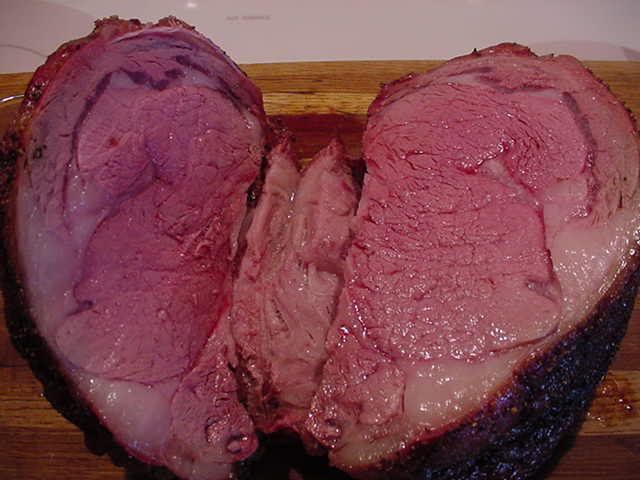
      Standing Rib Roast
      Here is a bone-in Prime Rib roast cooked in a barbecue pit at 225° with a simple rub and light smoke. this one was removed at an internal temperature of 125° and rested before carving.

      Image hosted by Photobucket.com

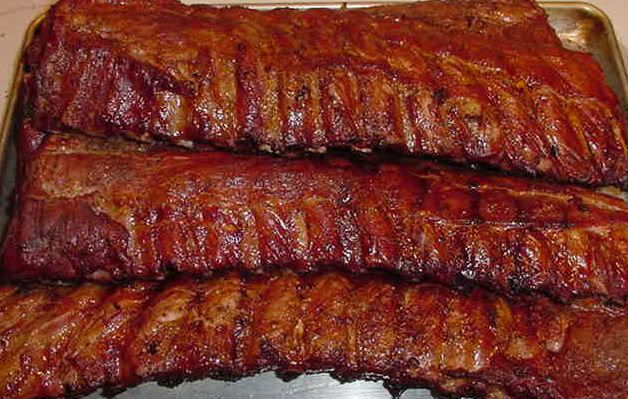
      Loin Back Ribs
      The ever growing popularity of traditional style barbecue cooked at home has grown to an almost cult-like status. "Barbecue" to most people means pork, cooked long and low. Loin Ribs also called Baby Back Ribs, are one of the quickest cooks for the backyard pit boss requiring a short prep time and 4 or 5 hours of cooking time. Here are a few racks cooked "dry" or "Memphis Style" meaning no sauce or glaze was added during cooking. All the flavor comes from a dry rub and smoke.

      Image hosted by Photobucket.com

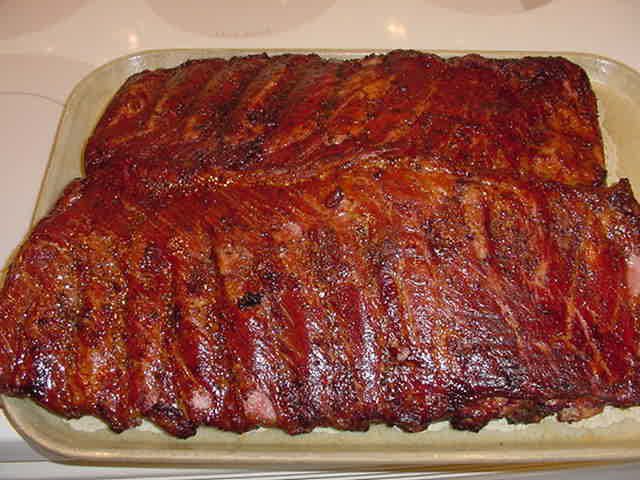
      Spare Ribs
      This is a picture of some spares I cooked on my Big Drum Smoker.

      Image hosted by Photobucket.com

      GUEST PIT BOSS Several recipes or techniques featured below have come from other folks who have
      achieved the special status of Guest Pit Boss. These recipes are published
      "by invitation only" and personally tested by yours truly. Here is the list so far:
    • Bobberqer's Pastrami
    • DobieDad's Stuffed Lamb Shoulder
    • Fishlessman's Country Ribs
    • Bobbyb's Paella
    • Richard's Key Lime Pie
    • Juggy D. Beerman's Pork Steak Marinade
    • Chubby's Planked Brie
    • SmokinCoyote's Tamales
    • Car Wash Mike's Baby Back Ribs
    • Rocky Richmond shares his Buckboard Bacon technique
    • RRP's Au jus for standing rib (prime rib) roast
    • BBQinMaineiac brings Austrian potato salad to the party
    • Norcoredneck shares his Mom's rice recipe.
    • Hey Everyone .... In addition to doing a little writing for The Cook's Kitchen, I've also been asked to contribute to Get Your Grill On. Both of these sites are part of The Well Fed Network. Feel free to drop by from time to time and check them out.
      My Cookers
      What do I cook on? I get asked that a lot. Here is the lowdown on the cookers I currently use:
      Big Green Eggs - These are ceramic cookers that can be used for barbecuing, grilling and baking. They are an upright design with a firebox in the bottom. The cooking set-up's can be direct, raised direct or indirect by using a heat barrier. Burn times on a load of lump charcoal can be 20 hours or longer. The Eggs are 4-season cookers and are unaffected by wind or cold. I have a small and a large Egg.
      Big Drum Smokers - The BDS is a vertical design drum cooker. I own two of these cookers. The models I have are 43 inches tall. A charcoal basket sits near the bottom and either one or two cooking grates can be used in the upper 1/3 of the cooker. This set up allows for direct cooking in the "sweet spot", way above the coals. The fats and juices dripping into the bed of coals during the cook produce old time smells and flavors that remind me of pit style barbecue.
      Big Chief Smoker - These are aluminum "box smokers" with an electric hotplate and chip pan in the bottom. They have a removable frame with adjustable racks. I use these for cold smoking cheese, smoke flavoring and drying jerky and for smoking fish. I have two of these also.

      Image hosted by Photobucket.com

      Start by reading this page. It will answer some general questions and will identify some terms you will hear.
      Barbecue & Smoking Tips for Newbies
      FEATURED RECIPE PAGES APPETIZERS Maple Planked Brie Pig Candy - Pig Tails Plum Pork CHICKEN Chicken Wings Skinless Breasts & Thighs Stuffed Chicken Breasts Slow Cooked Drumsticks, Thighs & Wings BEEF Brisket Burnt Ends Pastrami (smoked corned beef) Beef Chuck Roast - Pulled or Sliced Pepper Beef Steak Standing Rib Roast (Prime Rib) Rump & Round Roasts Smoked Beef Tongue Tri-Tip Beef Ribs LAMB Stuffed Shoulder Roast PORK Buckboard Bacon & Buckboard Chops Country Style Ribs Hocks, Shanks, Jowl & Trotters Pork Steaks Shoulder Roasts - Butt & Picnic Spare Ribs - Preparation Baby Back Ribs - Car Wash Mike's Rib Class Baby Back Ribs - EZBB Rib Method SAUSAGE Fatties Links and Bulk Sausage Sausage Recipes SEAFOOD Smoked Salmon - Dry Cure Method Grilled Fish Tacos TURKEY Turkey Breast - Roasting or Smoking Preparation Turkey Drumsticks ONE DISH MEALS Gumbo Paella Big Green Eggplant Parmesan Green Chili SIDE DISHES Austrian Potato Salad Pig Candied Yams Cowboy Potatoes Cream Corn

      Grate Tools for Lifting Hanging or Rotating

      April 10th, 2012 - Please go to thirdeyeQ.com for current information and pricing on my line of BBQ tools.

      ~~~~~~~~~~~~~~~~~~~~~~~~~~~~~~~~~~~~~~~~~~~~~~~~
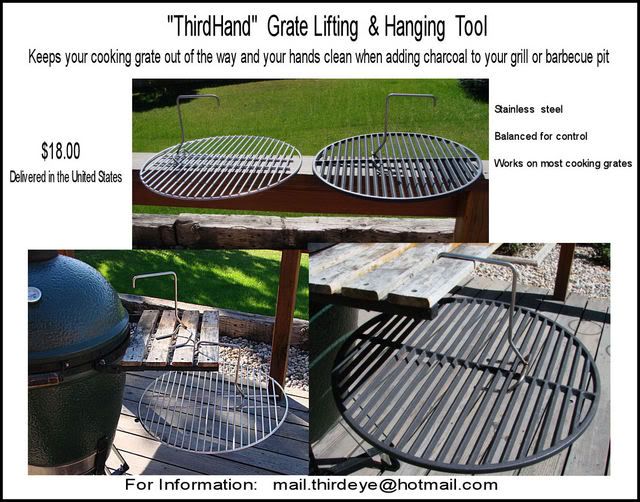
      What do you use to remove your cooking grate while cleaning out the ashes and reloading your grill or smoker with fresh charcoal? Are you tired of getting your hands dirty handling your cooking grates? An extra hand would sure make things easier, so with these questions in mind, I designed a couple of tools.

      ~~~~~~~~~~~~~~~~~~~~ ThirdHand ~~~~~~~~~~~~~~~~~~~~

      The first tool I designed and fabricated is the ThirdHand, a grate lifting tool that also works as a hanging tool if you have a table or deck railing close to your cooker. The ThirdHand works on standard cooking grates found most of the major brands of grills, barbecues or smokers. In addition, the ThirdHand works on large cast iron grates. The ThirdHand is the most popular and most universal of the two grate lifting and hanging tools. Usually, I have several on the shelf ready to go.

      ~~~~~~~~~~~~~~~~~~~~ ThreeFinger ~~~~~~~~~~~~~~~~~~~~

      A couple of years after introduction of the ThirdHand, I started getting requests for a tool specifically designed for lifting and hanging smaller cast iron grates and smaller standard grates on "tailgater" or camping size grills. The answer is a tool I call the ThreeFinger. It is a smaller design with shorter forks and a handle that is three fingers wide. The ThreeFinger is a special order and custom build, there may be a waiting list as I try to build several at one sitting.


      SELECTION GUIDE & PRICES

      Contact me at mail.thirdeye@hotmail.com for payment information, (including PayPal instructions) or if you just have a question about any of the tools. Please put the name of the tool or "tools" in the subject line.

      Image hosted by Photobucket.com

      *****************************************************************************

      INSTRUCTIONS - The ThirdHand and ThreeFinger grate lifting and hanging tools are only effective when used properly. Here are some demonstration videos.


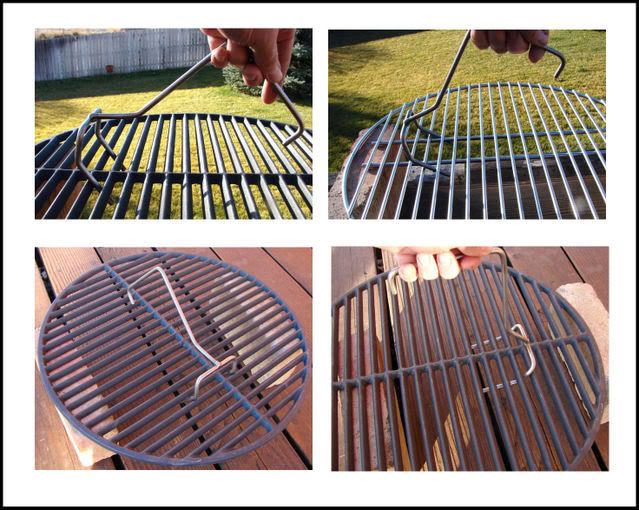
      REGULAR COOKING GRATE - Tip the handle forward and slip the fork between the cross members of the grate with an approximate even spacing on each side of the center rib or ribs. Depending on the weight of your grate, select the slot which allows you the best balance and control. Usually this is the 3rd, 4th or 5th slot from the edge.

      CAST IRON GRATES posed a particular problem because the unique shape of the cross members and the slot width varies a bit from each manufacturer. As you can see from the pictures, the handle must lean farther forward (almost touching the grate) to allow it to slip between the cross members. I find it easier to shift the fork to one side of the center rib, then shift back to center after they are in the slot. The fit can best be described as a "wedge fit" as the fork-to-grate contact is at the rear of the fork.

      CARE & CLEANING - Wash by hand and not in the dishwasher. You may notice a slight discoloration in the weld area. This is caused by the heat of welding and is normal.

      Image hosted by Photobucket.com

      ****************************************************************************

      Q & A

      1. Will it work on all grills and grates?I like the word "most". I've tried it on the grates used by a very popular brand of kettle cookers, and on my two personal ceramic cookers. Heavy cast iron grates posed a challenge because the cross bars have a unique shape. The ThirdHand may not work on all cast iron grates.

      2. My ThirdHand won't work on small cast iron grates, what do I use?I designed the ThreeFinger just for smaller cast iron grates and grates used on table top and "tailgate" style grills.

      3. The handle seems backwards to me. Wouldn’t you get better leverage if it was reversed? Actually, it would take some leverage to use the ThirdHand if the handle was reversed. But I wanted a tool that did not require leverage. With proper positioning, all you do is lift.

      4. Is it stainless steel or can it rust?
      Yep, the ThirdHand and ThreeFinger is 1/4" diameter stainless steel and has one weld joining the two pieces. Stainless steel is just that, "stain less". It is resistant to rust and stains, not rust proof.

      5. I have big hands, do they come with a bigger handle?I thought about it, and that might be an option down the road. Remember, the tool is only in use a few seconds when removing or replacing your grate.... The handle on the ThirdHand is plenty long, which helps in the balance. The ThreeFinger needed a shorter handle to enable it to lean farther forward so the forks could slip between the crossbars. The handle is three fingers wide, hence the name. Both tools have a return bend on the end of the handle to prevent slipping.

      ***********************************************************************************
      TESTIMONIALS

      Feedback is really important, both positive and negative. A couple of months ago I made a "please give me your comments" post on several barbecue forums that I hang out on. I was afraid I had overlooked something in the design that would make this tool even easier to use. All the comments were really positive, I appreciated every ones comments!! To all you field testers, about 25 in all, thanks again for confirming that my idea was workable.

      Here are just a few of the testimonials I have received:

      "...works like a charm...simple but functional"
      thillin

      "It's a great tool...way cool"
      Norcoredneck

      "You just lift and the handle does all the work"
      Richard FL

      "...it's my MOST USED Q'n TOOL!
      swamprb

      "...your lifter has made me fall in love with my cast iron grate again"
      Retired Railroader

      *****************************************************************************

      DISCLAIMER

      The ThirdHand grate lifting and hanging tool was designed to lift and/or hang a cooking grate when adding charcoal or cleaning your outdoor grill or barbecue. Working around hot charcoal is dangerous. Wearing leather “welder type” gloves or special heat resistant cooking gloves is recommended. Use caution when moving or hanging a hot grate. Never set a hot grate on any surface which is not suitable for hot items, such as a wooden table or deck.

      All grills, barbecues and smokers are dangerous if not used properly and correctly, and can cause serious bodily injury and property damage. I advise you to read the instructions provided by the manufacturer of your particular cooker. You as the consumer and purchaser are responsible for understanding of all owner manuals, safety literature and fire safety provided by the manufacturer. Proper clothing, eye, face, ear, and hand protection is the responsibility of the consumer.

      ISC or myself are in no way responsible for any mishaps, damages, irresponsibility, loss of time, material and injuries incurred from misuse, poor training or accidents that are associated with any product sold or distributed.


      20060218

      Guide to Meat Cuts

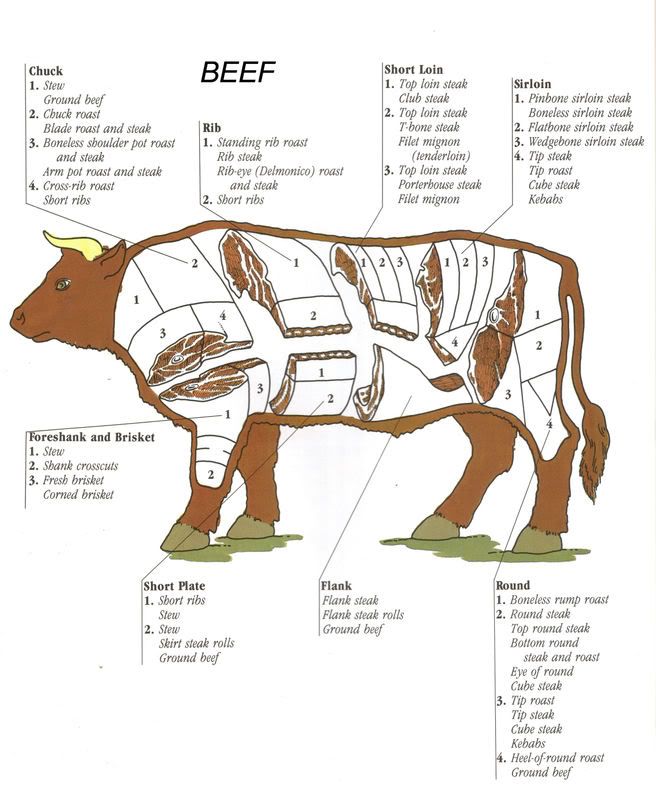
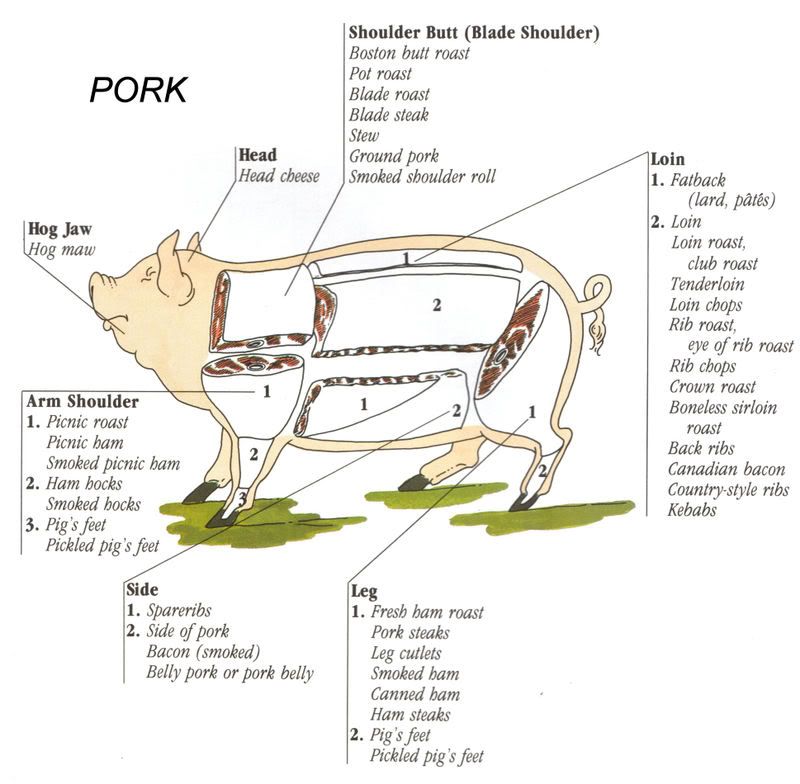
      Sometimes I overlook the fact that cuts of meat as well as cutting and preparing meat can be confusing to some folks. To make things worse butchers just ain't what they used to be. There are still some real ones out there, and if you find one consider yourself lucky, but I'll just say they are not as common as you would expect. With this in mind you need to know your way around the meat case and not be afraid of a little cutting board work every now and then.


      First I'm going to talk about names. In barbecue circles, the names we use a lot can be really confusing. Farther on down the page are some charts and some of my photographs illustrating some meat-cutting.


    • For example, a pork butt comes from the front of a pig (the shoulder), not the end you would expect. And a Boston butt got it's name from the wooden casks (called butts) that the "Boston cut roasts" were packed in. The blade end of the shoulder is what we generally refer to as a "butt"


    • You most likely know that a brisket comes from the chest of a steer, but did you know the point (or nose) is the forward end?


    • And speaking of steers, that is the "beef" we use for barbecue...we generally don't use cows and we almost never use bulls. What's the difference between a steer and a bull you ask? Well, a steer is lacking some .....uh, hardware so to speak.


    • Tri-tip - There are often regional names and nicknames for certain cuts of beef, and there are also some new names born from marketing. A tri-tip is a perfect example of this. They come from the bottom of the sirloin, and there are only two tri-tip roasts on each steer. Very popular in California around Santa Maria, where they grilled over a hot fire, they are often hard to come by in the Eastern US. Your butcher may know them as a triangle roast.


    • Hanging Tenders are more uncommon than tri-tip, there is only one per steer and it's about 7 or 8 inches long, and weigh a little more than a pound. NO, it's not what you are thinking (that part of a bull is measured in feet!) A hanging tender is found between the 12 & 13th rib, and can be cooked whole or cut into Hanging Tender Steaks or Onglet Steaks.


    • A Flat Iron Steak is relatively new, uh...wait a minute.... I mean it's always been there, but some clever folks at the University of Nebraska led a marketing plan to produce this particular cut. Technically it's a beef shoulder, top blade steak that has had the tendon removed. It is well marbled and quite flavorful. They are well worth asking for at the meat counter.... If your butcher looks at you like you've been reading some fancy cooking magazine, just tell him to look up NAMP # 1114D. Now, if he says "What's NAMP?" You might want to find another butcher.


    • What is NAMP? It stands for North American Meat Processors Association.
      This organization publishes The Meat Buyers Guide, which assigns a number to both large and small cuts of meat. It's the meatcutters and meat buyers bible.


    • Surely, you have heard the expression "eatin' high on the hog", well that is referring to cuts of pork along the backbone like the loin, tenderloin and back ribs. You know the high dollar cuts.


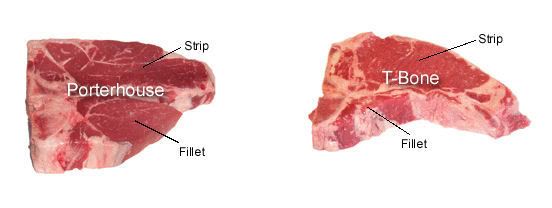
    • Ever wonder how a Porterhouse steak came by that name? They were served at "Porter Houses" along the early coach routes. And you know that little muscle, the really tender one, that's the tenderloin (which is the same hunk of meat that chateaubriand is prepared with) otherwise known as a filet, or is it fillet. Heheee, either one is acceptable.


    • And guess what..... If you see Rocky Mountain Oysters on the menu, be advised they don't come from the ocean. Think of them as "swinging beef". I go nuts over them.


    • You most likely have had corned beef on St. Patrick's Day, but have you ever eaten pastrami? It's just corned beef that is seasoned and smoked. Corned beef got it's name because in the old days "corns" of salt were used to cure it.


    • Pork "Country Ribs" are cut from the loin in the Eastern US and from the shoulder (butt) in the Western US.


    • Ever hear of an Airline Breast? It's a chicken breast with one joint of the wing left on. If was served on airplanes years ago, it makes the portion look bigger.


    • Did you know that City Chicken is not chicken at all? Nope, it's cubes of pork and veal on a skewer, then dipped in egg and crumbs, then sauteed


    • A city ham is still a ham. It's the general name for a very mild and not very salty ham. Your standard grocery store hams are all city hams. A country ham on the other hand is one that is salt cured for a very long time and develops a strong flavor and can be salty if not soaked in water before cooking


    • We see commercials for SPAM all the time, but what does it stand for??? No, I'm not talking about the annoying pointless e-mails that show up in your in-box, I'm talking about the tinned meat product made by Hormel. SPAM is an acronym for spiced ham. The residents of Hawaii are the biggest consumers of SPAM.


    • I make kebabs all the time, but why did the Middle Eastern Cooks come up with idea to cube everything and cook on skewers? Well, for kind of the same reason that Chinese cooks cut up their food in to smaller pieces..... Fuel. Or lack of it. When you don't have an abundant fuel source you cook smaller pieces, which take less fuel and cook faster.


    • Throughout history spices have always commanded a pretty penny. Peppercorns were even used as money in certain civilizations..... why were spices in such high demand? Sure a little of this or that can dramatically change the flavor of things. But in the old days (like before refrigerators) folks were kind of limited to what they ate. Lets say all you had to eat was lamb, after a few years it would get pretty boring. A few spices would let let you change things up a little. So I guess variety really is the spice of life.


    • Enhanced Meats - Do you read labels or do you select meats based on appearance and price? Some pork and poultry products have labels that say "Naturally Tender", "Moist and Tender", "Guaranteed Moist", "Self Basting" or "Deep Basted". These terms indicate that they have been injected with a solution to increase moisture, give a longer shelf life and make them more tender. This all sounds dandy, but the solutions can be up to 15% of the weight, so you are paying up front for chemicals in liquid. Buy only natural meats, season and cook them properly and you will be pleased. If you want to experiment with enhancing your own meat, look into flavor brining, which works on both pork and chicken.


    • Speaking of labels, "FRESH Pork" means it has not been frozen or cured. We usually think of a ham as a cured product, but you can buy a fresh ham. When it's cooked it is basically roast pork.


    • "Previously Frozen" - This means that the meat in the counter has been frozen and now has been thawed out. Meat should be frozen one time only to avoid drying it out. When you see previously frozen meat for sale, it's okay to buy it and cook it, but I would not recommend buying it and re-freezing it.


    • Charts


      Porterhouse & T-Bone Steak

      Image hosted by Photobucket.com


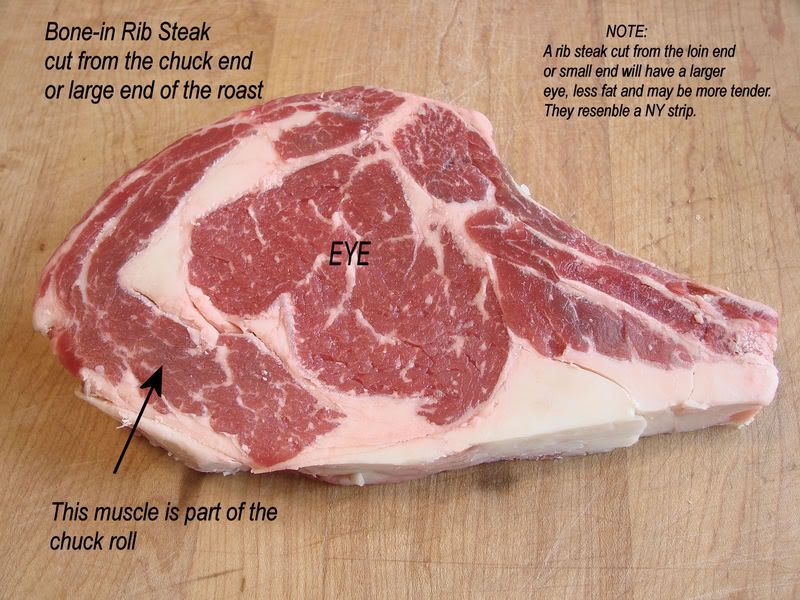
      Anatomy of a rib steak

      Image hosted by Photobucket.com


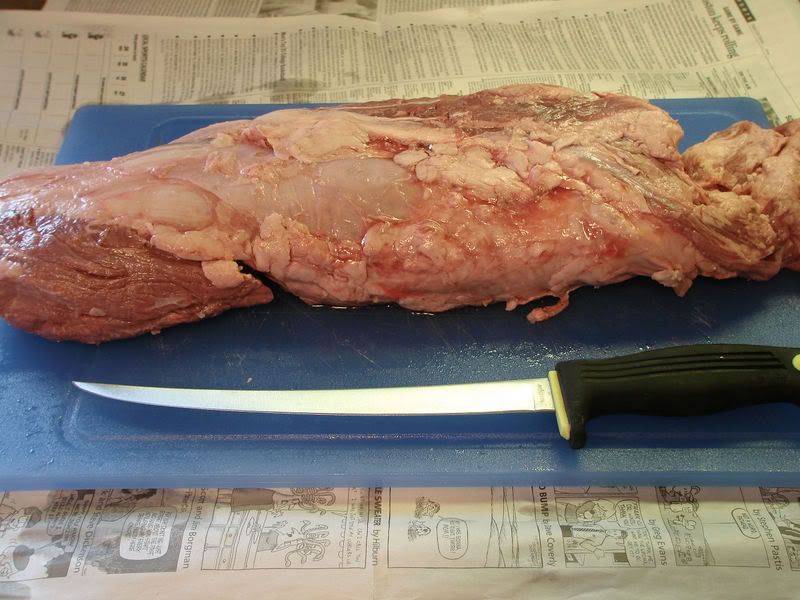
      Whole Beef Tenderloin

      Image hosted by Photobucket.com


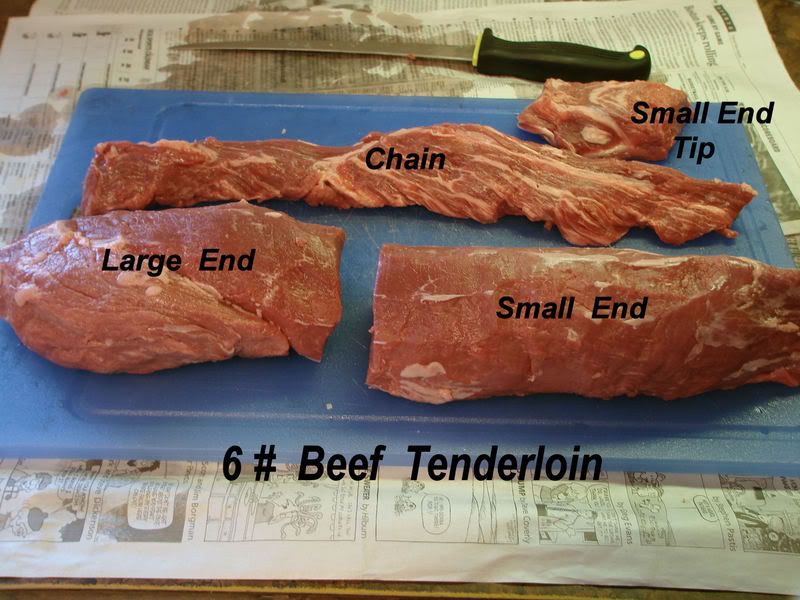
      Whole Beef Tenderloin - Chain Removed & Cut In Sections

      Image hosted by Photobucket.com


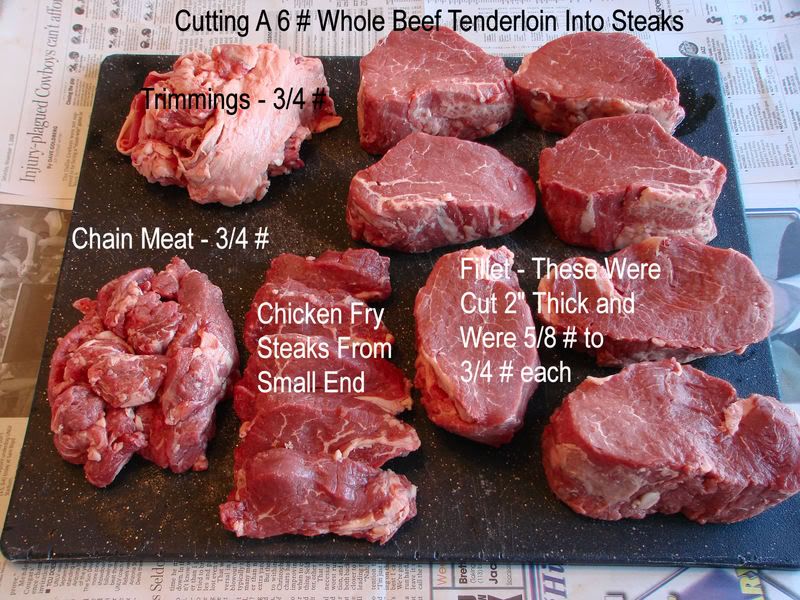
      Whole Beef Tenderloin - Steaked Out

      Image hosted by Photobucket.com


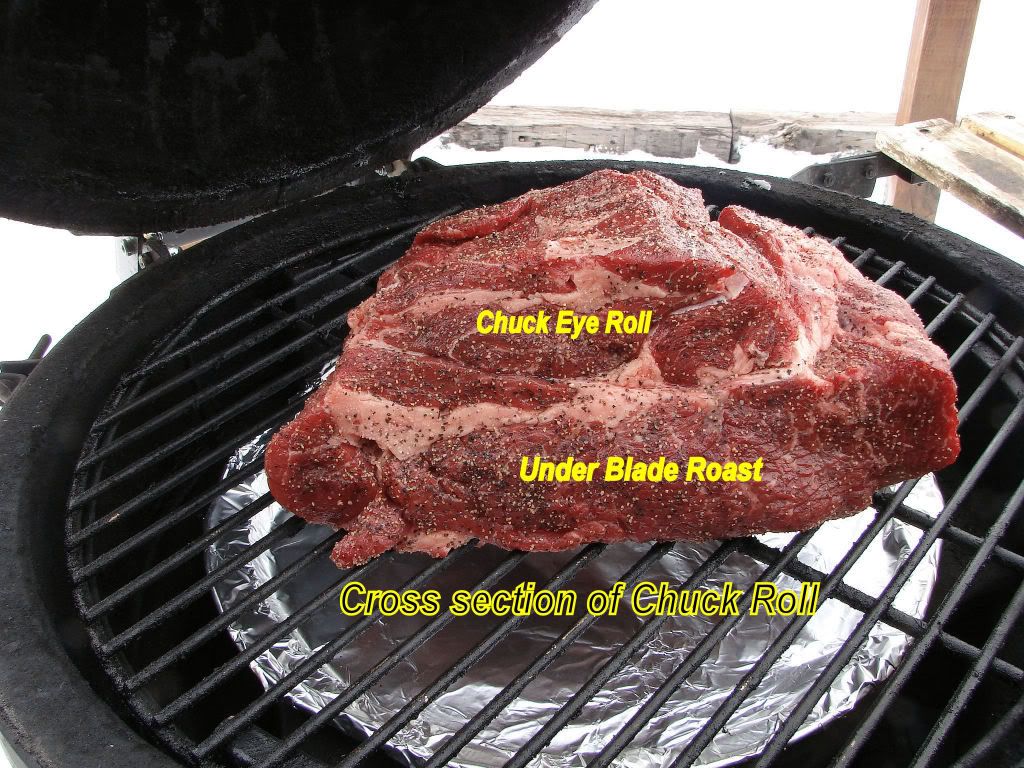
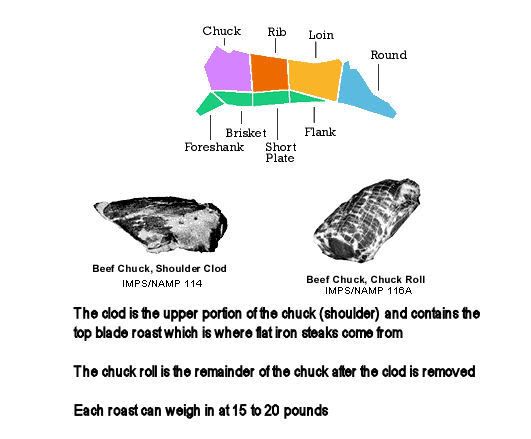
      Chuck Roll - Section Cut

      Image hosted by Photobucket.com


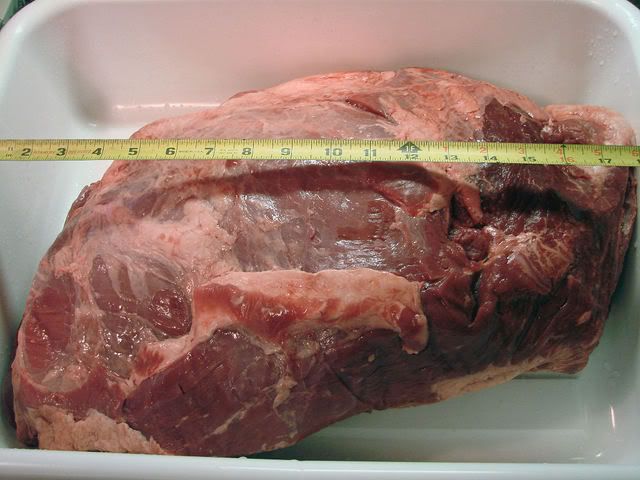
      Chuck Roll - Whole

      Image hosted by Photobucket.com


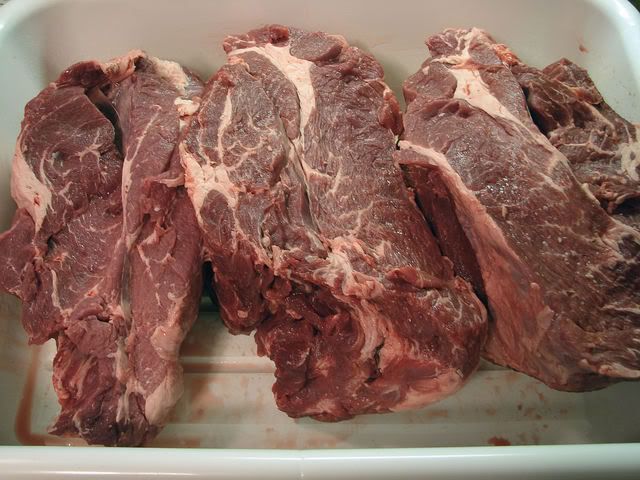
      Chuck Roll - Cut Into Roasts

      Image hosted by Photobucket.com


      The shoulder clod is the next door neighbor to the chuck roll

      Image hosted by Photobucket.com


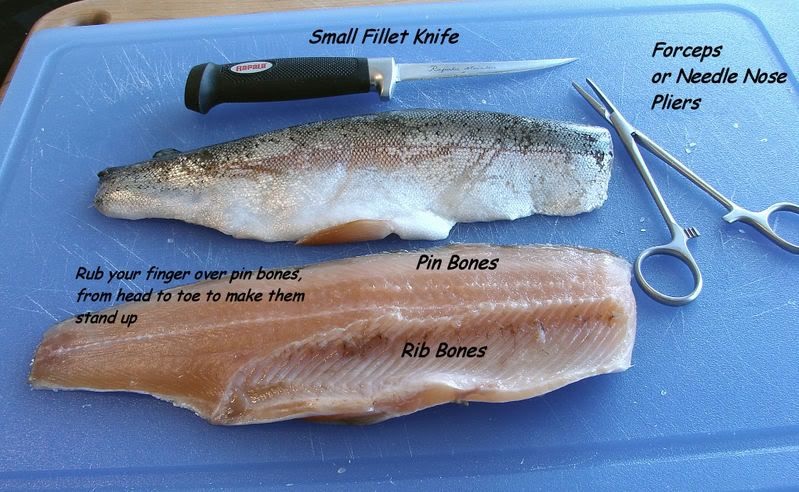
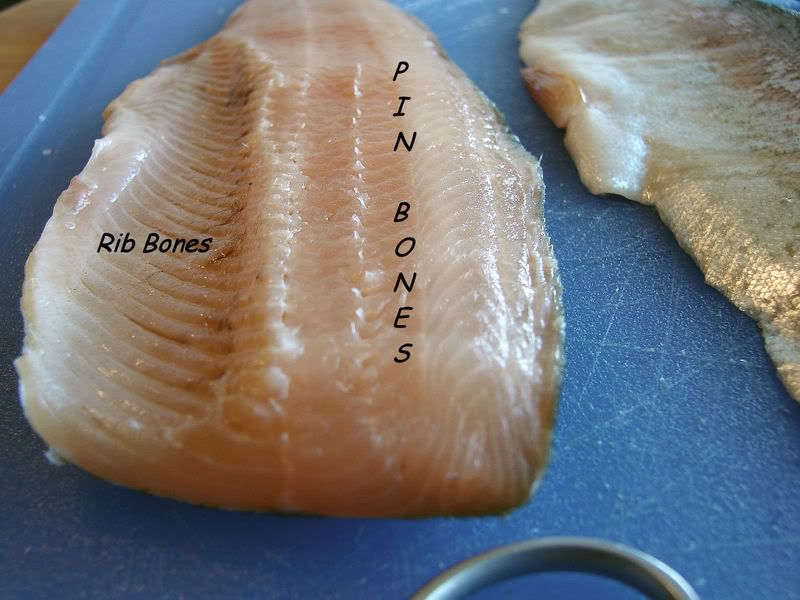
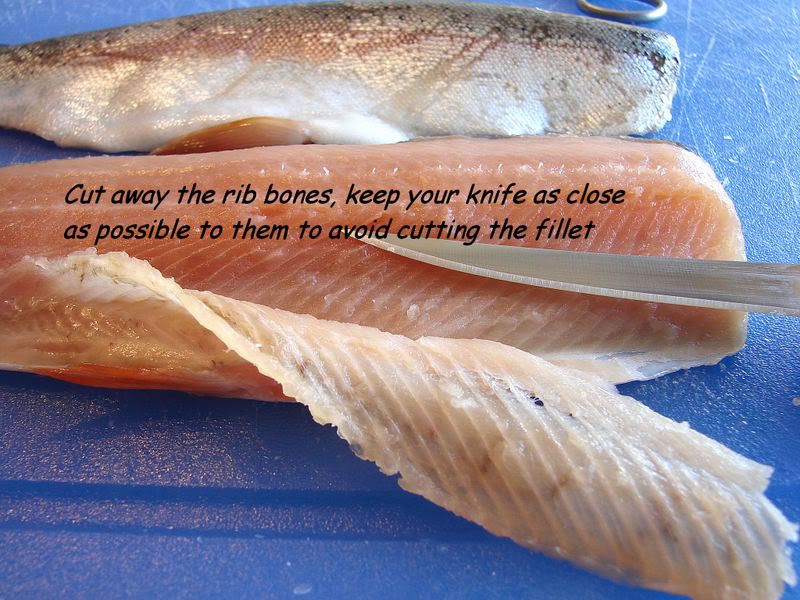
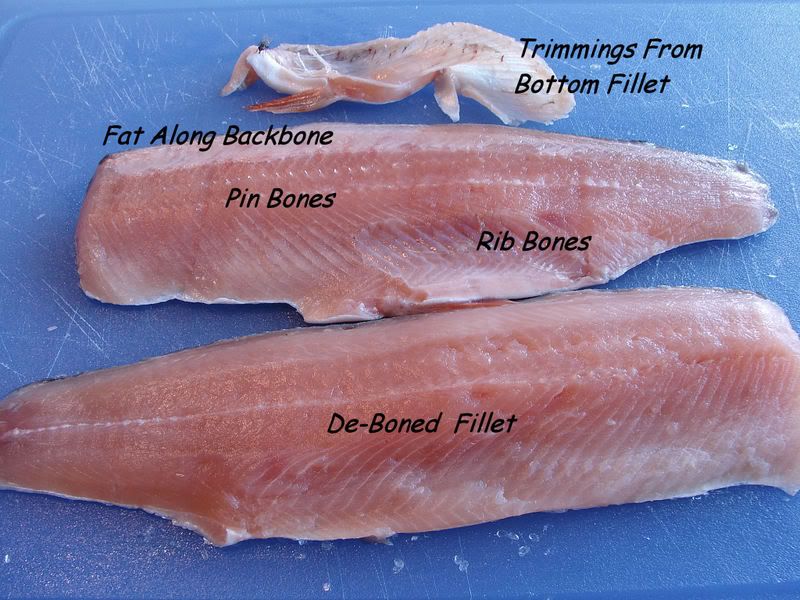
      Steps to de-bone a trout or salmon

      Image hosted by Photobucket.com


      The pin bones are simply plucked out with the forceps. Sometimes you can get 2 or 3 at the same time.

      Image hosted by Photobucket.com


      Image hosted by Photobucket.com


      Image hosted by Photobucket.com


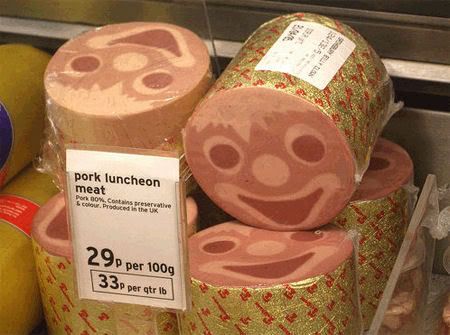
      What the heck is this? Maybe a happy meal??? I think it was called "Clown Meat"

      Image hosted by Photobucket.com


      Picture Format & Templates

      View this information in Html in order to view codes.....


      Use this for posting template


      Image hosted by Photobucket.com


      code for making a picture a hyperlink


      .) How do I turn on comments for my blog?
      There are three things you need to do to enable comments on your blog:


      Click the 'Post Options' link in the bottom right corner of the post editor and make sure that you have allowed reader comments.
      From the Layout | Page Elements tab, click 'Edit' in the Blog Posts widget. A window will pop up, and from there make sure check the comments field.
      From the Settings | Comments tab, make sure that 'Show' comments is enabled. Then simply clear your cache and cookies, and then you should be all set!

      ...............


      sample using picture above - no url to go to has been inserted


      Message when someone runs their curser over your picture

      ..........................


      2.) Icons are missing from my post editor!

      First clear your cache and cookies.


      Then notice that there are two different posting modes within Blogger: 'Compose' and 'Edit HTML.' In 'Edit HTML' mode, not all of the formatting icons appear, and this is usually what trips folks up. To fix this, simply click on the "Compose" tab and you should see those missing icons appear again.


      3.) How do I make a picture a hyperlink?

      To make an image into a hyperlink you will need to use the following code:


      Message when someone runs their curser over your picture


      First upload your picture to a post. Then switch the post editor into Edit HTML mode, and you can see the photo's URL inside an tag. Simply copy that URL into the “link_to_photograph” part of the above code, fill out the rest of the code, and you’re done!


      4.) How do I add Audio to my blog?
      First you will need to upload the audio file to a free file storage site. Two free media storage sites are OurMedia.org or Archive.org. Once your audio is hosted and you have a unique URL for the file, you can use this code to embed audio:

      height=62 width=144 controls="console">


      More suggestions here.


      5.) How do I create a hyperlink?


      Text to be displayed


      More instructions here


      6.) How do I add a favicon to my blog?


      Once you have created an icon using Favicon from Pics, save it to your computer. You will need to unzip the favicon to your desktop.


      Blogger does not support .ico files, so you will need to upload it to a free file host.


      To find a free file host enter the keywords “free file host” into your Google search bar, or you can upload your icon to Fileden.com.


      Once you have done that, copy the url to your icon.


      Next go to your Blogger admin panel and click on the template tab and then on Edit HTML.


      Copy and paste the following code into your template.


      Replace Your_Favicon_Url with the link to where you stored your icon. Place the above code between the and tags of your blog.


      Save the template. Now refresh your page and you should see your icon in the corner of your page.


      Weber Smokey Joe "Tall Boy" Smoker Conversion

      As anyone in grilling circles knows, Weber grills set the benchmark. I've had several over the years, and still have the Smokey Joe model which I use when camping or on fishing trips. It's a very portable grill and has always served me well.
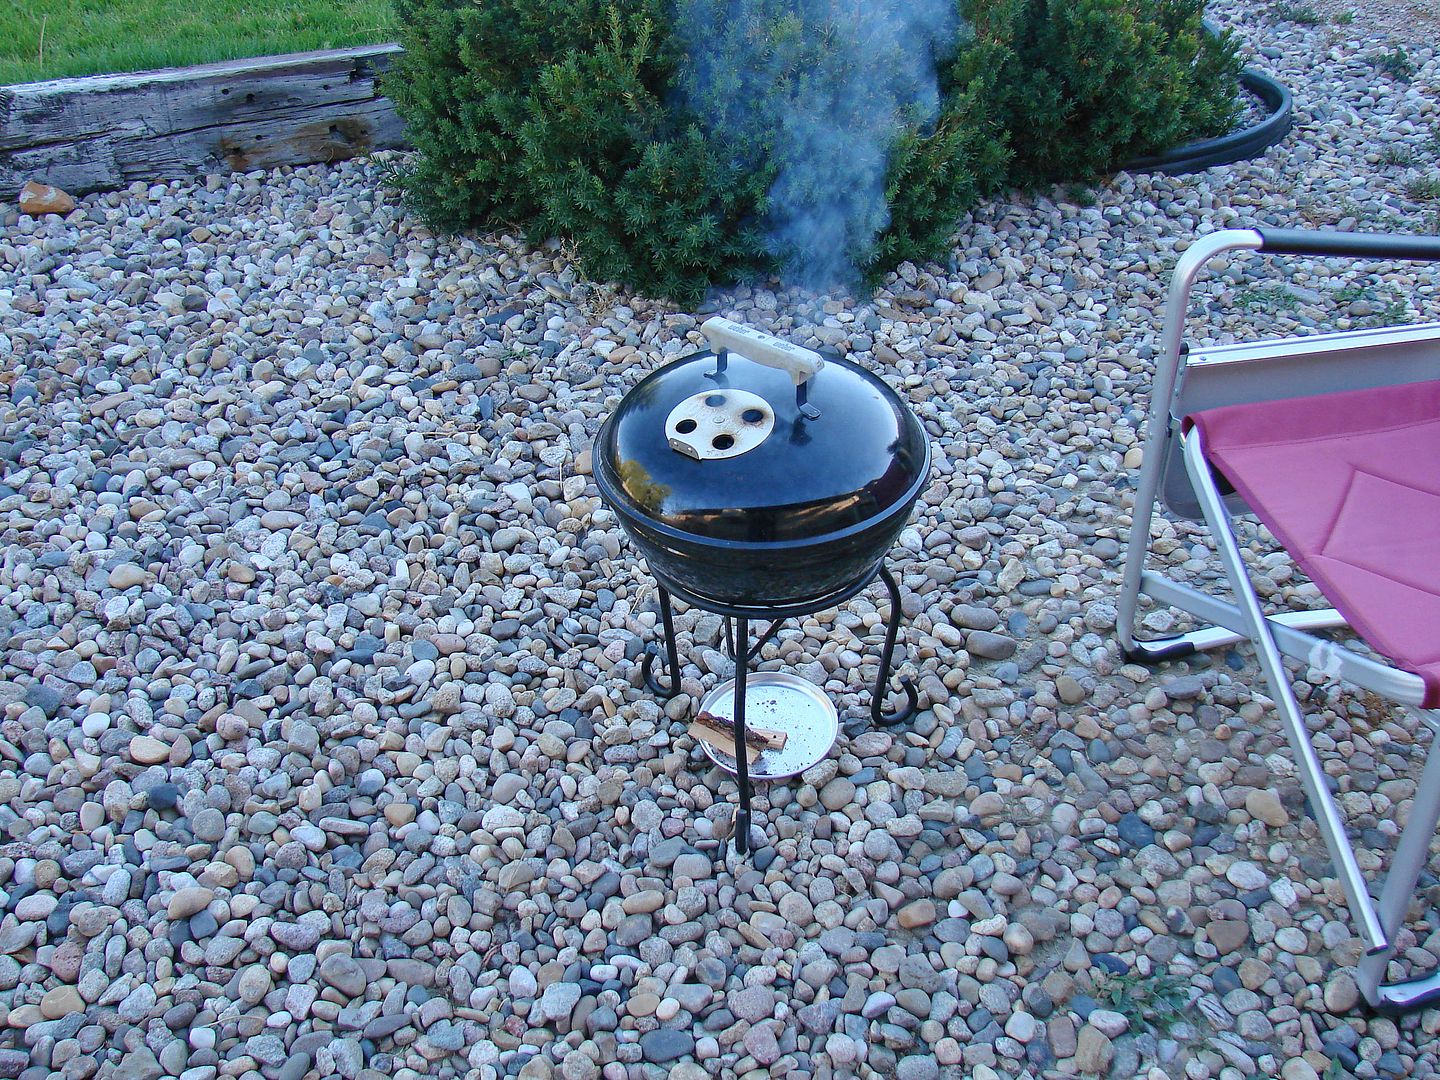

      Image hosted by Photobucket.com


      For smoking, Weber makes a Smokey Mountain also known as a WSM. These are a bullet style smoker loaded with features and Weber quality. A couple of years ago on barbecue forums and websites I started seeing modifications that folks had done to a Smokey Joe to transform that grill into a smoker, similar to a WSM. I finally got around to doing that modification and here are the results.
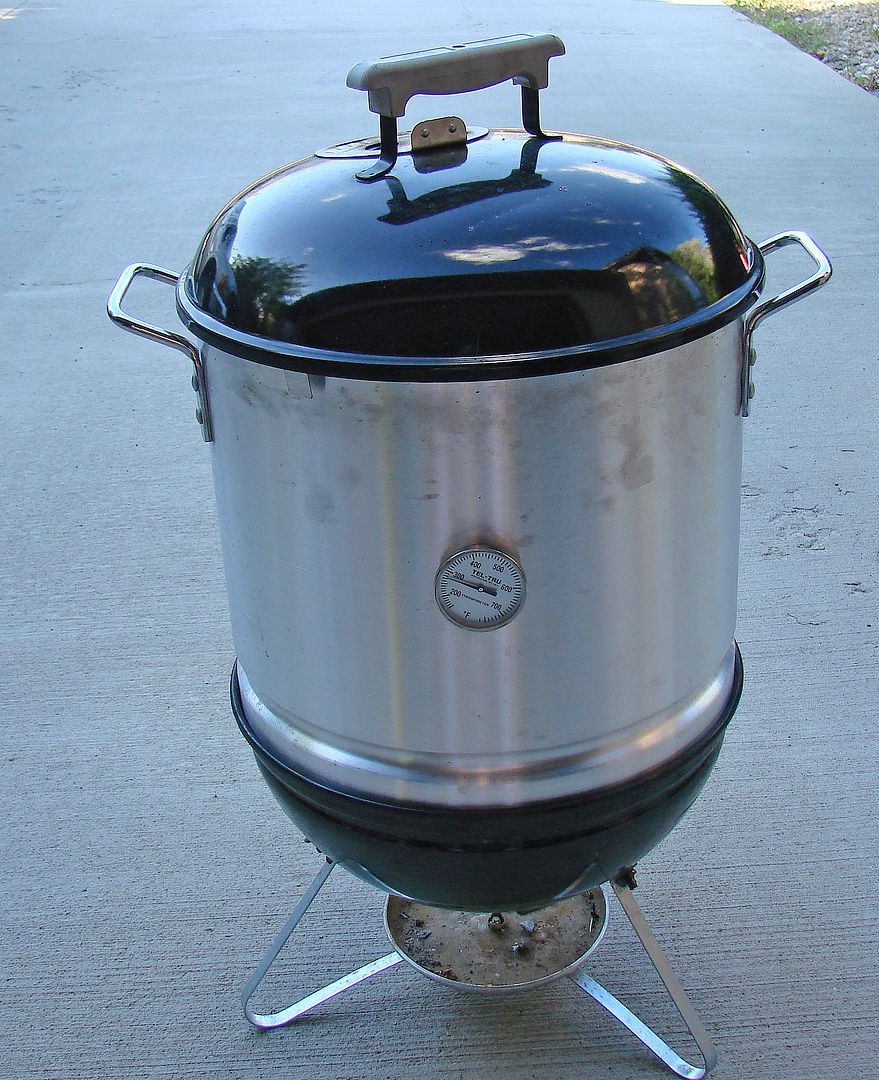

      Image hosted by Photobucket.com


      The key component to this build is a IMUSA 32Qt Tamale / Seafood Steamer, which is available at WalMart in stores or online for around $25. This particular pot nests perfectly into the base of the Smokey Joe, and the lid is a perfect fit. The grate fits snugly inside the steamer.
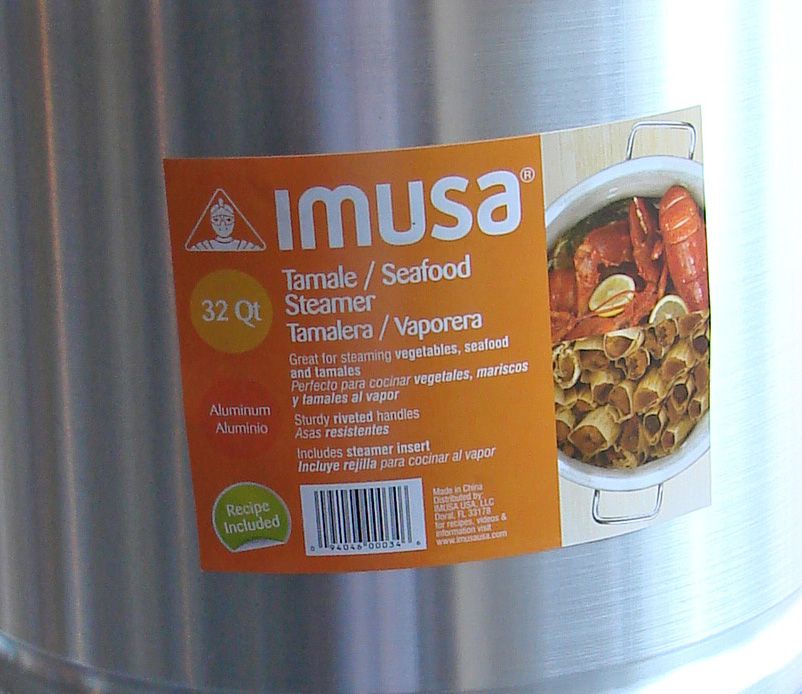

      Image hosted by Photobucket.com


      The factory lid and perforated steamer rack were not needed in my build, but the rack did come in handy for finding the center of the bottom which must be cut out.
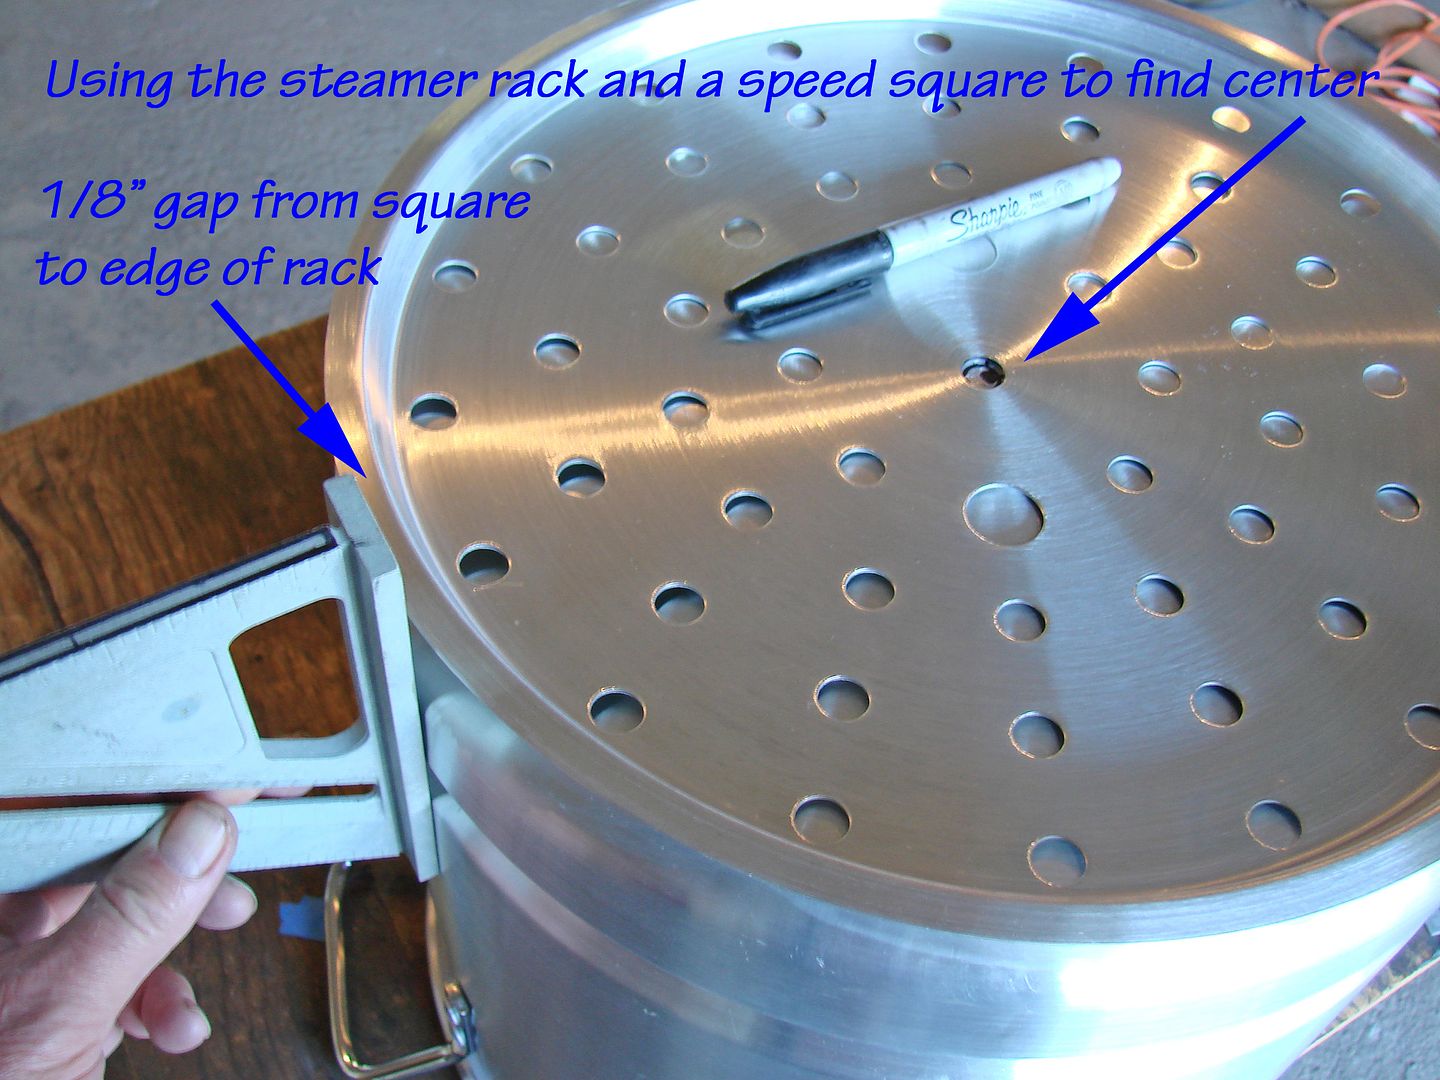

      Image hosted by Photobucket.com


      Once the center point is marked, drill a pilot hole and insert a self tapping sheet metal screw about halfway in the hole. Measure 7/8" from the edge of the steamer and make a reference mark. Next, using the screw as a pivot point, use a string and a marker to mark a circle.
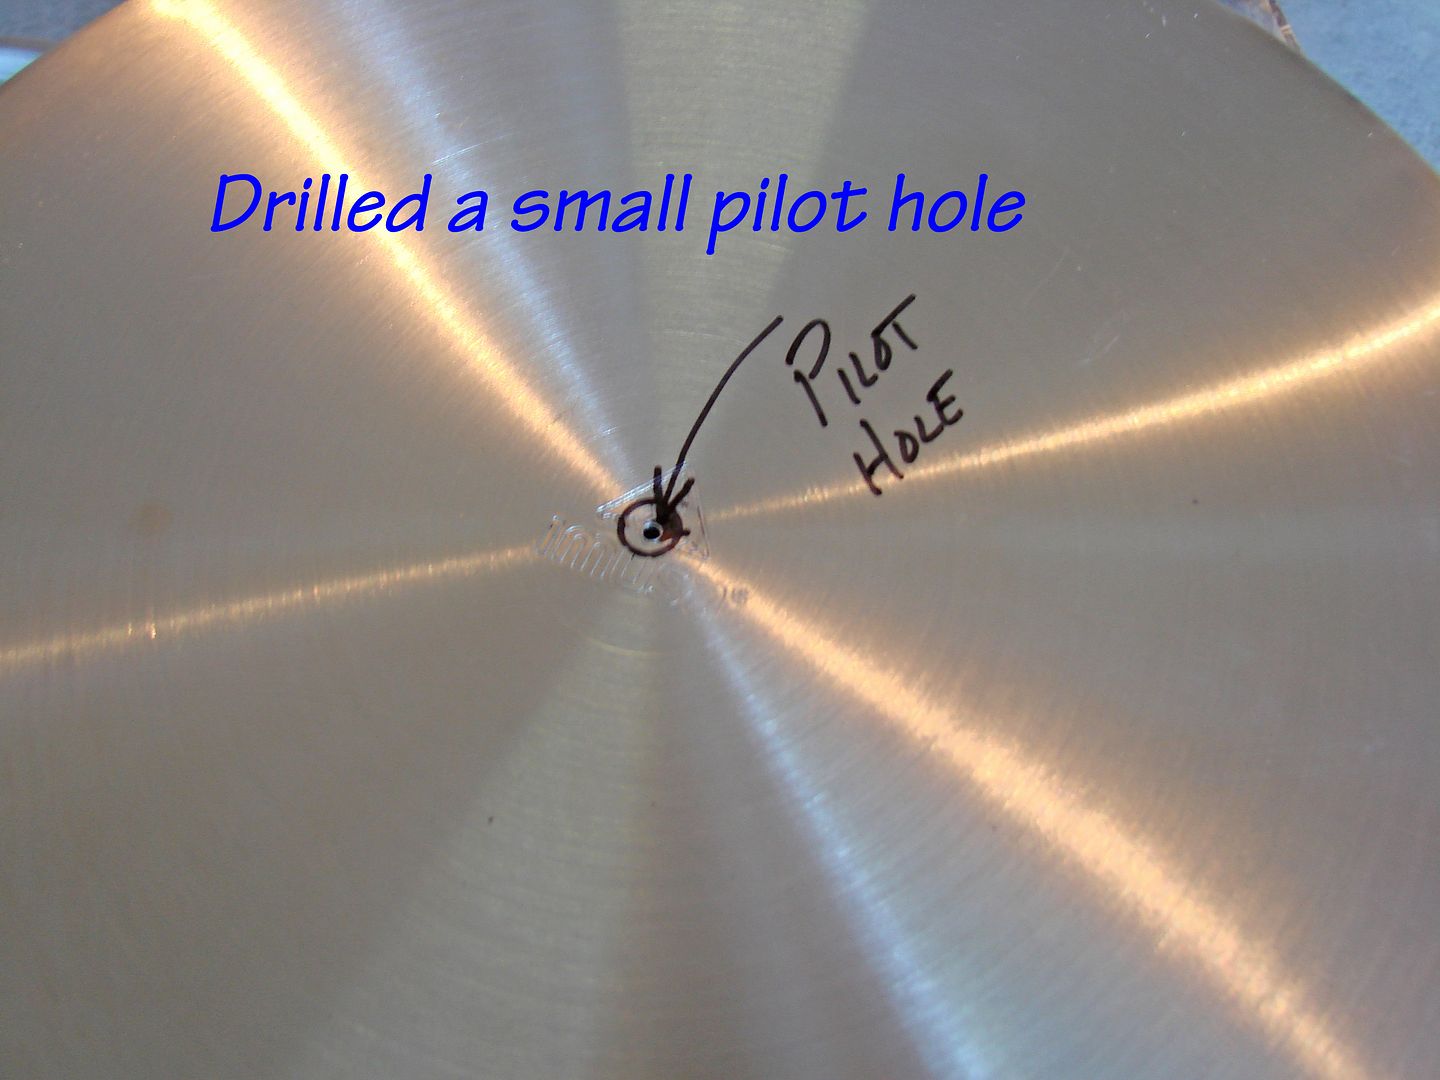
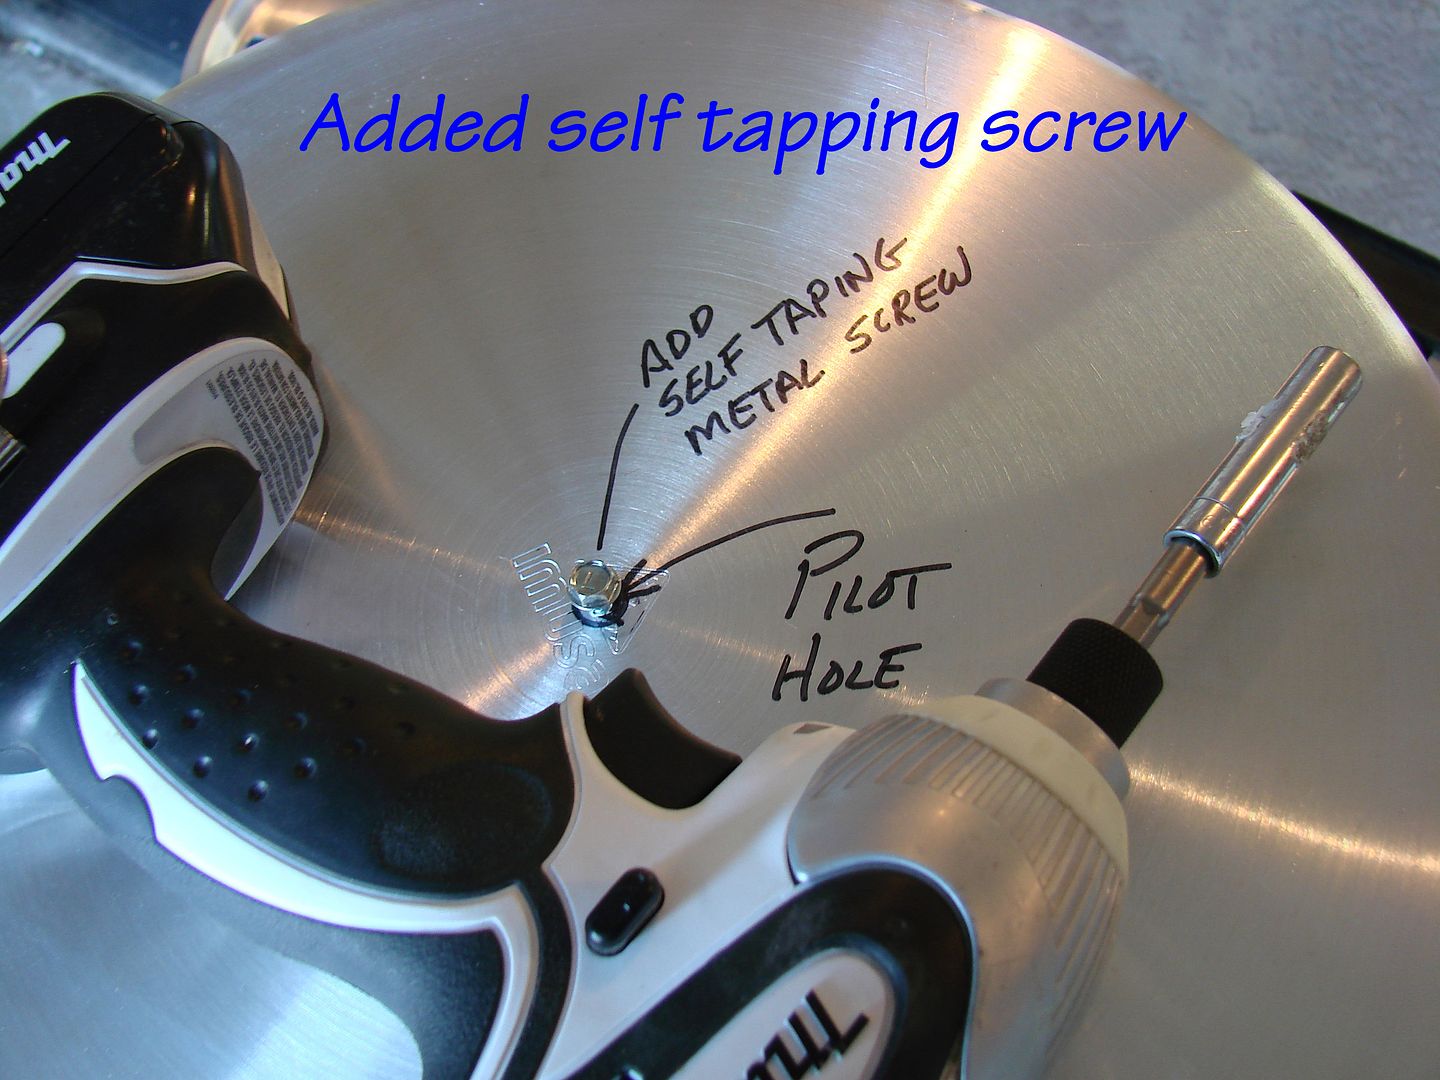
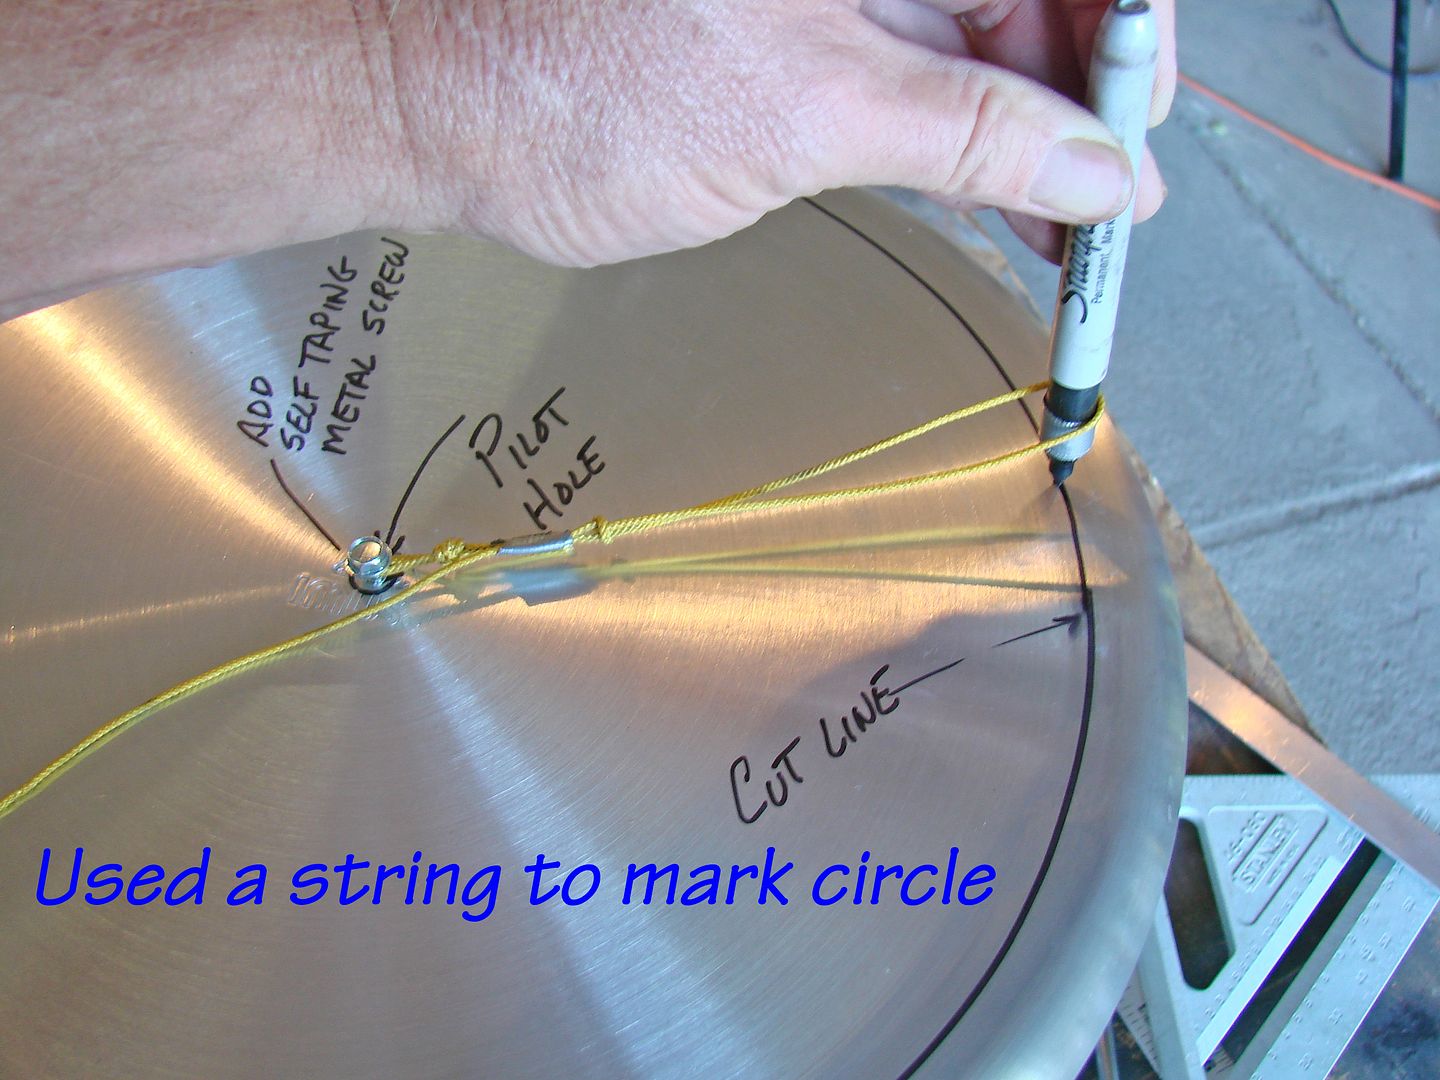
      Image hosted by Photobucket.com


      Image hosted by Photobucket.com


      Image hosted by Photobucket.com


      Double check your measurement - "Measure twice, cut once" is the best advice here.
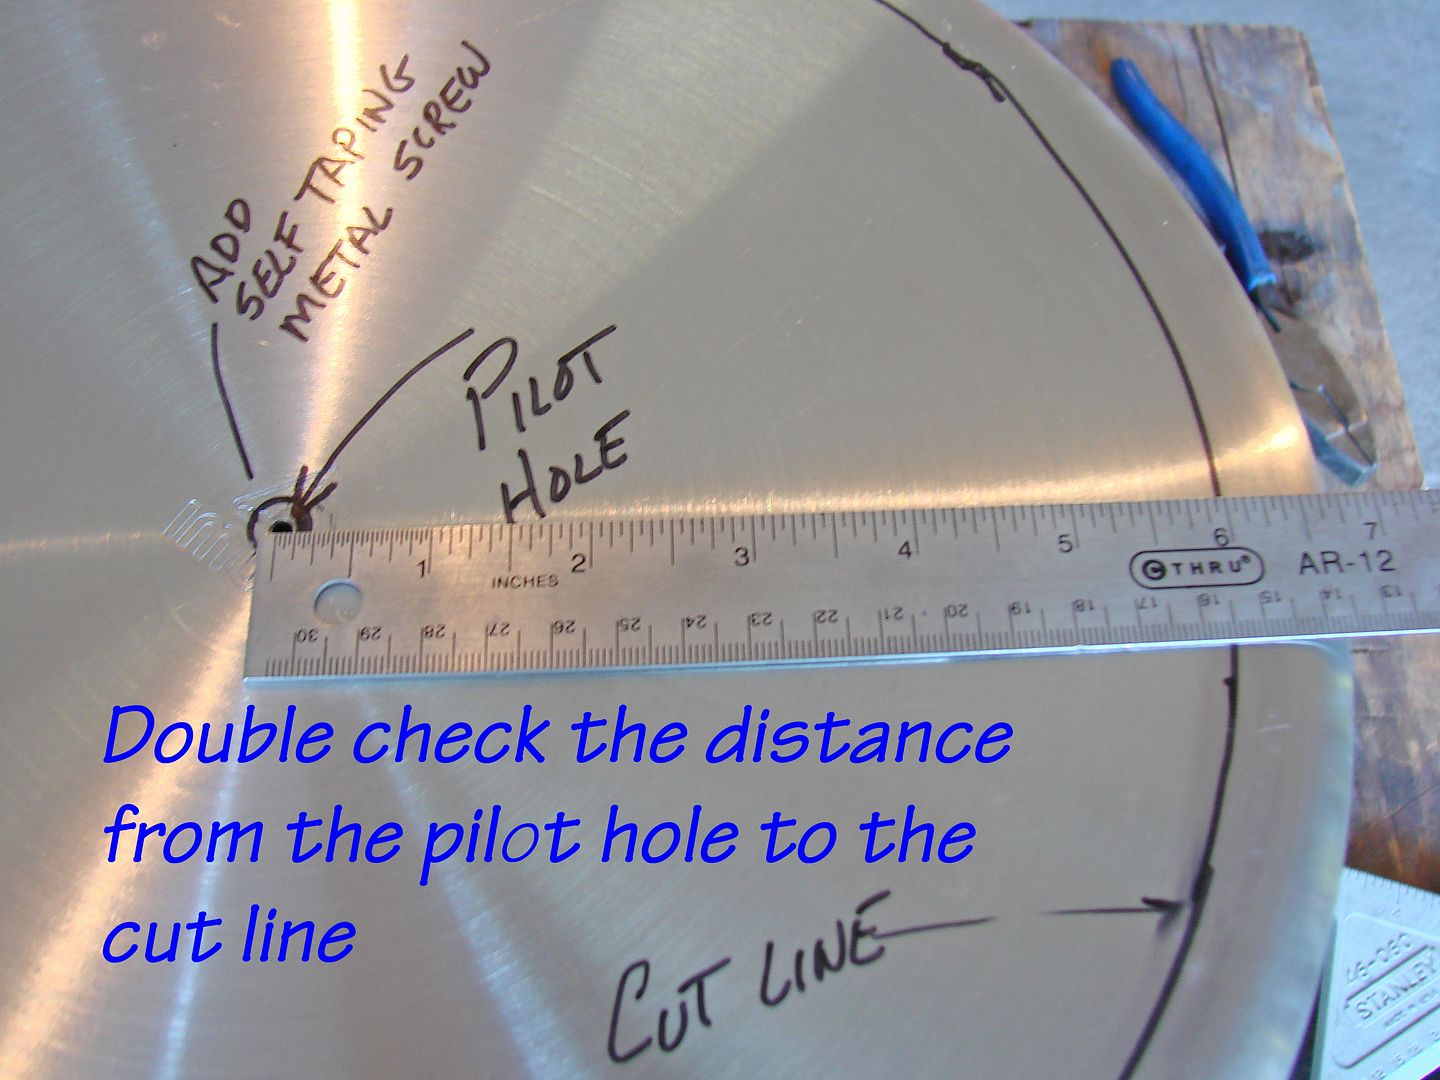

      Image hosted by Photobucket.com


      I opted to use an angle grinder with a cut-off wheel for the major cuts. A jigsaw with a metal cutting blade may also work. I made a series of relief cuts, then followed my circle.
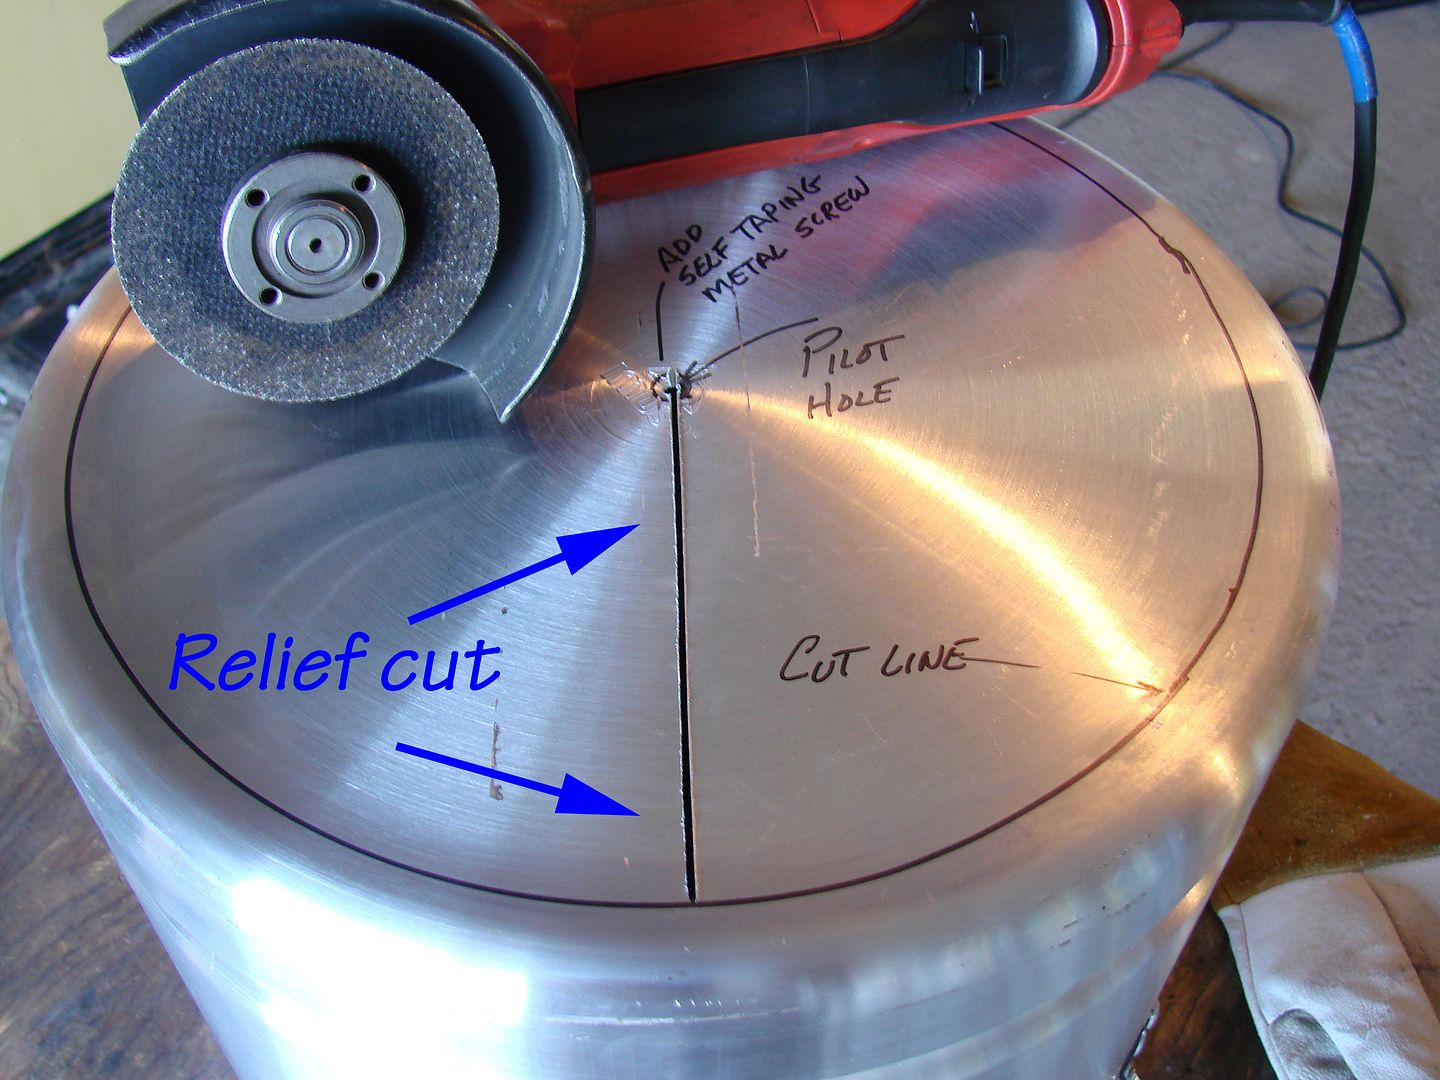
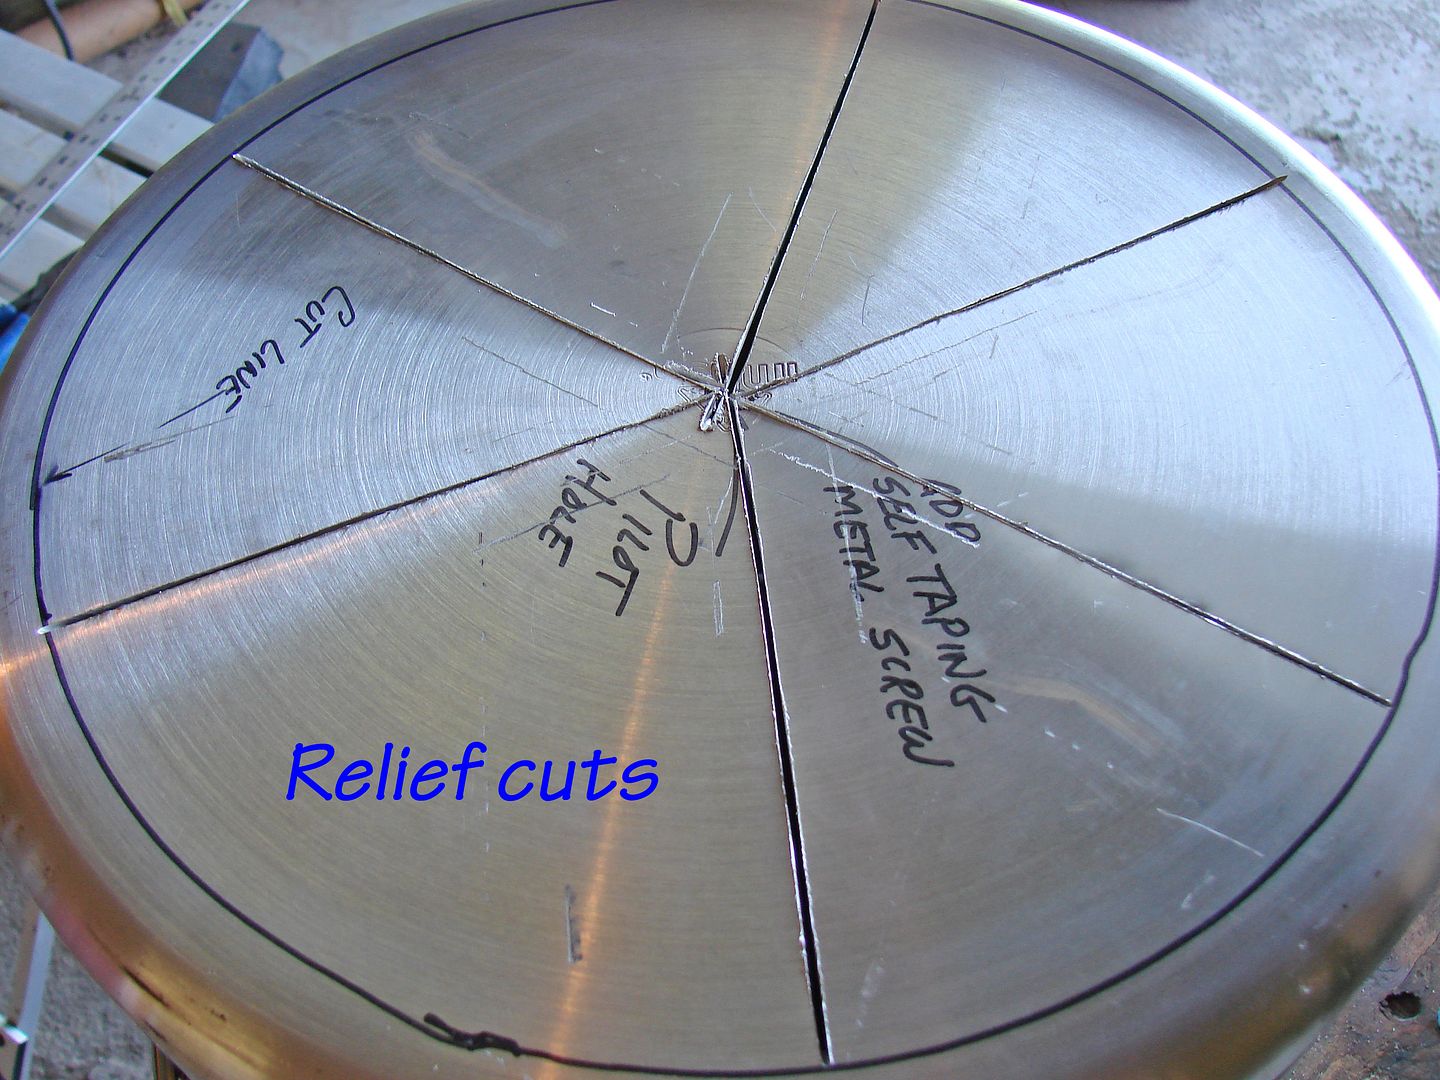
      Image hosted by Photobucket.com


      Image hosted by Photobucket.com


      After removing the bottom, use a sanding disk or Dremel tool with a grinding wheel to remove the burrs, then hand sand with 300 grit followed by 800 grit sandpaper.
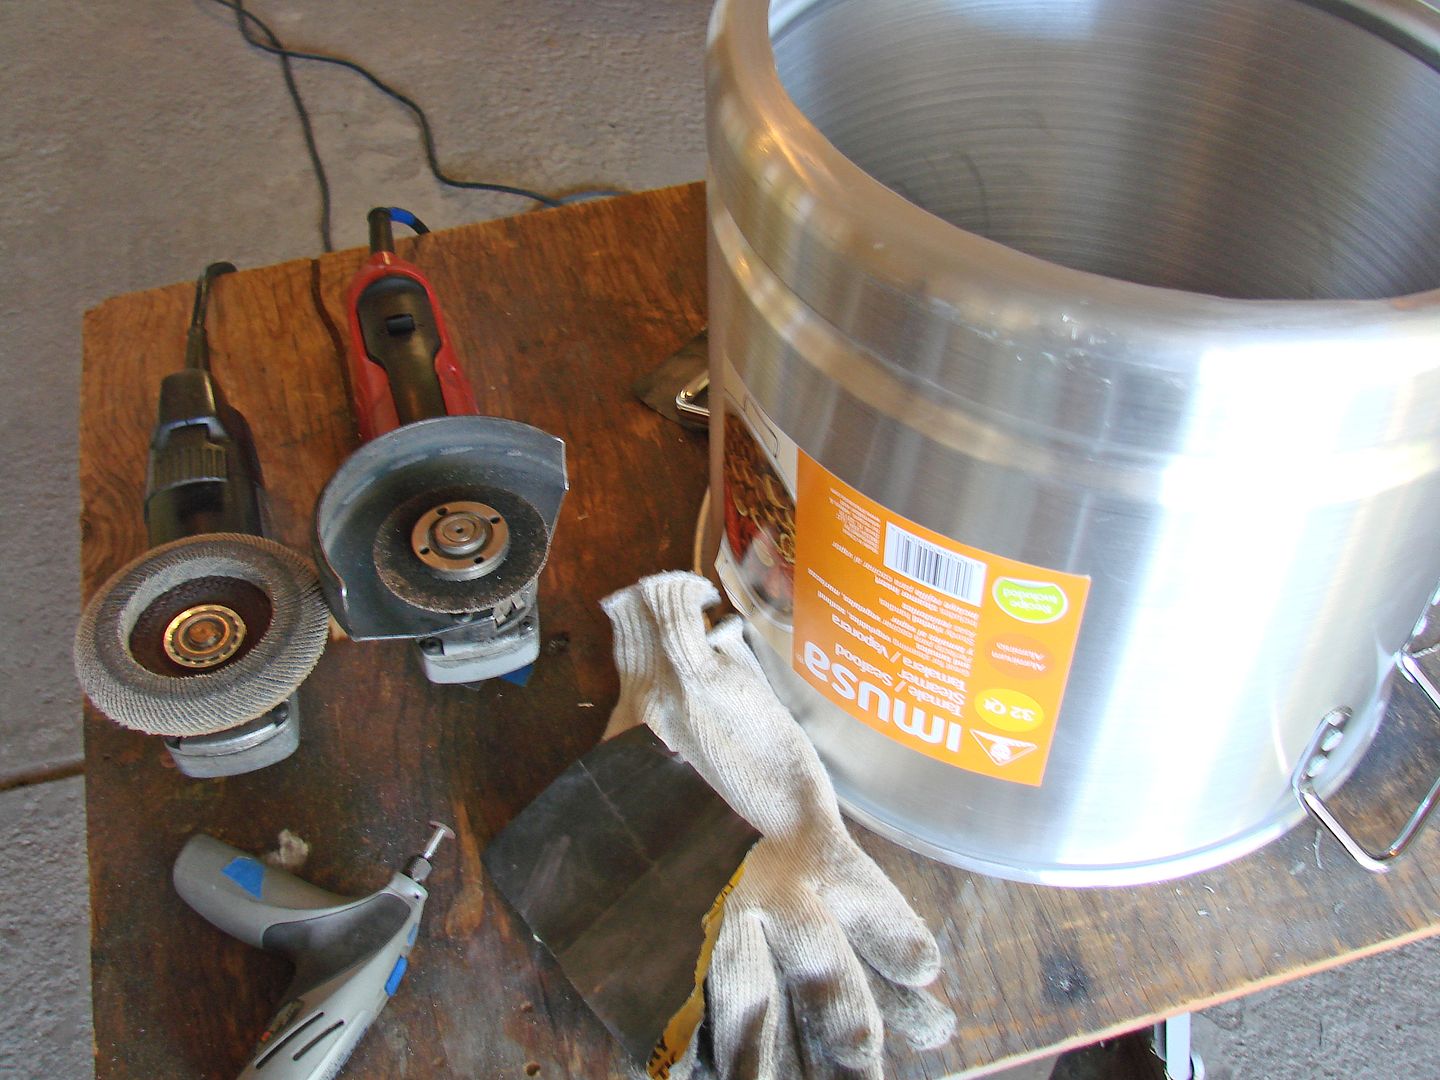
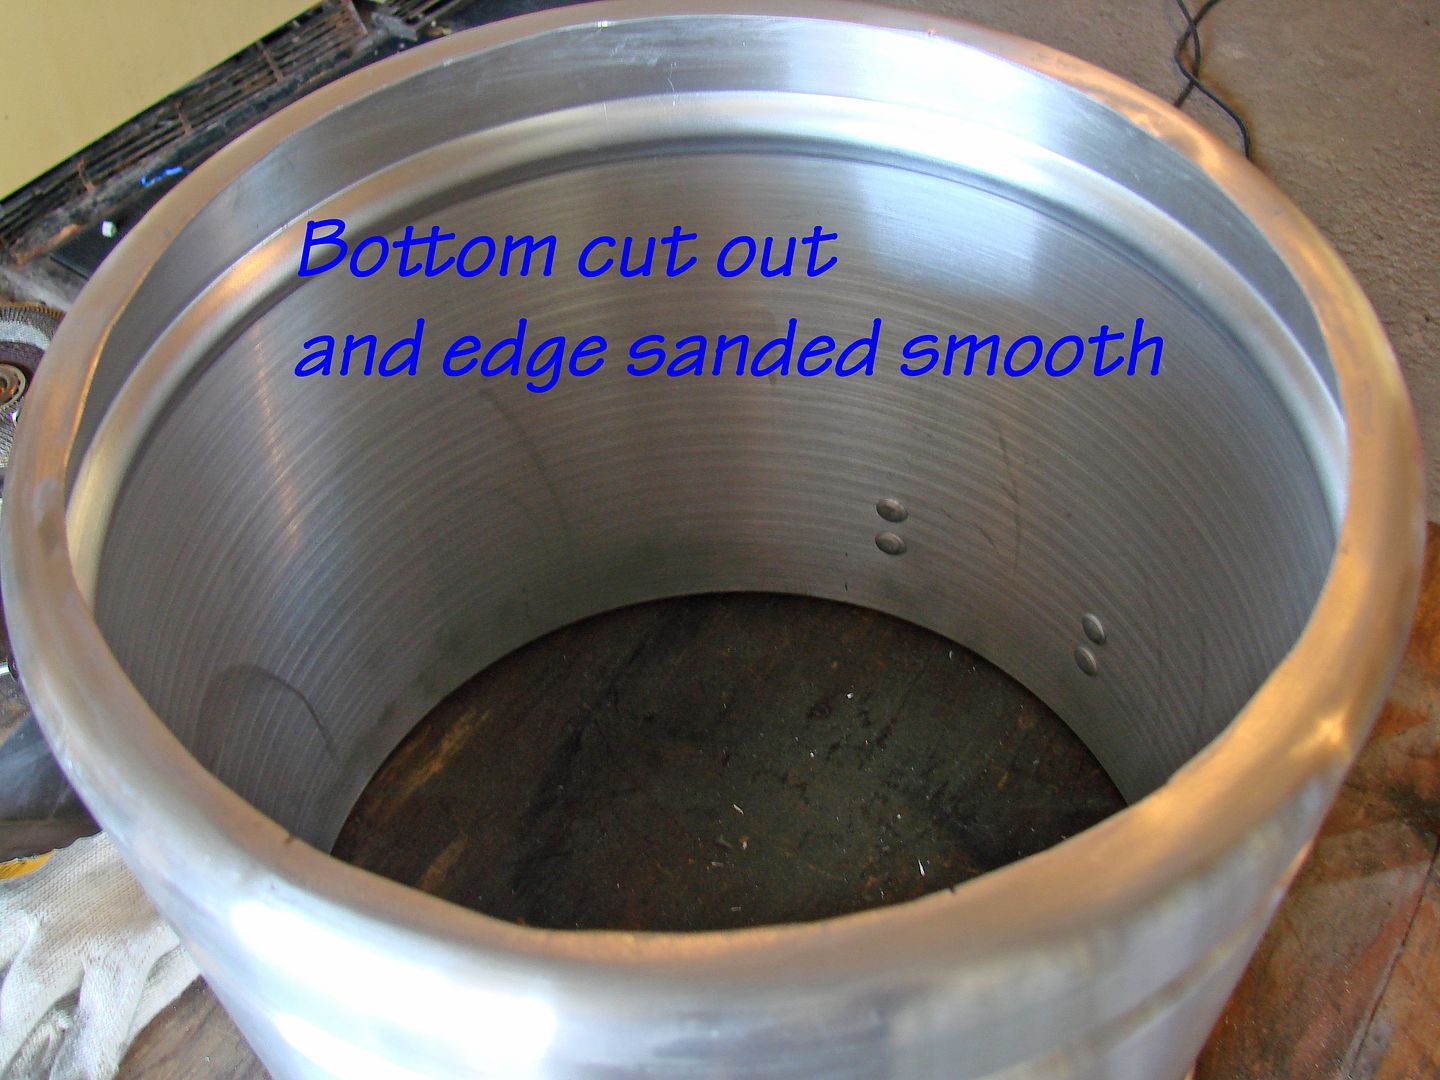
      Image hosted by Photobucket.com


      Image hosted by Photobucket.com


      Until I locate the "sweet spot" for my grate height, I opted to make some clips to hold the grate. This way, I can try several heights before adding some permanent bolts to support the grate. As you can see, the clips passed the weight test using 3 gallons of water.
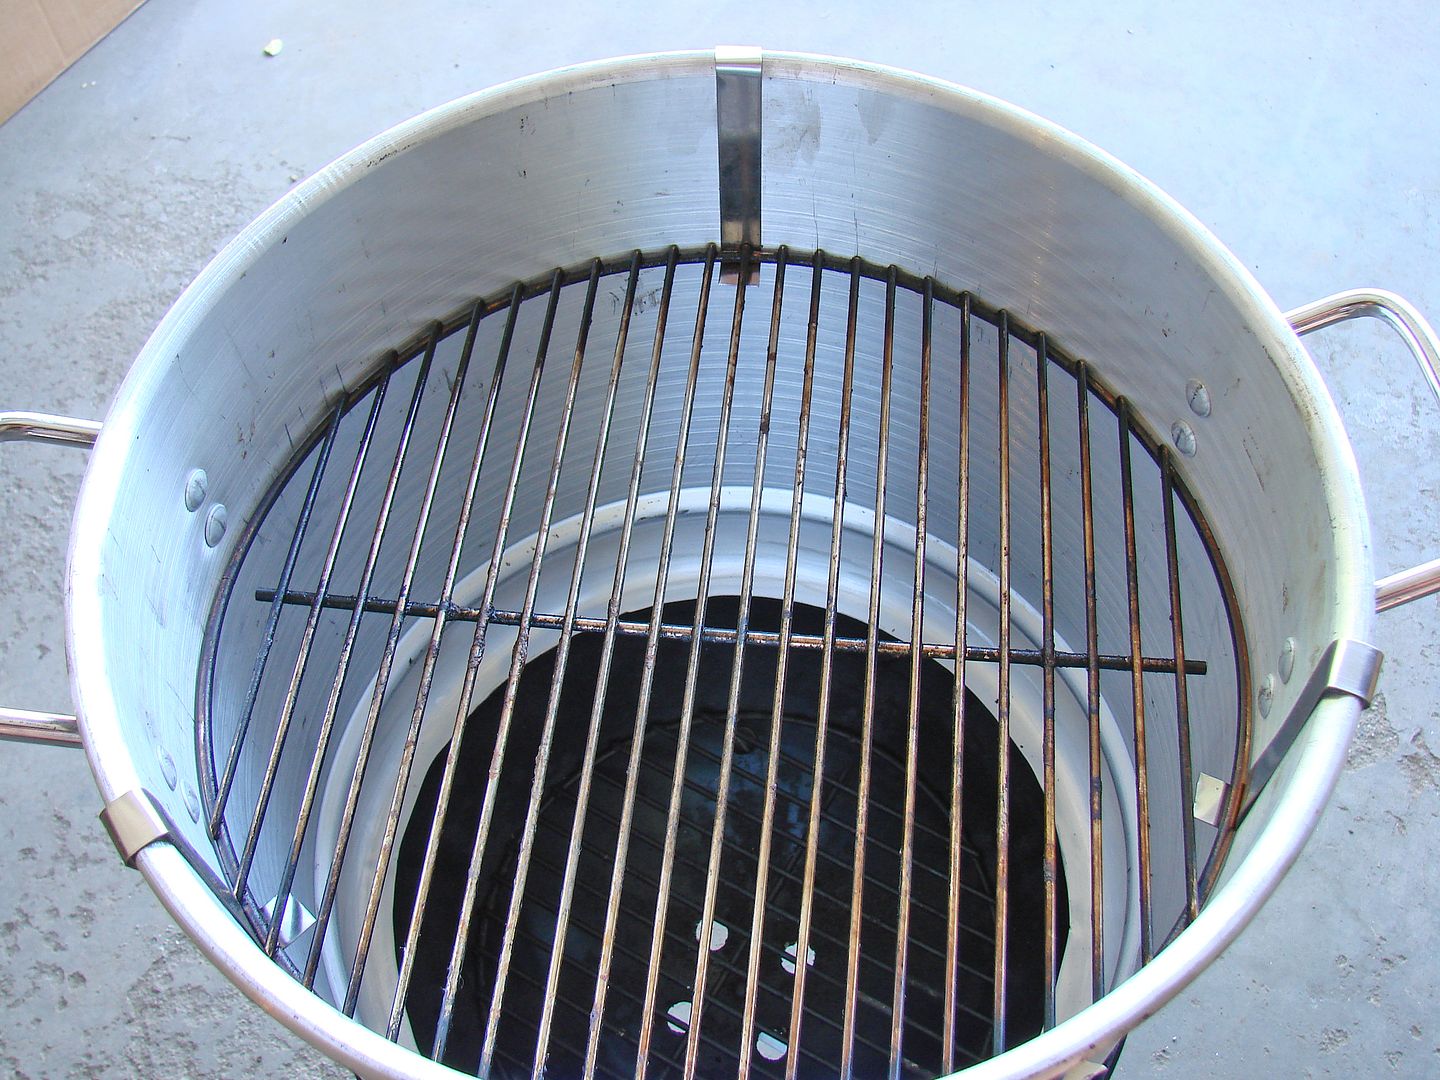
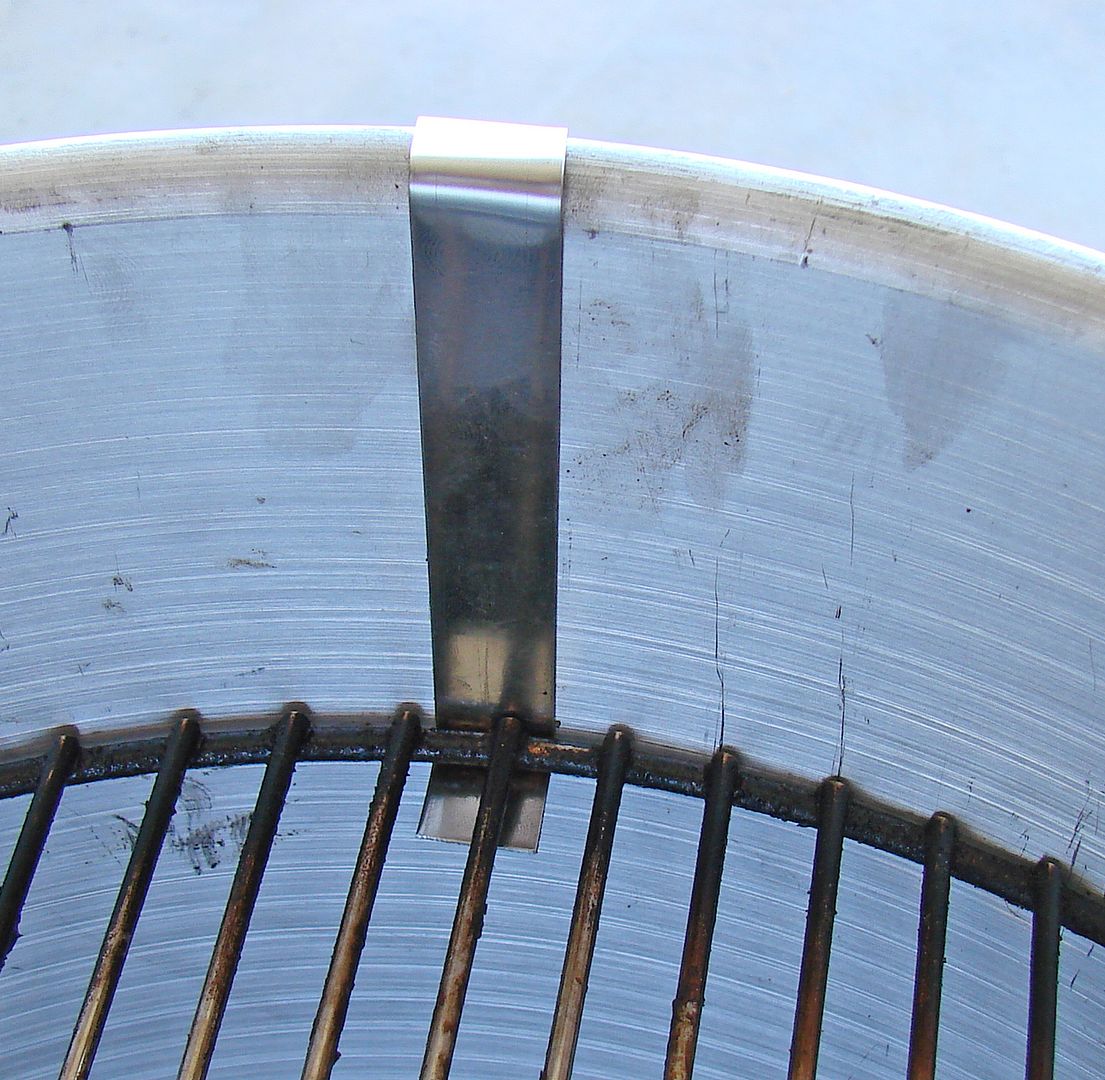
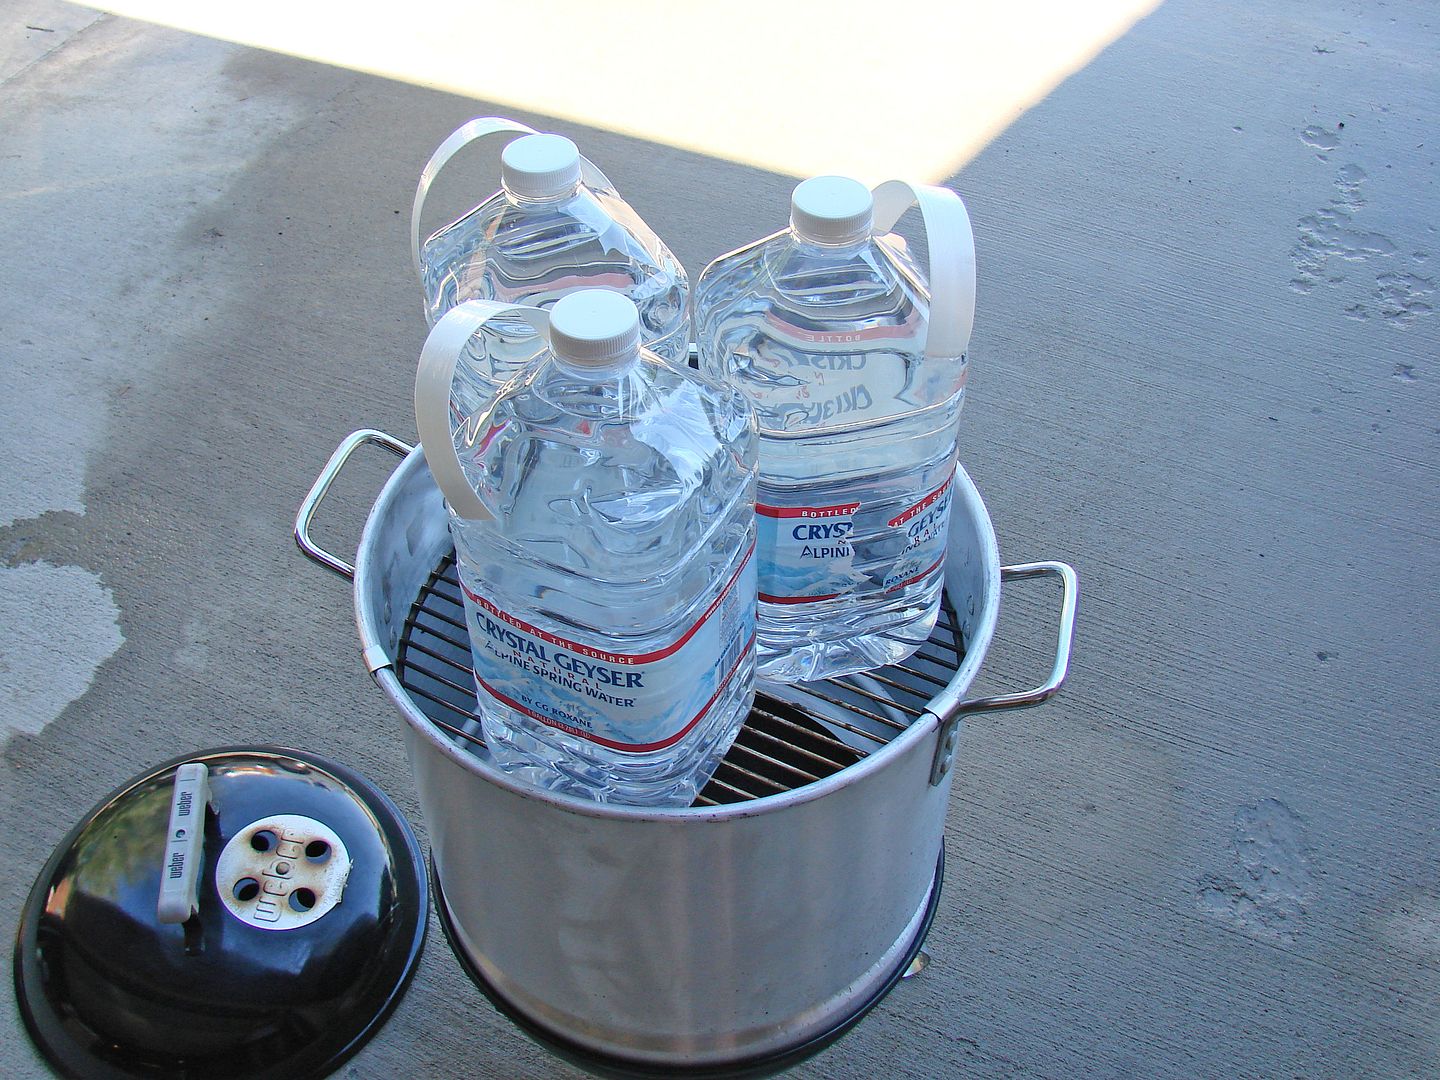
      Image hosted by Photobucket.com


      Image hosted by Photobucket.com


      Image hosted by Photobucket.com


      For my thermometer I chose a Tel Tru 150° to 750°, 5" stem model with a calibration nut. It cost $20 and is the same model I use on my Big Green Eggs.
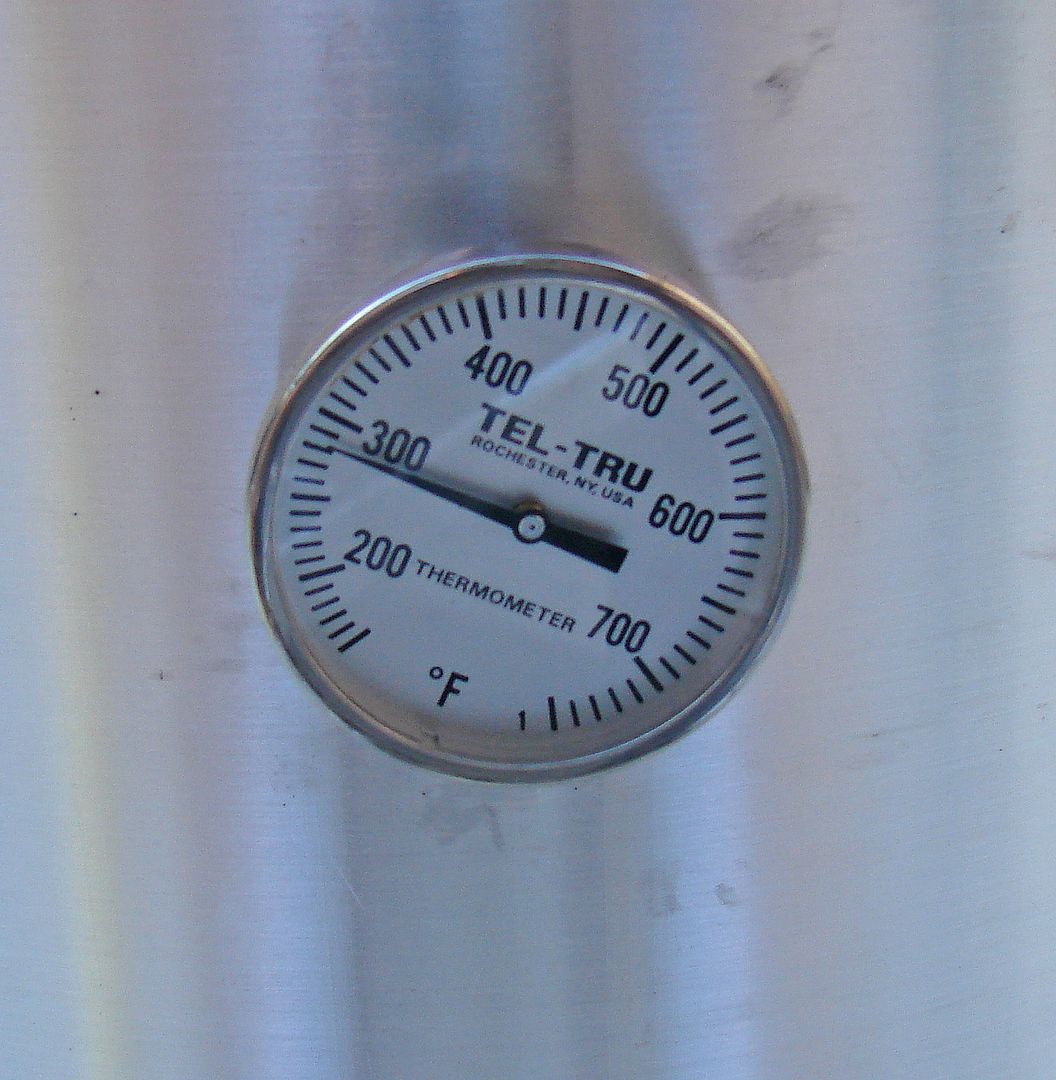
      Image hosted by Photobucket.com


      The next part of the build is a charcoal basket, because I prefer using natural lump charcoal. My basket has a bottom circle of expanded steel and a charcoal ring wired to the bottom circle. The original charcoal grate is still used under my charcoal basket. I also made a mini ring that will be used for shorter cooks, it just sits inside the larger ring.
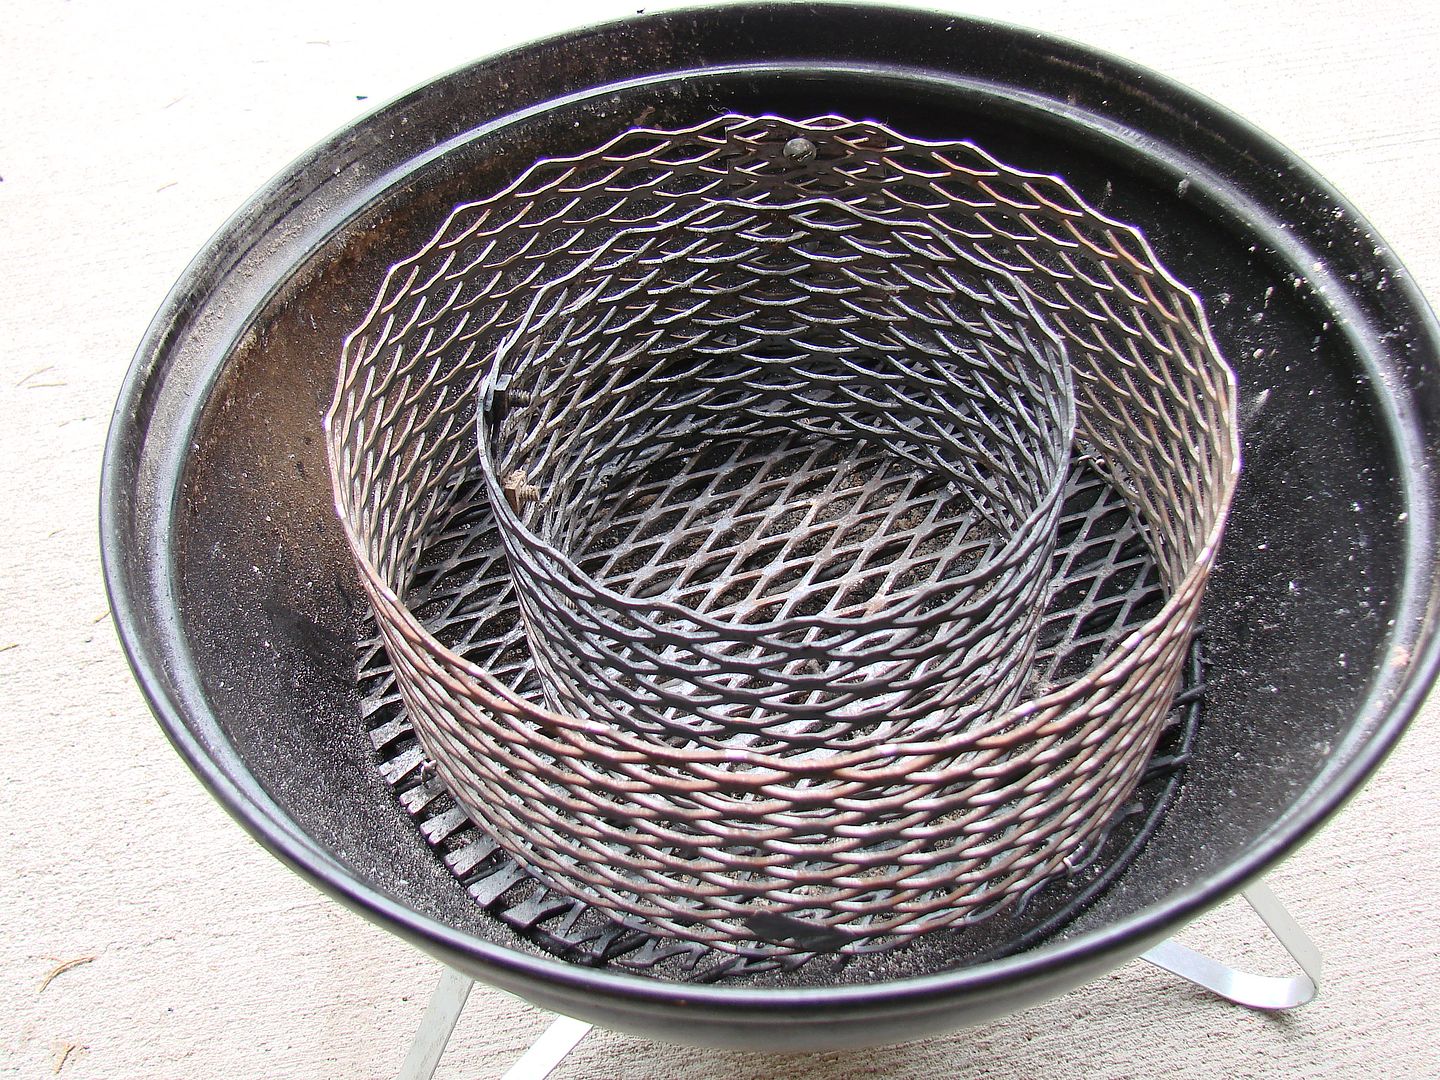

      Image hosted by Photobucket.com


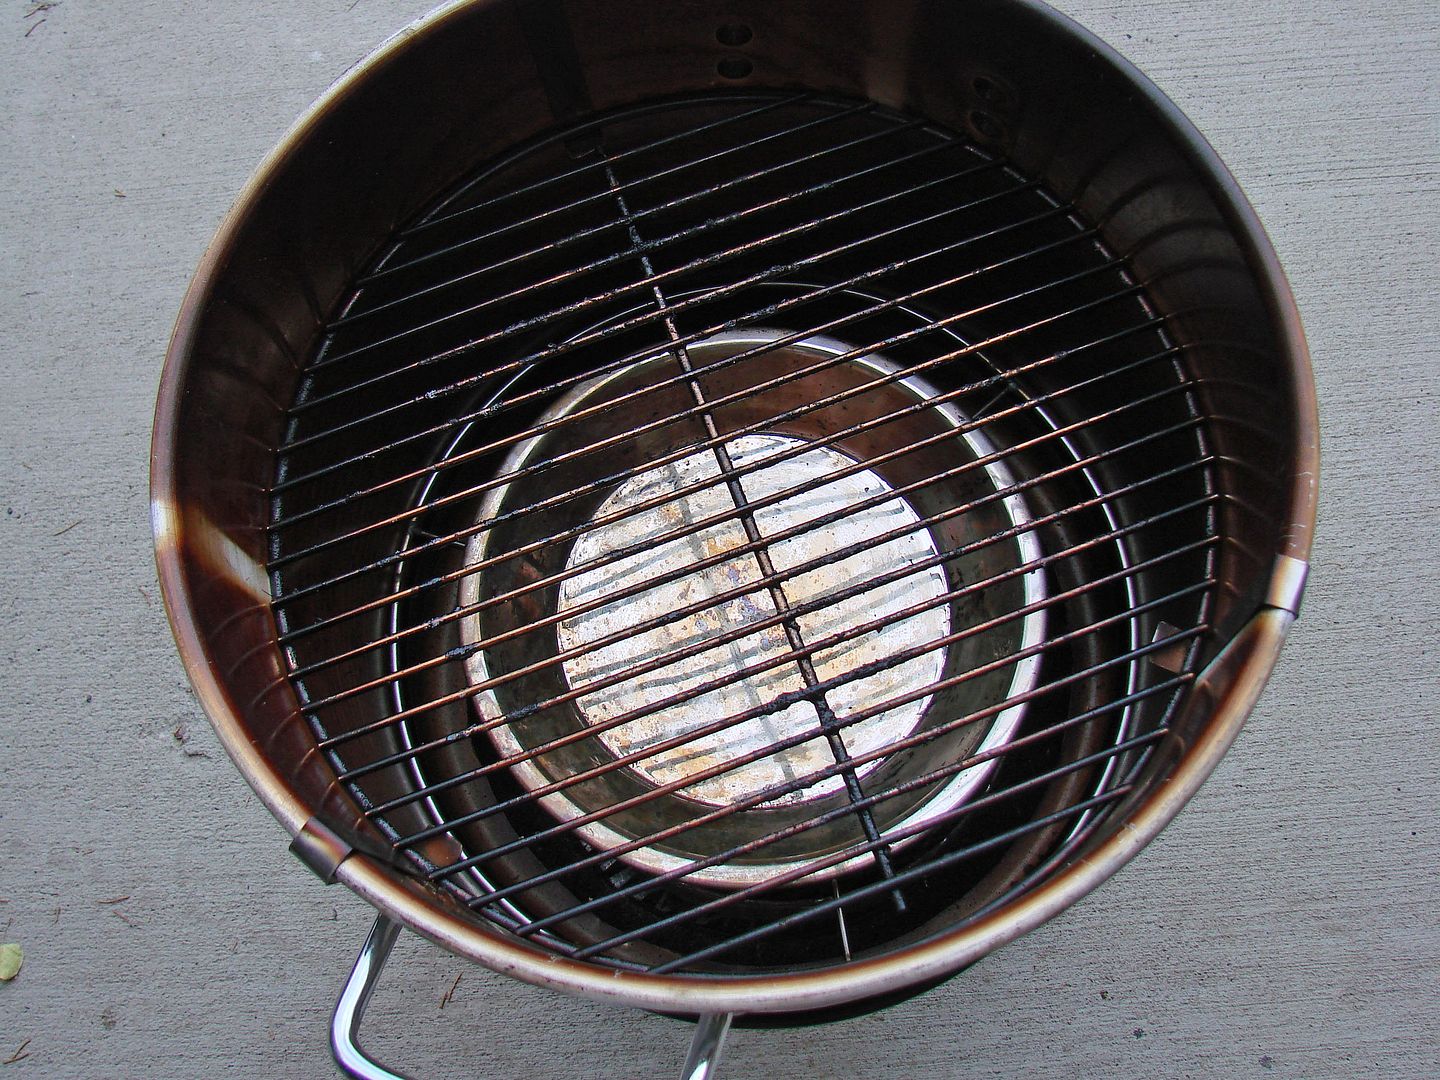
      I wanted an option of a drip pan / heat shield for cooking indirect, and there is a natural ledge toward the bottom of the steamer (that is where the perforated steamer rack fits), an additional grate would fit on that ledge and could hold a drip pan, however that location is really close to the charcoal basket. My next step was to fabricate a double ring. The large diameter ring sits on the ledge, the smaller ring is attached to risers to get it farther away from the charcoal basket and it's sized to fit a standard pie pan.
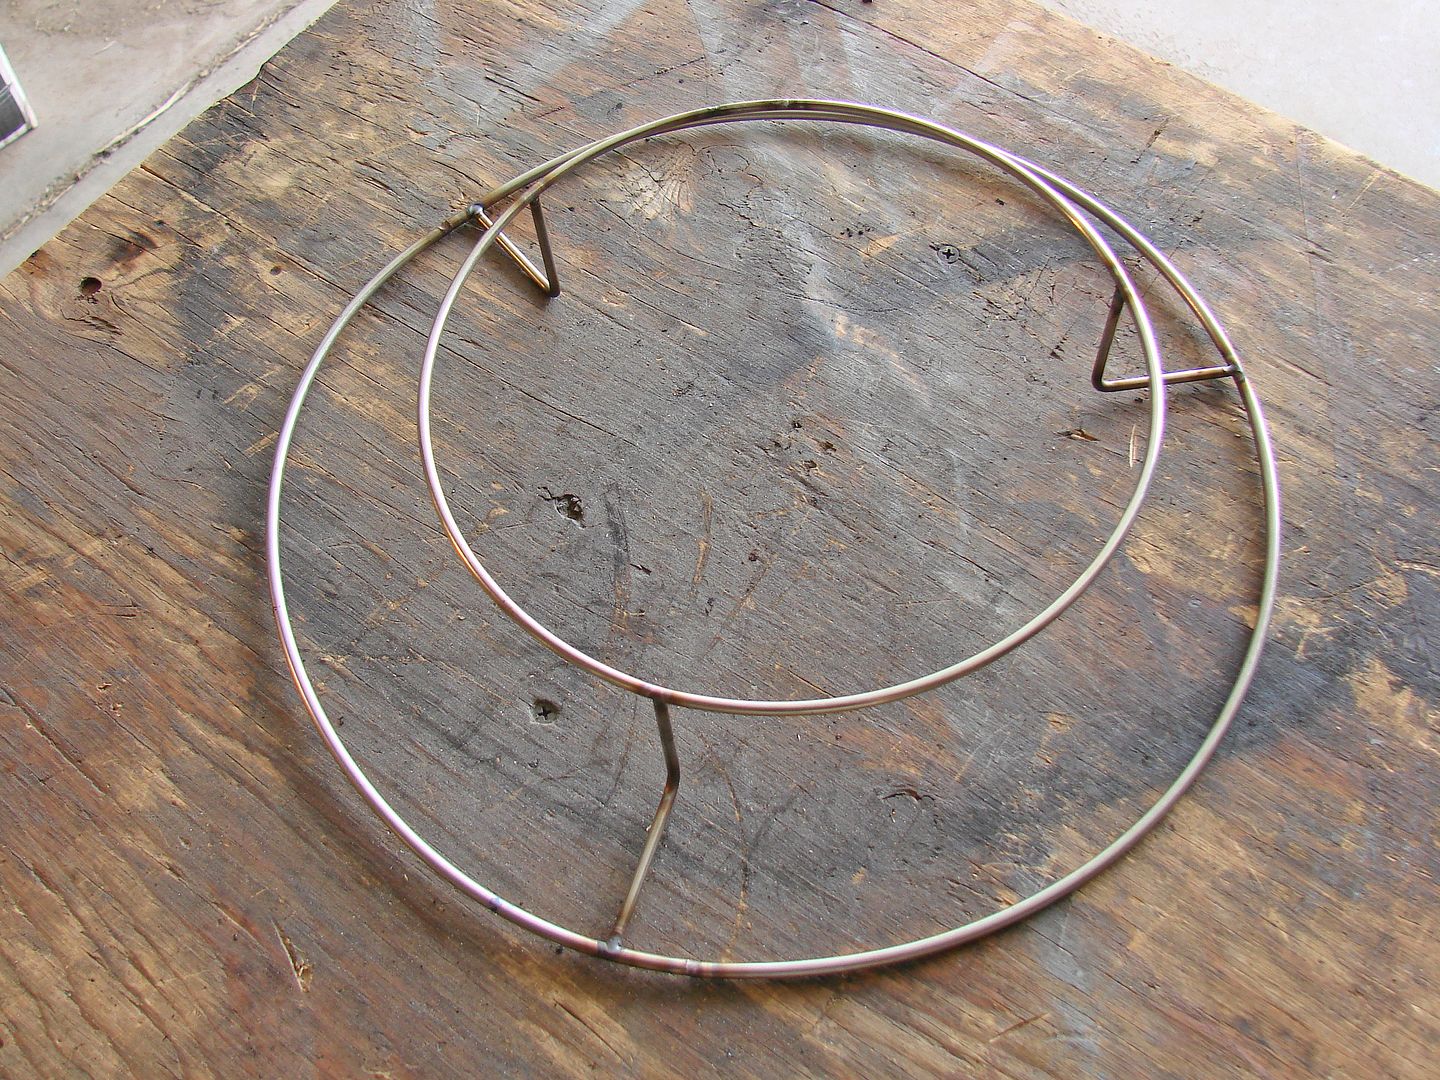
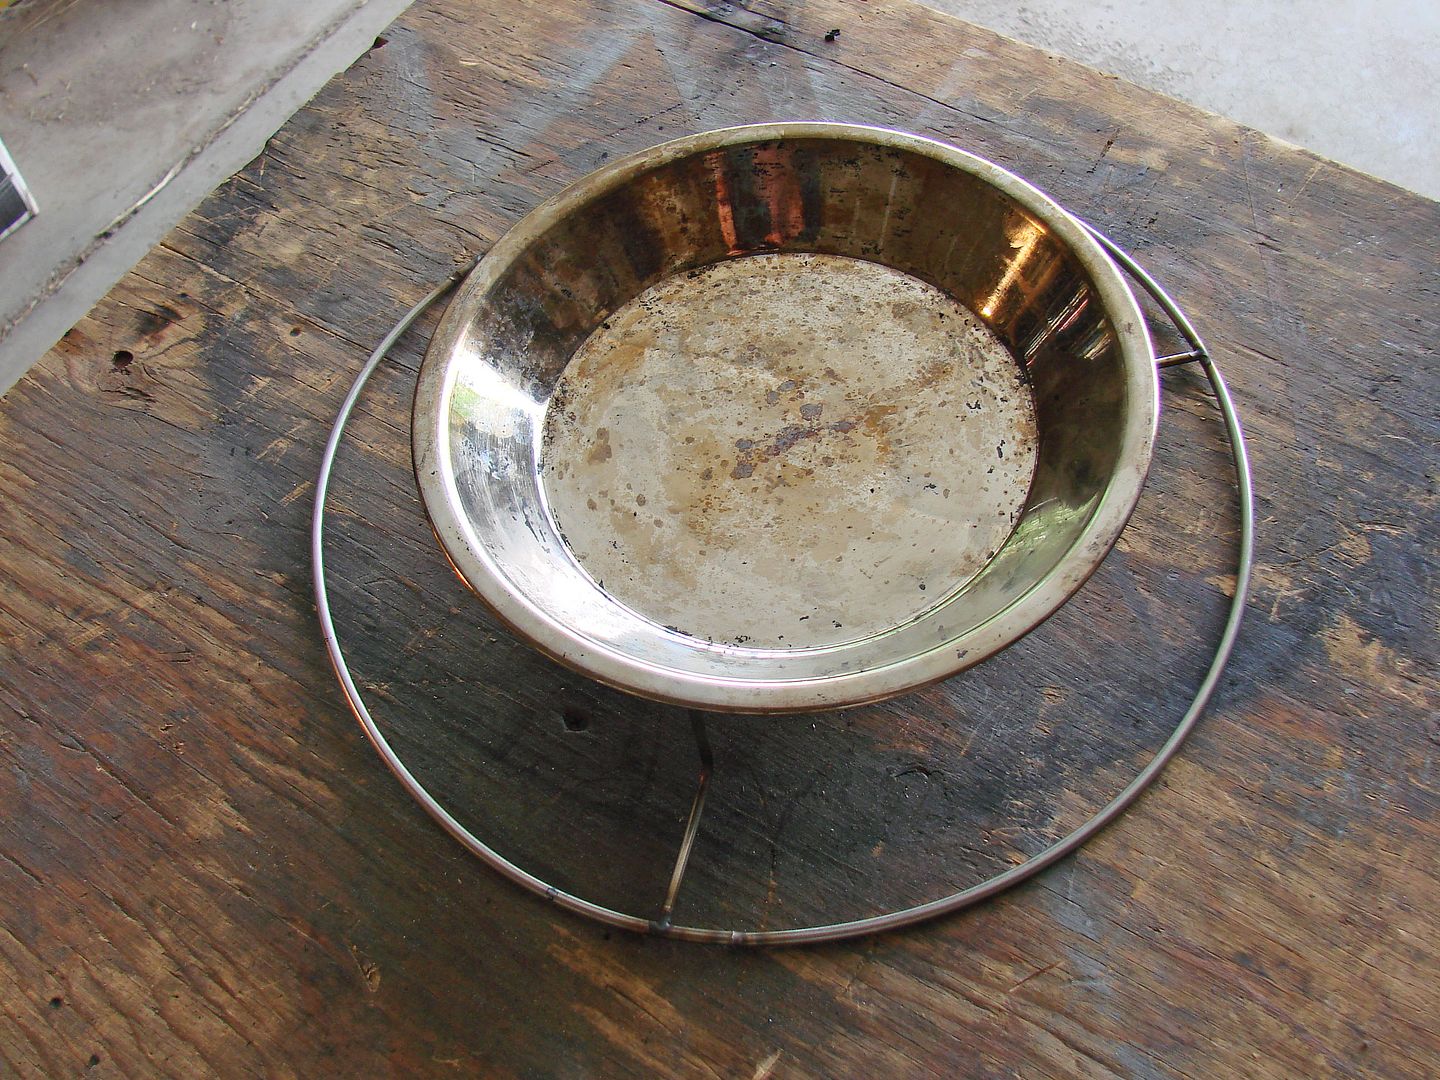
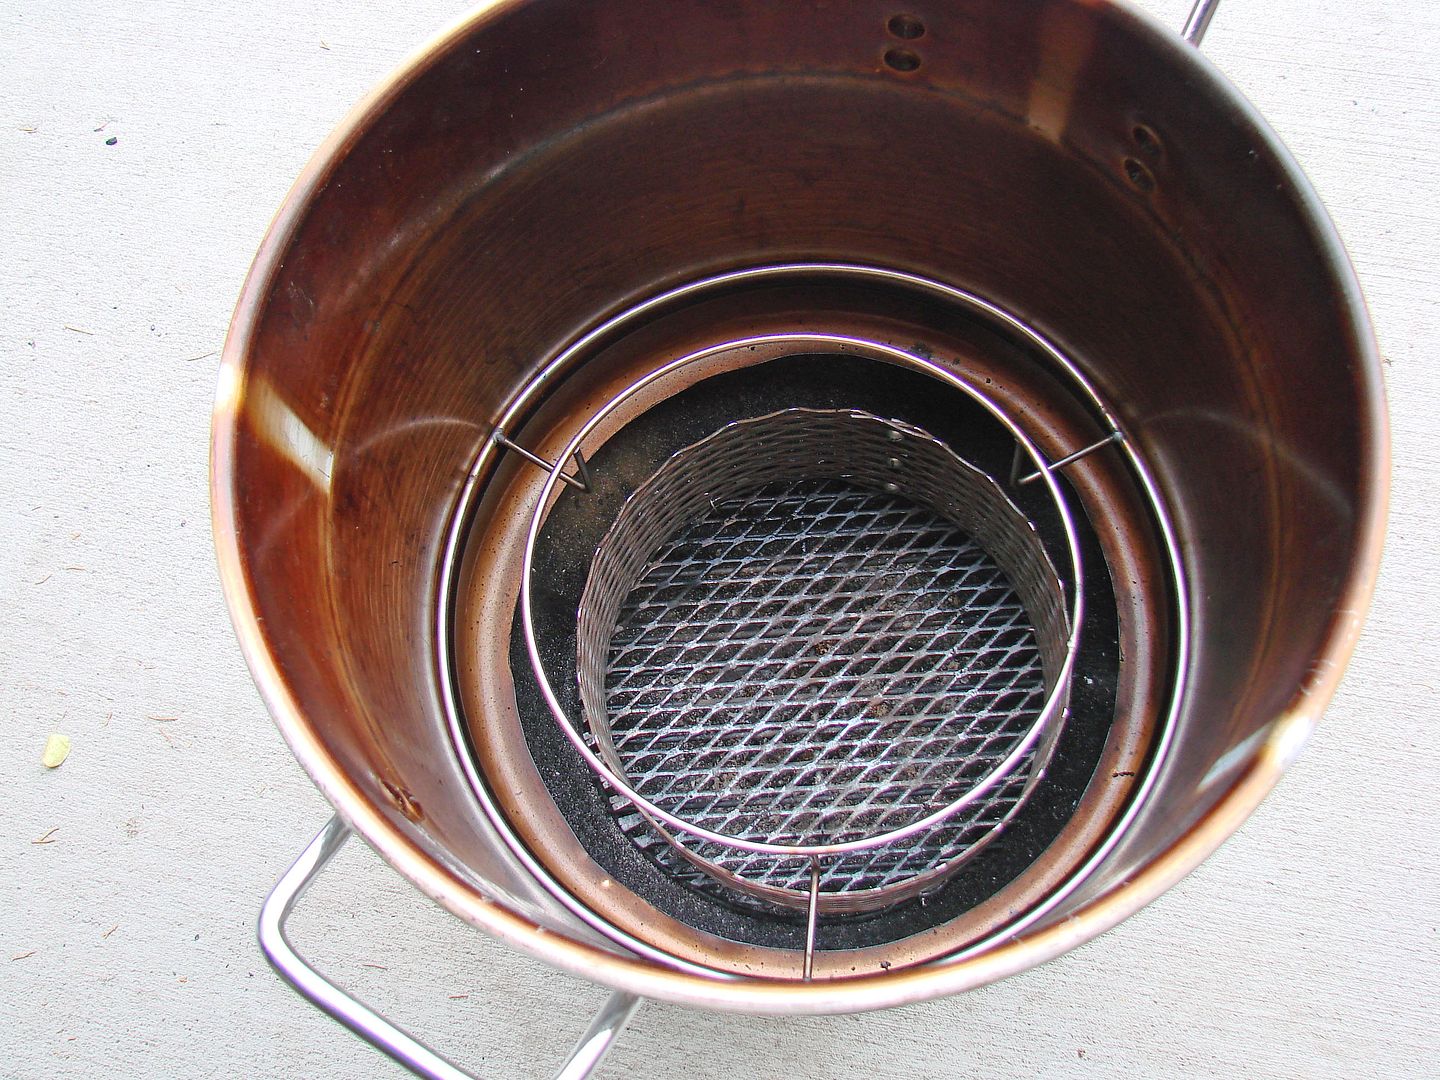
      Image hosted by Photobucket.com


      Image hosted by Photobucket.com


      Image hosted by Photobucket.com


      Image hosted by Photobucket.com


      So far, I've only done a few test cooks so I'll be updating this page from time to time, especially if I make additional modifications. I would appreciate any and all feedback/tips/suggestions from my readers as this is a popular build and only set me back about $75.